Document Export
“Great things begin as outlines.”
Outlines enable the clarification and development of ideas and concepts. Outlines define the creative process and help to visualize the entirety of a project or goal. Outlines are the essential first step in achieving successful outcomes.
But outlines can’t truly fulfill their purpose unless they become the framework upon which great ideas take shape and come to life.
OmniOutliner easily exports outlines to data archives and documents of many various formats, from standard office, spreadsheet, and text formats, to interactive HTML content, and personal management projects.
This section examines how to create instances of the FileWrapper class in preparation for the export of documents and content.
Documentation regarding the other classes involved in the saving and export of OmniPlan documents can be found in FileTypes and FileSavers.
Installable export examples include:
- Export Outline as Text to the Clipboard
- Export Outline as Text via Share Panel
- Export Outline in Current Format to Folders
- Export Outline as Presentation Document
- Export Outline as Word Processing Document
- Export Outline as Spreadsheet Document
- Export Outline as HTML Webpage
- Export Outline to JSON Data File
- Export Outline to OmniFocus Project
FileWrappers
If you think of an outline as a set of data, then it’s easy to understand that an outline’s data can be packaged in a variety of ways. Each “data package” has a set of parameters that determine how the outline data is stored or presented.
For example, one package may store the data as tabbed data, while another may store the outline data in XML format. Each of the supported file packaging formats has its own set of parameters. In terms of Omni Automation, these file packages are referred to as FileWrappers.
Each instance of the FileWrapper class has a unique type identifier that identifies that wrapper. To get a list of the export types supported by OmniOutliner, write a simple script to access the value of the writableTypes property of the Document class. The result will be an array of the identifiers for the FileWrappers supported in OmniOutliner.
NOTE: a complete list of all readable and writeable filetypes supported by OmniOutliner is available here.
Getting a List of Writable Types
txt = document.writableTypes.join('\n')console.log(txt)//--> "com.omnigroup.omnioutliner.xmlooutlinecom.omnigroup.omnioutliner.ooutlinecom.omnigroup.omnioutliner.oooutlinecom.omnigroup.omnioutliner.xmlooutline-packagecom.omnigroup.omnioutliner.otemplatecom.omnigroup.omnioutliner.otemplate-packagecom.omnigroup.omnioutliner.oo3com.omnigroup.omnioutliner.oo3-packagecom.omnigroup.omnioutliner.oo3templatecom.omnigroup.omnioutliner.oo3template-packageorg.opml.opmlorg.opml.opmltemplatepublic.rtfcom.symantec.MORE.textpublic.plain-textcom.apple.rtfdcom.omnigroup.word.openxml.indentedcom.omnigroup.word.openxml.outlinecom.omnigroup.OmniOutliner.SimpleHTMLExport.HTMLcom.microsoft.powerpoint.openxml.presentationcom.omnigroup.OmniOutliner.OO3HTMLExport.OO3HTMLDynamiccom.omnigroup.OmniOutliner.HTMLExport.HTMLDynamiccom.microsoft.excel.openxml.documentpublic.comma-separated-values-text"
A writable type is used when creating a new FileWrapper instance by using the makeFileWrapper(…) function of the Document class:
makeFileWrapper(baseName: String, type: String or null) → (Promise of FileWrapper) • Generates a FileWrapper instance representing the contents of the document formatted as the specified type, or its current fileType if a null is passed for the type. Returns a Promise that will yield the file wrapper or an error. The returned file wrapper will have a name based off the given baseName and the default path extension for the requested file type.
Specified FileWrapper Type using Explicit Promise Handlers
fileTypeID = "com.omnigroup.OmniOutliner.CSVExport.CSV"baseName = document.name.replace(/\.[^/.]+$/, "")wrapperPromise = document.makeFileWrapper(baseName, fileTypeID)wrapperPromise.then(wrapper => {console.log(wrapper)//--> [object FileWrapper: file, 2729 bytes]})wrapperPromise.catch(err => {console.error(err.message)})
Specified FileWrapper Type using Asynchronous Function
(async () => {try {fileTypeID = "com.omnigroup.OmniOutliner.CSVExport.CSV"baseName = document.name.replace(/\.[^/.]+$/, "")wrapper = await document.makeFileWrapper(baseName, fileTypeID)console.log(wrapper)//--> [object FileWrapper: file, 2729 bytes]}catch(err){new Alert(err.name, err.message).show()}})();
Default FileWrapper Type (asynchronous)
(async () => {try {baseName = document.name.replace(/\.[^/.]+$/, "")wrapper = await document.makeFileWrapper(baseName, null)console.log(wrapper)}catch(err){new Alert(err.name, err.message).show()}})();
Instance Properties
Each FileWrapper instance has a set of supported properties, most of which have values that are read-only, with the exception of the preferredFilename property whose value can be set in a script.
children (Array of FileWrapper r/o) • Returns an Array of child FileWrappers, if this represents a directory. Otherwise, an empty array is returned.
contents (String or nil r/o Data) • Returns the regular file contents of the wrapper, if this represents a regular file. Otherwise, null is returned.
destination (URL or nil r/o) • Returns the destination if this represents a symbolic link. Otherwise, null is returned.
filename (String or nil) • Returns the actual file name that was last read for this file wrapper. Depending on the names of other sibling wrappers, this may not be what file name will be written.
preferredFilename (String or nil) • Returns the preferred file name that should be used when writing the file wrapper if no other file in the same parent directory wrapper is in use.
type (FileWrapper.Type r/o) • Returns the type of this FileWrapper
The value of the contents property is a representation of the outline data, which can be manipulated using class and instance functions from the Data class, such as the toBase64() and toString() functions shown in the following examples:
FileWrapper Content as Base64 Data
(async () => {try {fileTypeID = "com.omnigroup.OmniOutliner.CSVExport.CSV"baseName = document.name.replace(/\.[^/.]+$/, "")wrapper = await document.makeFileWrapper(baseName, fileTypeID)encodedData = wrapper.contents.toBase64()}catch(err){new Alert(err.name, err.message).show()}})();
Exporting as Text to the Clipboard
Sometimes nothing is better than the old favorite of Copy/Paste!
FileWrapper Content as Text on the Clipboard (@)
(async () => {try {fileTypeID = "public.plain-text"baseName = document.name.replace(/\.[^/.]+$/, "")wrapper = await document.makeFileWrapper(baseName, fileTypeID)Pasteboard.general.string = wrapper.contents.toString()}catch(err){new Alert(err.name, err.message).show()}})();
Exporting via System Share Panel
Incorporating the use of the system Share Panel to share to messaging services or other applications:
Export Text File via Share Panel (@)
(async () => {try {fileTypeID = "public.plain-text"baseName = document.name.replace(/\.[^/.]+$/, "")wrapper = await document.makeFileWrapper(baseName, fileTypeID)new SharePanel([wrapper]).show()}catch(err){new Alert(err.name, err.message).show()}})();
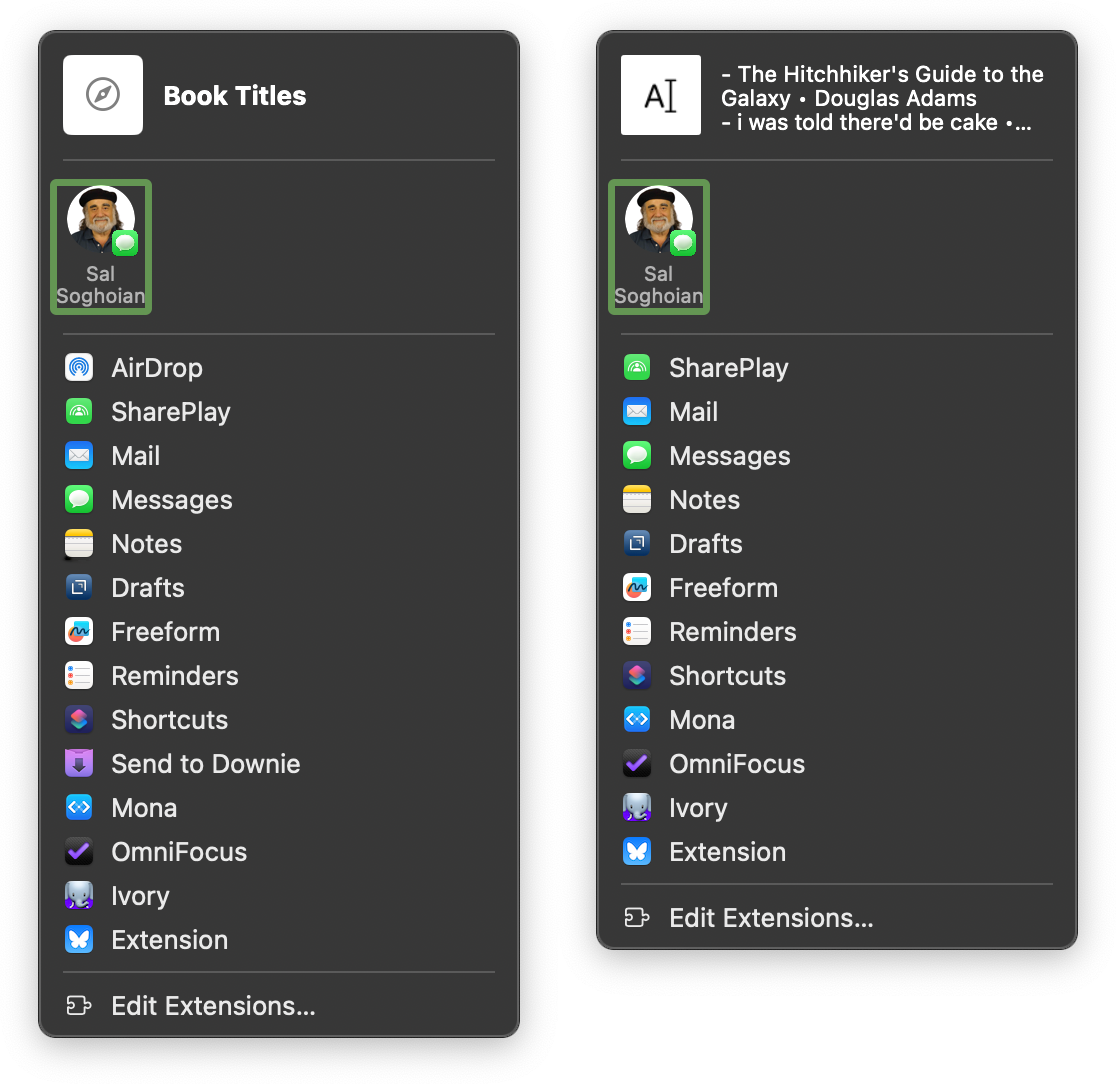
Export Text Content via Share Panel
(async () => {try {fileTypeID = "public.plain-text"baseName = document.name.replace(/\.[^/.]+$/, "")wrapper = await document.makeFileWrapper(baseName, fileTypeID)txt = wrapper.contents.toString()new SharePanel([txt]).show()}catch(err){new Alert(err.name, err.message).show()}})();
(⬇ see below ) Sharing the current outline as a text file (left) and as text content (right):
Exporting to Folders
The following example script will export a copy of the current OmniOutliner outline to the local OmniOutliner Documents folder within the default Documents folder:
Export Outline to Local App Documents Folder (@)
(async () => {try {proposedFileName = document.name.replace(/\.[^/.]+$/, "")wrapper = await document.makeFileWrapper(proposedFileName, null)folderURL = URL.documentsDirectoryfileName = wrapper.preferredFilenamefileURL = folderURL.appendingPathComponent(fileName)wrapper.write(fileURL, [FileWrapper.WritingOptions.Atomic], null)if(Device.current.type === DeviceType.mac){folderURL.open()}}catch(err){new Alert(err.name, err.message).show()}})();
The following example exports a copy of the current outline to a directory selected in a FileSaver dialog:
Export Outline to Chosen Directory
(async () => {try {proposedFileName = document.name.replace(/\.[^/.]+$/, "")wrapper = await document.makeFileWrapper(proposedFileName, null)filesaver = new FileSaver()urlObj = await filesaver.show(wrapper)new Alert("FILE URL", urlObj.string).show()}catch(err){if(!err.causedByUserCancelling){new Alert(err.name, err.message).show()}}})();
Export as Presentation Document
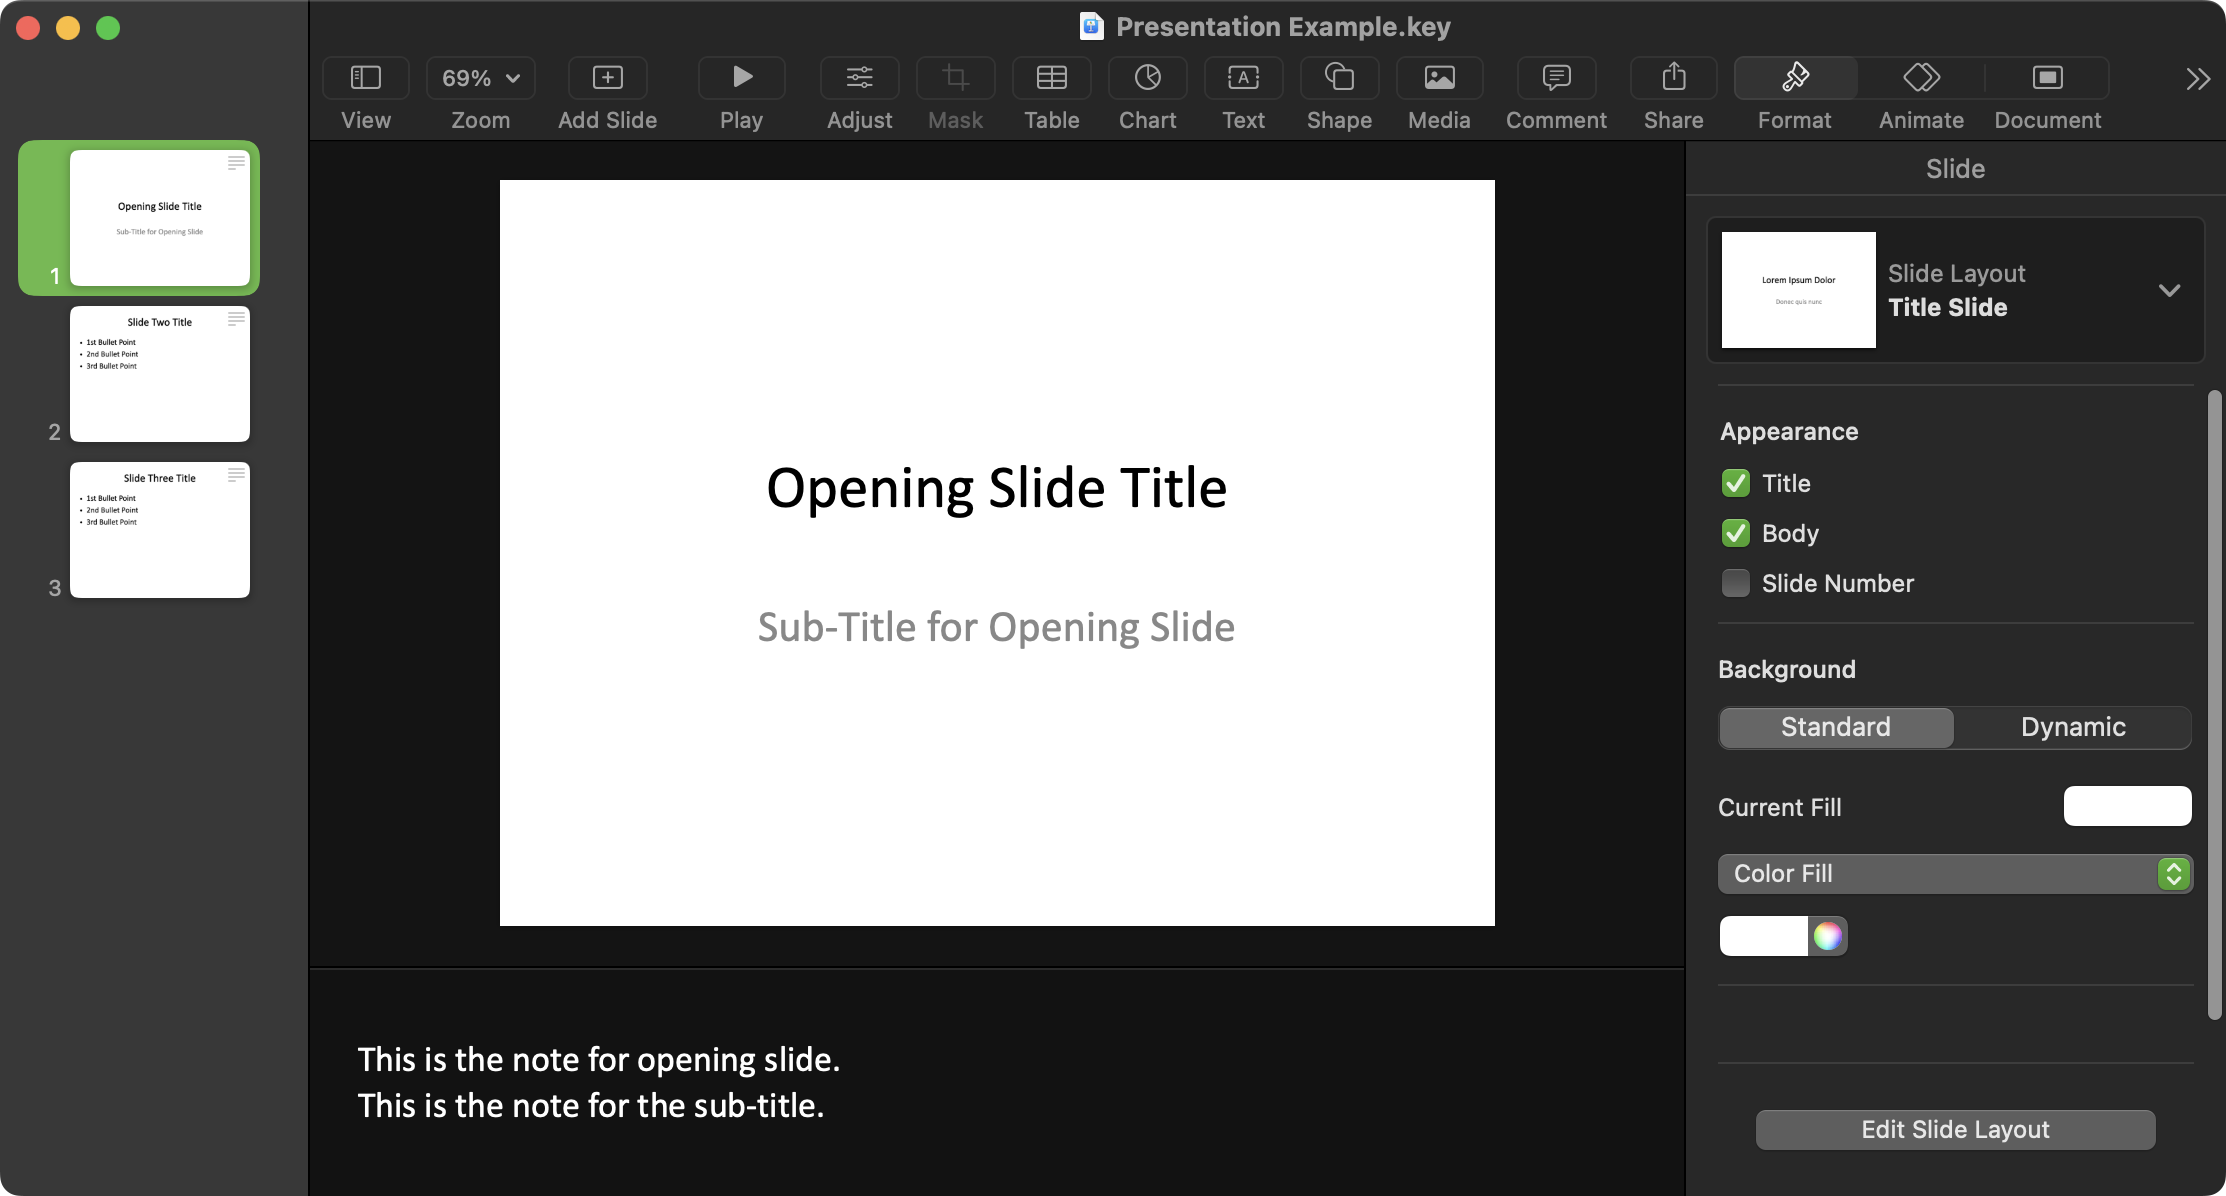
The following example exports an example outline file as a Microsoft Powerpoint presentation file with the top-level outline items as slide titles and their notes becoming each slide’s presenter notes. NOTE: If Microsoft PowerPoint is not present on the host computer, the exported file can be opened using Apple’s Keynote application.
Export Outline as Presentation (@)
(async () => {try {targetType = "com.microsoft.powerpoint.openxml.presentation"proposedFileName = document.name.replace(/\.[^/.]+$/, "")wrapper = await document.makeFileWrapper(proposedFileName, targetType)filesaver = new FileSaver()fileURL = await filesaver.show(wrapper)if(Device.current.type === DeviceType.mac){fileURL.open()}}catch(err){if(!err.causedByUserCancelling){new Alert(err.name, err.message).show()}}})();
(⬇ see below ) The example outline file opened in Keynote:
TIP: To have Office Open XML presentation files automatically open in Apple’s Keynote app, in the Finder information window for exported PPTX file, set the “Open with…” control to the Keynote application and click the “Change All” button.
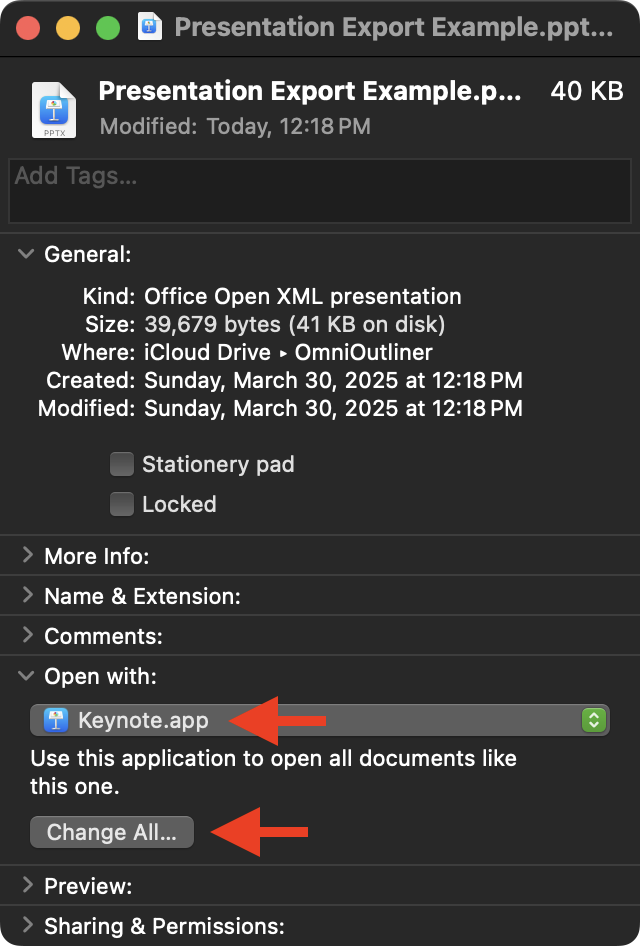
OmniOutliner outlines exported as Office Open XML presentation files will now automatically open in the Keynote application.
Export as Word Processing Document
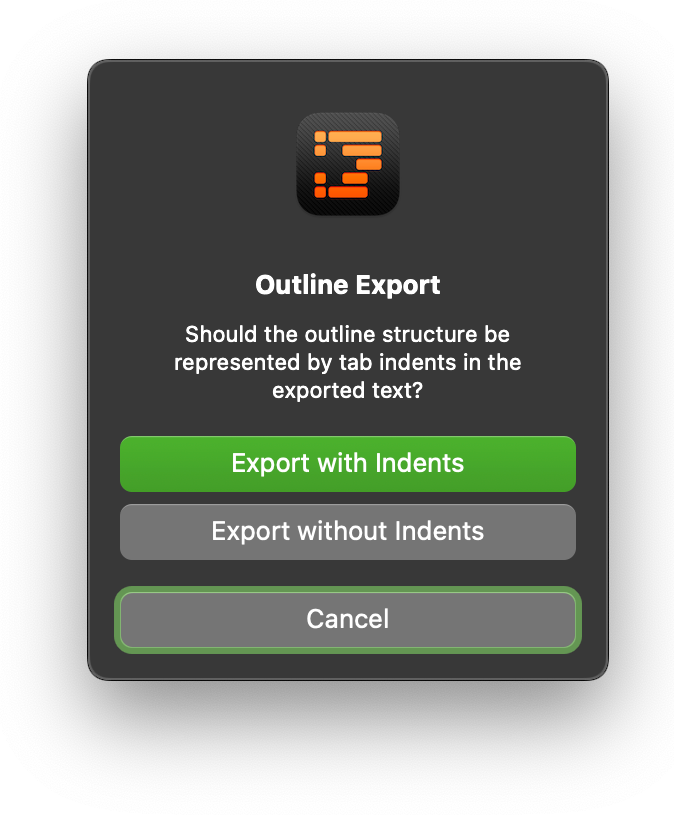
Another export option is to export the outline content as a Microsoft Word file, with or without outline row hierarchy represented by tabs.
Export as Word Processing Document (@)
(async () => {try {alertTitle = "Outline Export"alertMsg = "Should the outline structure be represented by tab indents in the exported text?"alert = new Alert(alertTitle, alertMsg)alert.addOption("Export with Indents")alert.addOption("Export without Indents")alert.addOption("Cancel")buttonIndex = await alert.show()if(buttonIndex === 2){return "User cancelled."}targetTypeA = "com.omnigroup.word.openxml.indented"targetTypeB = "com.omnigroup.word.openxml.outline"targetType = (buttonIndex === 0) ? targetTypeA:targetTypeBproposedFileName = document.name.replace(/\.[^/.]+$/, "")wrapper = await document.makeFileWrapper(proposedFileName, targetType)filesaver = new FileSaver()fileURL = await filesaver.show(wrapper)if(Device.current.type === DeviceType.mac){fileURL.open()}}catch(err){if(!err.causedByUserCancelling){new Alert(err.name, err.message).show()}}})();
TIP: To have Office Open XML Word files automatically open in Apple’s Pages app, in the Finder information window for exported PPTX file, set the “Open with…” control to the Pages application and click the “Change All” button.
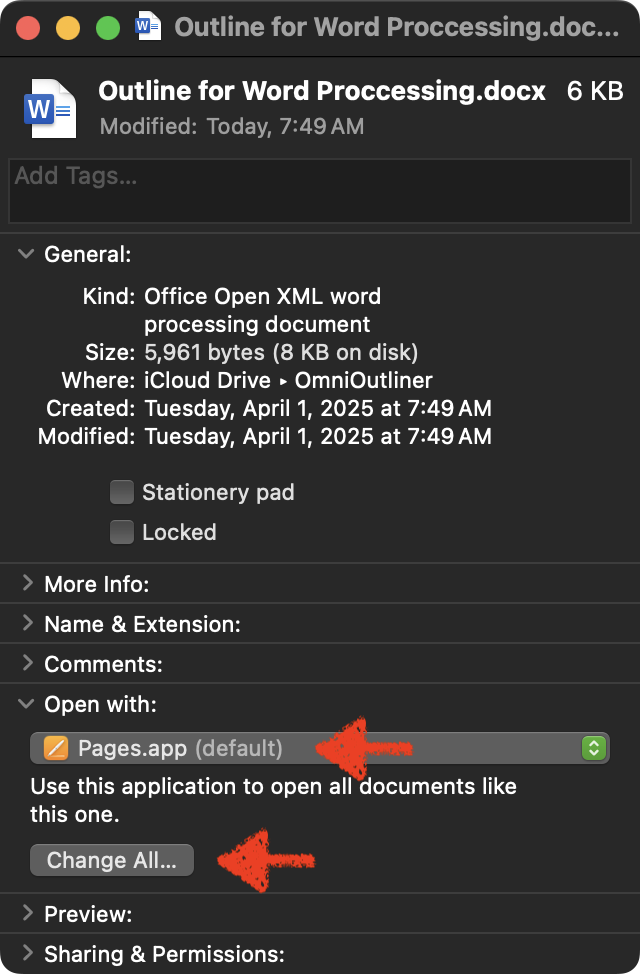
OmniOutliner outlines exported as Office Open XML word processing files will now automatically open in the Pages application.
EXAMPLE: Here is a link to the text of President Abraham Lincoln’s “Gettysburg Address.” The webpage contains an Omni Automation script that will open a new outline containing the speech. Using the provided Word Processing Export script or plug-in, export the contents of the outline to Microsoft Word or Pages on your computer.
Export to Spreadsheet Document
OmniOutliner outlines incorporating the use of multiple columns can be exported in CSV (Comma-Separated Values) format, which can be opened by spreadsheet applications, such as Microsoft Excel or Apple’s Numbers application.
Export to Spreadsheet Document (CSV) (@)
(async () => {try {targetType = "com.omnigroup.OmniOutliner.CSVExport.CSV"proposedFileName = document.name.replace(/\.[^/.]+$/, "") + ".csv"wrapper = await document.makeFileWrapper(proposedFileName, targetType)filesaver = new FileSaver()fileURL = await filesaver.show(wrapper)if(Device.current.type === DeviceType.mac){fileURL.open()}}catch(err){if(!err.causedByUserCancelling){new Alert(err.name, err.message).show()}}})();
TIP: To have files in CSV (Comma-Separated Values) format automatically open in Apple’s Numbers app, in the Finder information window for exported CSV file, set the “Open with…” control to the Numbers application and click the “Change All” button.
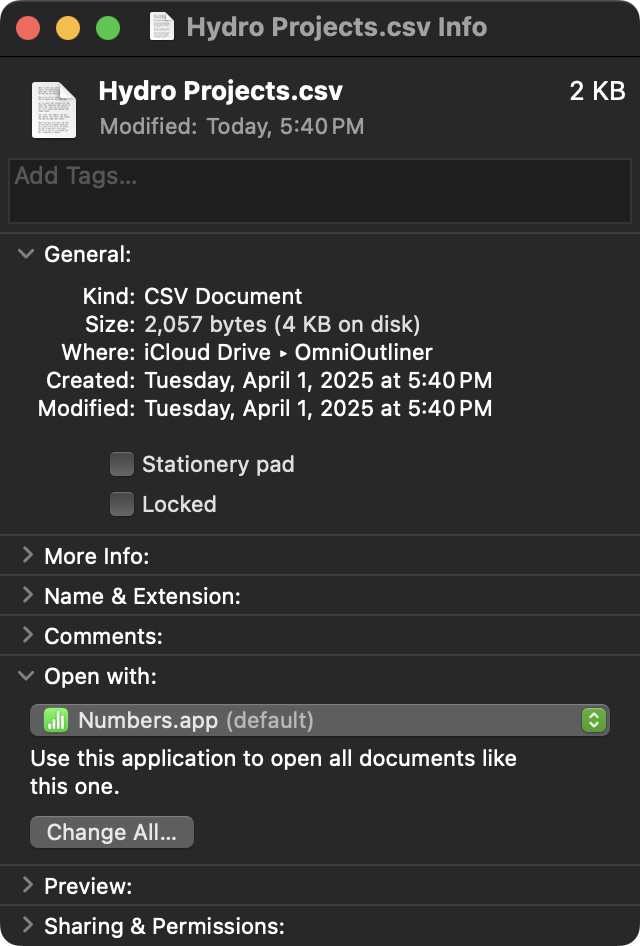
OmniOutliner outlines exported as CSV files will now automatically open in the Numbers application.
Class Functions
The class functions for the FileWrapper class:
withContents(name:String or nil, contents:Data or nil) → (FileWrapper) • Returns a new FileWrapper instance that represents a flat file containing the given data.
Create FileWrapper from Text
fileName = "Cow.txt"textData = Data.fromString("How now brown cow")wrapper = FileWrapper.withContents(fileName, textData)
It may be desired to perform multiple exports of a document to files in a variety of formats. The withChildren(…) class function can be used to create a folder containing one or more exported documents.
withChildren(name:String or nil, contents:Data or nil) → (FileWrapper) • Returns a new FileWrapper instance that represents a directory with the given child file wrappers. Each child file wrapper must have a unique name specified.
The following example uses the all(…) method of the Promise class with a FileSaver to add exported files in various formats to a new folder:
Multiple Simultaneous Exports into New Folder
docName = document.name.replace(/\.[^/.]+$/, "")var fileTypeID1 = "org.opml.opml"var fileTypeID2 = "com.omnigroup.OmniOutliner.CSVExport.CSV"wrapperPromise1 = document.makeFileWrapper(docName + ".opml", fileTypeID1)wrapperPromise2 = document.makeFileWrapper(docName + ".csv", fileTypeID2)promises = [wrapperPromise1, wrapperPromise2]Promise.all(promises).then(fileWrappers => {filesaver = new FileSaver()folderType = new TypeIdentifier("public.folder")fileType1 = new TypeIdentifier(fileTypeID1)fileType2 = new TypeIdentifier(fileTypeID2)filesaver.types = [folderType, fileType1, fileType2]fldrwrapper = FileWrapper.withChildren("Export Folder", fileWrappers)fileSaverPromise = filesaver.show(fldrwrapper)fileSaverPromise.then(folderURL => {// file url to directoryconsole.log(folderURL.string)if(Device.current.type === DeviceType.mac){folderURL.open()}})fileSaverPromise.catch(function(err){console.log(err.message)})}).catch(err => {console.log(err.name, err.message)new Alert(err.name, err.message).show()})
Instance Functions
The instance functions for the FileWrapper class:
filenameForChild(child:FileWrapper) → (String or nil) • Returns the unique file name that will be used for the given child FileWrapper, or null if this file wrapper is not a child of the receiver.
FileWrapper.Type
The class properties of a FileWrapper.Type:
Directory --> (FileWrapper.Type r/o) • A FileWrapper that represents a directory with zero or more child wrappers.
File --> (FileWrapper.Type r/o) • A FileWrapper that represents a regular file with data contents.
Link --> (FileWrapper.Type r/o) • A FileWrapper that represents a symbolic link to another location.
As mentioned previously, here is a full explanation of the FileWrapper.Types supported by OmniOutliner:
Getting a List of Writable Types
txt = document.writableTypes.join('\n')console.log(txt)//--> "com.omnigroup.omnioutliner.xmlooutlinecom.omnigroup.omnioutliner.ooutlinecom.omnigroup.omnioutliner.oooutlinecom.omnigroup.omnioutliner.xmlooutline-packagecom.omnigroup.omnioutliner.otemplatecom.omnigroup.omnioutliner.otemplate-packagecom.omnigroup.omnioutliner.oo3com.omnigroup.omnioutliner.oo3-packagecom.omnigroup.omnioutliner.oo3templatecom.omnigroup.omnioutliner.oo3template-packageorg.opml.opmlorg.opml.opmltemplatepublic.rtfcom.symantec.MORE.textpublic.plain-textcom.apple.rtfdcom.omnigroup.word.openxml.indentedcom.omnigroup.word.openxml.outlinecom.omnigroup.OmniOutliner.SimpleHTMLExport.HTMLcom.microsoft.powerpoint.openxml.presentationcom.omnigroup.OmniOutliner.OO3HTMLExport.OO3HTMLDynamiccom.omnigroup.OmniOutliner.HTMLExport.HTMLDynamiccom.microsoft.excel.openxml.documentpublic.comma-separated-values-text"
Here are the various export formats with their corresponding FileWrapper.Type:
- CSV
- When exporting a multi-column outline as CSV, OmniOutliner saves the .csv file using standard comma-separated values (CSV) conventions (i.e., each column is separated by a comma, and text with spaces is placed within quotations).
- com.omnigroup.OmniOutliner.CSVExport.CSV
- Excel 2010 Format
- Creates a .xlsx spreadsheet document capable of being read in Microsoft Excel 2010 (and other versions of Excel that support the format). This export option maps most closely to multi-column data outside OmniOutliner, and does its best to replicate styles between the two (within the limits of Excel).
- com.microsoft.excel.openxml.document
- HTML
- Creates a like-named folder that contains an index.html file along with the necessary images and attachments that make up your OmniOutliner file. All of the styles you’ve used in OmniOutliner are converted to CSS and included in the index.html file.
- com.omnigroup.OmniOutliner.SimpleHTMLExport.HTML
- HTML (Dynamic)
- This option gives you everything that comes with the basic HTML export, plus an added outliner.js file. This JavaScript file is what makes the file dynamic; you can open and close the sections of your document just as you would in OmniOutliner.
- com.omnigroup.OmniOutliner.HTMLExport.HTMLDynamic
- com.omnigroup.OmniOutliner.OO3HTMLExport.OO3HTMLDynamic
- Microsoft Word (indented)
- Creates a .docx file that opens in the default page layout view and retains the outline structure via indentation. This export option only includes the topic column, and is primarily useful for transitioning from an outline to a word processor (rather than duplicating OmniOutliner’s functionality in Word). Row level styles are converted to heading styles, and other styles are flattened and applied directly to text (Microsoft Word does not support OmniOutliner’s style model).
- com.omnigroup.word.openxml.indented
- Microsoft Word (outline)
- Creates a .docx file that opens by default in Microsoft Word’s Outline view. Choose this option to export an outline that can be readily expanded upon in Word. This export option only includes the topic column.
- com.omnigroup.word.openxml.outline
- OmniOutliner Document
- Exports a .ooutline file, the current default OmniOutliner file format (for OmniOutliner 5 and later).
- com.omnigroup.omnioutliner.ooutline
- com.omnigroup.omnioutliner.xmlooutline
- com.omnigroup.omnioutliner.xmlooutline-package
- OmniOutliner Template
- Exports a .otemplate file which can be used as the base theme for other OmniOutliner outlines. This template format is not compatible with versions earlier than OmniOutliner 5.
- com.omnigroup.omnioutliner.otemplate
- com.omnigroup.omnioutliner.otemplate-package
- OmniOutliner 3
- Exports a .oo3 file which can be opened in either OmniOutliner 3 or 4 for Mac, and in OmniOutliner 1 for iPad and OmniOutliner 2 for iOS. These files are not compatible with OmniOutliner 2 for Mac and earlier. They can be opened in OmniOutliner 5, but must be updated to the newer .ooutline format before all editing features are available.
- com.omnigroup.omnioutliner.oo3
- com.omnigroup.omnioutliner.oo3-package
- OmniOutliner 3 Template
- Exports a .oo3template file which can be opened in either OmniOutliner 3 or 4. These files are not compatible with OmniOutliner 2 or earlier. They can be opened in OmniOutliner 5, but must be updated to the newer .otemplate format before they can be edited.
- com.omnigroup.omnioutliner.oo3template
- com.omnigroup.omnioutliner.oo3template-package
- OPML (Outline Processor Markup Language)
- Exports a .opml file, which retains the hierarchical structure of your outline. However, OPML files do not retain any of the styles or attachments you may have applied in OmniOutliner.
- org.opml.opml
- com.apple.news.opml
- org.opml.opmltemplate
- Plain Text (with tabs)
- Exports a raw .txt file without any styles. Child rows and columns are aligned using tabs rather than spaces, making this type of export useful for importing into spreadsheet apps such as Numbers or Excel.
- public.plain-text
- PowerPoint 2012 Format (pptx)
- OmniOutliner exports the contents of your outline in an XML format that PowerPoint 2012 can interpret and render. After exporting your outline as .pptx, you can then import the PowerPoint file into Apple’s Keynote app.
- Each Level 1 row becomes a separate slide in the PowerPoint presentation, with its children listed on that slide, and notes become presenter notes. Very little styling is carried over from OmniOutliner (styles don’t match well between the two formats, so we err on the side of removing them).
- Image attachments are placed on slides corresponding to their level in the hierarchy, but must be manually repositioned to the desired location on the slide.
- com.microsoft.powerpoint.openxml.presentation (pptx)
- RTF (Rich Text Format)
- Exports a .rtf file, which retains all of the styles you’ve applied in OmniOutliner. RTF is a standard document format that most word processors, such as Word and macOS’s TextEdit app can open. Export to RTF if your Outliner document contains only text and numbers.
- public.rtf
- RTFD (Rich Text Format with Attachments)
- Exports a .rtfd file, which retains all of the styles you’ve applied in OmniOutliner. What sets RTFD apart from RTF is that an RTFD file can contain attachments, such as any images, audio clips, or anything else you attach to your OmniOutliner file. Most word processors, such as Word, Pages, and macOS’s TextEdit can open .rtfd files.
- com.apple.rtfd
Export to HTML
The following Omni Automation plug-in will export the current outline to disk as a folder containing an HTML file with supporting files.
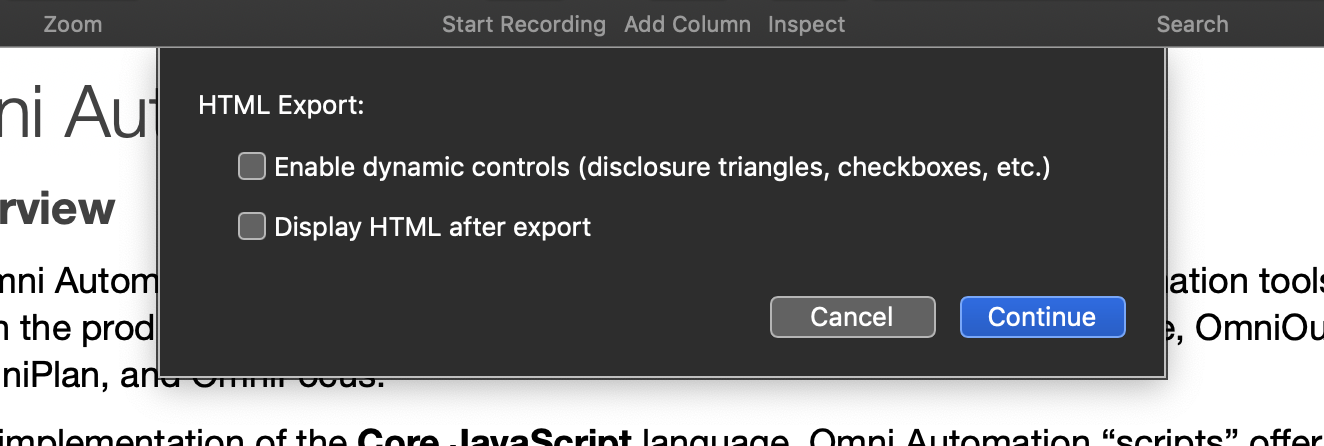
This plug-in uses an action form to prompt the user to select the export parameters to use. In addition, the action displays a file saver dialog from which the user determines the name and location to be used for the exported HTML folder.
The action code incorporates three uses of the JavaScript Promise class: 1) for form creation and display; 2) for generating the export file wrapper; and 3) for displaying and responding to the file saver dialog.
Export to HTML (@)
/*{"type": "action","targets": ["omnioutliner"],"author": "Otto Automator","identifier": "com.omni-automation.oo-export-to-html","version": "1.1","description": "This action will export the current outline in either simple or dynamic HTML format.","label": "Export to HTML","shortLabel": "Export to HTML","paletteLabel": "Export to HTML","image":"richtext.page"}*/(() => {const action = new PlugIn.Action(async function(selection, sender){try {inputForm = new Form()dynamicCheckbox = new Form.Field.Checkbox("dynamicCheckbox","Enable dynamic controls (disclosure triangles, checkboxes, etc.)",false)openFileCheckbox = new Form.Field.Checkbox("openFileCheckbox","Display HTML after export",false)inputForm.addField(dynamicCheckbox)inputForm.addField(openFileCheckbox)formObject = await inputForm.show("HTML Export:","Continue")shouldExportAsDynamic = formObject.values['dynamicCheckbox']if(shouldExportAsDynamic){var fileTypeID = "com.omnigroup.OmniOutliner.HTMLExport.HTMLDynamic"} else {var fileTypeID = "com.omnigroup.OmniOutliner.SimpleHTMLExport.HTML"}shouldDisplayAfterExport = formObject.values['openFileCheckbox']baseName = document.name.replace(/\.[^/.]+$/, "")wrapper = await document.makeFileWrapper(baseName, fileTypeID)filesaver = new FileSaver()folderURL = await filesaver.show(wrapper)console.log(folderURL.string)if(shouldDisplayAfterExport){fileURL = folderURL.appendingPathComponent("index.html")fileURL.open()}}catch(err){if(!err.causedByUserCacelling){new Alert(err.name, err.message).show()}}});action.validate = function(selection, sender){return true};return action;})();