Single-File Plug-In (also called “Simple Plug-In”)
The single-file plug-in employs an economical design that delivers great flexibility and functionality in a solitary file. Containing both the plug-in metadata and function code, these plug-ins are perfect for quick light-weight development using any text editing application.
TIP: Visit the PLUG-IN TEMPLATE GENERATORS for quick generation of simple plug-ins.
PlugIn.Action Class
A plug-in’s “action” is the function that does the work. The parent plug-in is the wrapper for the action.
Constructor
This constructor is used to create a new “action” or instance of the PlugIn.Action class:
new PlugIn.Action(perform: Function) → (PlugIn.Action) • Returns a new PlugIn.Action. Only used within an action JavaScript file embedded within a plug-in.
Validation Property
An instance of the PlugIn.Action has an optional validate property whose value is a function that checks to see if the current application environment has the correct conditions for the action to execute. For example, checking to see that something is selected in the application interface.
validate (Function or nil) • A function to check whether the action is supported, given the current application state, as determined by the arguments passed (typically including the selection). This optional Function may be configured while the Action is being loaded, but after that the Action will be frozen.
IMPORTANT: With single-file plug-ins, the parent plug-in and it's single action are contained within the same file. With bundle plug-ins, the actions of the plug-in are contained in single files stored within the plug-in bundle.
Plug-In Design
The structure of a single-file plug-in is expressed in two components:
- Plug-In Metadata • The plug-in properties that indicate how the plug-in is defined and used.
- Plug-In Code • The JavaScript-based statements and functions that are read and executed by the host application to perform the indicated procedures.
As listed below, the Plug-In Code section of an Omni Automation single-file plug-in is comprised of specilized JavaScript functions placed within a self-invoking anonymous (unnamed) JavaScript arrow function. This anonymous (unnamed) function wrapper is used to minimize the chance of conflicts with other actions whose code statements contain variables using the same titles as those used in other actions.
Referencing the shown lined-numbered code example:
- Plug-In Metadata (lines 01—12)
- Anonymous Function Wrapper: Open (line 13)
- Action Instance (lines 14—25) • An instance of the PlugIn.Action class is created containing the code that performs the procedures the plug-in (action) is meant to accomplish.
- Action Validation Function (optional) (lines 27—30) • The result of the action validation function is a boolean value (true/false) that determines whether the plug-in is enabled or disabled for execution.
- Return Action Object (ine 32) • The PlugIn.Action instance is returned to the enclosing function wrapper to be automatically executed.
- Anonymous Function Wrapper (line 33) • The closing paren closes the wrapper, and then passes the function to the open and closing parens ( ) which self-invoke causing the passed action object to executed.
Basic Plug-In
Basic Single-File Plug-In
/*{"type": "action","targets": ["omnigraffle", "omnifocus", "omniplan", "omnioutliner"],"author": "","identifier": "","version": "1.0","description": "A single-file plug-in.","label": "Plug-In Menu Item Title","shortLabel": "Item Title","paletteLabel": "Toolbar Item","image": "gearshape.fill"}*/(() => {const action = new PlugIn.Action(function(selection, sender){// action codetry {// PROCESSING STATEMENTS}catch(err){new Alert(error.name, err.message).show()console.error(err)}});action.validate = function(selection, sender){// validation codereturn true};return action;})();
Asynchronous Plug-In
For those with more advanced JavaScript knowledge, here’s an asynchronous version of the single-file plug-in that incorporates await statements within an asynchronous wrapper rather than relying on explicit Promise handlers:
Asynchronous Single-File Plug-In
/*{"type": "action","targets": ["omnigraffle", "omnifocus", "omniplan", "omnioutliner"],"author": "","identifier": "","version": "1.0","description": "A plug-in that performs asynchronous operations.","label": "Plug-In Menu Item Title","shortLabel": "Item Title","paletteLabel": "Toolbar Item","image": "gearshape.fill"}*/(() => {const action = new PlugIn.Action(async function(selection, sender){try {// ASYNCHRONOUS STATEMENTS (await)}catch(err){if(!causedByUserCancelling){new Alert(err.name, err.message).show()}}});action.validate = function(selection, sender){// validation codereturn true};return action;})();
See the Sequential Forms documentation for an example of the use of the asynchronous plug-in template.
1st-Run Interaction Plug-In
A plug-in that uses the Preferences class to create a 1st-run interaction. To reset the plug-in, hold down Control modifier key when selecting plug-in from the Automation menu.
1st-Run Sensor
/*{"type": "action","targets": ["omnifocus","omniplan","omnioutliner","omnigraffle"],"author": "Otto Automator","identifier": "com.omni-automation.all.first-run-sensor","version": "1.0","description": "This plug-in will present an alert the first time it is executed. To reset the plug-in, hold down Control key when selecting from Automation menu.","label": "First Run Example","shortLabel": "1st Run","paletteLabel": "1st Run","image": "gearshape.fill"}*/(() => {const preferences = new Preferences()const action = new PlugIn.Action(async function(selection, sender){try {incrementedCount = preferences.readNumber("incrementedCount")if(!incrementedCount){preferences.write("incrementedCount", 0)incrementedCount = 0}if (app.controlKeyDown){alertMessage = "Reset the stored count?"alert = new Alert("Confirmation Required", alertMessage)alert.addOption("Reset")alert.addOption("Cancel")buttonIndex = await alert.show()if (buttonIndex === 0){preferences.write("incrementedCount", 0)console.log("incrementedCount", "reset")return "user reset"}}console.log("incrementedCount", incrementedCount)if (incrementedCount === 0){alertTitle = "Plug-In 1st Run"alertMessage = "Welcome to the 1st-Run Plug-In!"await new Alert(alertTitle, alertMessage).show()}preferences.write("incrementedCount", incrementedCount + 1)// PROCESSING CODE GOES HERE}catch(err){if(!causedByUserCancelling){new Alert(err.name, err.message).show()}}});action.validate = function(selection, sender){// validation codereturn true};return action;})();
Plug-In Metadata Keys/Values
The plug-in metadata is comprised of key/value pairs detailing the manner in which the plug-in should interact with the host application. Here is a synopsis of the plug-in metadata:
Plug-In Metadata
/*{"type": "action","targets": ["omnigraffle", "omnifocus", "omniplan", "omnioutliner"],"author": "You or Your Company","identifier": "com.youOrCompany.all.plug-in-name","version": "1.0","description": "Description of what the plug-in does.","label": "Plug-In Menu Item Title","shortLabel": "Item Title","mediumLable": "Menu Item Title","paletteLabel": "Toolbar Picker Title","image": "newspaper.fill"}*/
- type • The value of the type key should always be “action” which is used as a synonym for an instance of the PlugIn.Action class included as the execution mechanism of the plug-in.
- targets • The value of the targets key is a JavaScript array containing the lowercase name(s) of the Omni application(s) in which the plug-in should perform. For example, the array ["omnifocus", "omniplan"] indicates that the plug-in will be available in both the OmniFocus and OmniPlan applications, while the array ["omnigraffle"] indicates that the plug-in wil only be available in the OmniGraffle application. Use of the targets property ensures that linked folders containing plug-ins for multiple Omni applications will always load in the correct application.
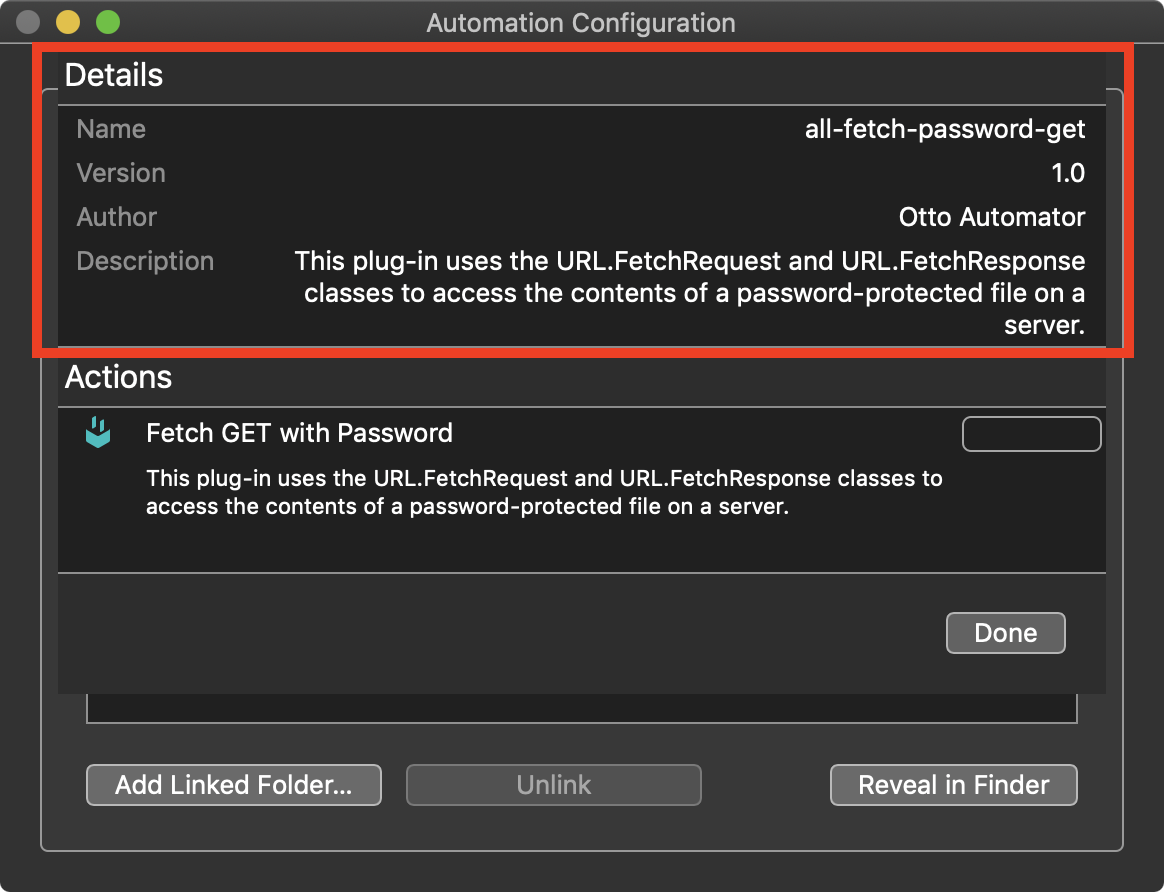
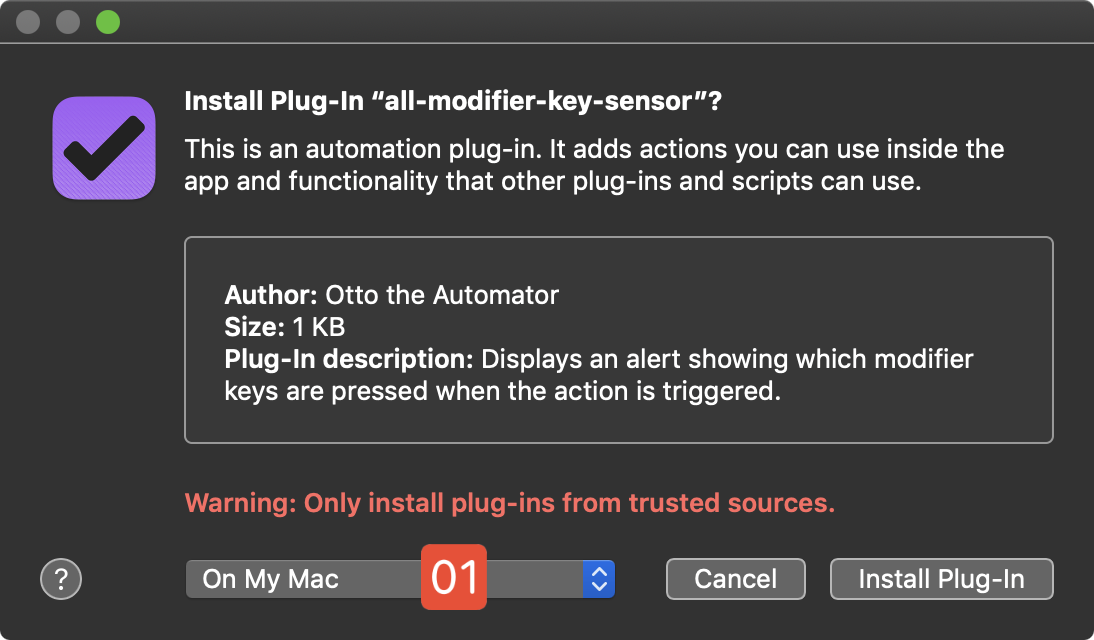
- author • The value of the author key is the name of the individual, developer, or company that created the plug-in. This content is visible by the user (see illustration below).
- identifier • Plug-ins are recognized and managed by hosting Omni applications through the use of their identifier key, whose value should always be unique to the plug-in. A common practice in constructing identifiers follows this structure:
- com.AuthorName.AbreveiationOfTargetApp.hypenated-plug-in-title
- TIP: use “of”, “og”, “op”, “oo”, “of-op”, or “all” for abbreviations, as in:
- com.omni-automation.og.reorder-canvases-by-name
- version • The value of the version key is a Version string, which is used by the host application to check to see that an install request is an update to an existing plug-in. The version string is visible by the user (see illustration below).
- description • The value of the description key is a “short description” of what the plug-in does, and any other important information the user needs to know about the use of the plug-in. This content is visible by the user (see illustration below).
- label • The value of the label key is the text displayed as the plug-in’s menu item in the Automation or Share menus.
- shortLabel (optional) • Returns the label to use for interface controls that invoke the action, when a short amount of space is available. Usually used for toolbar items.
- mediumLabel (optional) • Returns the label to use for interface controls that invoke the action, when a medium amount of space is available.
- paletteLabel (optional) • Returns the label to use for interface controls that show a prototype of the action control, such as on a macOS toolbar configuration sheet. TIP: keep this short!
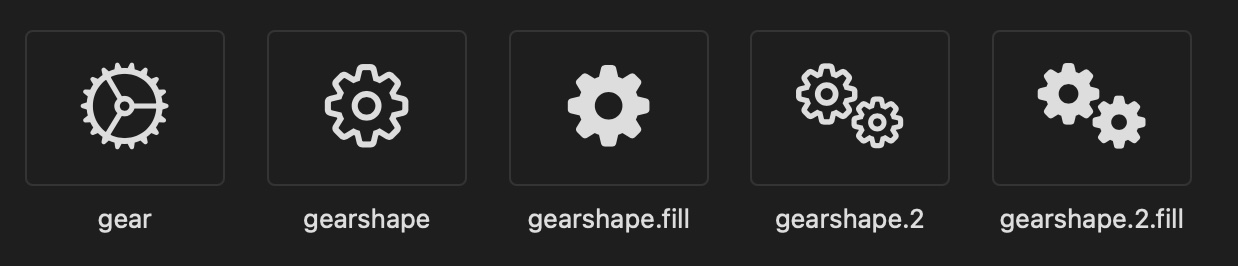
- image (optional)(req: macOS 11/iOS 14/iPadOS 14) • To use an Apple SF Symbols character as the icon for the plug-in, set the value of this parameter to the assigned name of the character, such as: "newspaper.fill". For a complete catalog of SF Symbols characters, download the SF Symbols application from Apple.
TIP: The SF Symbol icon for a plug-in can be changed dynamically using code placed in the plug-in’s validation routine. Here’s an example plug-in that will display an SF Symbol indicating the number of selected tasks in OmniFocus:
Show Count of Selected Tasks
/*{"type": "action","targets": ["omnifocus"],"author": "Otto Automator","identifier": "com.omni-automation.of.selection-count","version": "1.0","description": "Plug-In icon shows count of selection.","label": "Count of selected tasks","shortLabel": "Count of selected tasks","paletteLabel": "Count of selected tasks","image": "square.3.stack.3d"}*/(() => {var action = new PlugIn.Action(function(selection, sender){// PROCESSING STATEMENTS GO HERE});action.validate = function(selection, sender){selectionCount = selection.tasks.lengthif (selectionCount === 0) {sender.image = Image.symbolNamed("00.square.fill")return false} else {if (selectionCount < 10){symbolName = "0" + String(selectionCount) + ".square.fill"} else if (selectionCount < 51){symbolName = String(selectionCount) + ".square.fill"} else {symbolName = "greaterthan.square.fill"}sender.image = Image.symbolNamed(symbolName)return true}};return action;})();
Plug-In Metadata Interface
(⬇ see below ) The metadata displayed for a plug-in in the Automation Configuration dialog.
Selection Input
In the plug-in code, both the action declaration and validation handlers include two input parameters in their functions:
- selection • The selection parameter is the Selection object of the host application. This object contains references to the application elements currently selected in the application interface. Of course, this list of elements varies with each Omni application:
- OmniFocus: database, folders, projects, tags, tasks, window, allObjects, databaseObjects, and document
- OmniPlan: project, resources, and tasks
- OmniGraffle: canvas, document, graphics, lines, solids, and view
- OmniOutliner: allObjects, columns, document, editor, items, nodes, outline, and styles
- sender • The sender parameter contains a reference to the object that triggers the execution of the plug-in. The value of the sender parameter can be one of three types:
- An instance of the MenuItem class, meaning that plug-in was triggered via either the Automation or Share menus.
- An instance of the ToolbarItem class, meaning that the plug-in was triggered by a toolbar item.
- A value of undefined if the plug-in was triggered by another script.
The sender parameter is documented in detail in the Sender Parameter section of this website.
Validation Function
The value returned by the Validation Function of the PlugIn.Action instance determines whether or not the plug-in is enabled or disabled in the application interface. A returned value of true means that the Automation Menu, Share Menu, and any corresponding Toolbar Item will be enabled for use. A returned value of false will make those disabled.
NOTE: Use of the Validation Function is optional. If omitted from the plug-in code, a result value of true will be assumed by the plug-in.
The Validation Function is often used to ensure that the items necessary to be processed by the plug-in are indeed currently selected in the application interface. Here are examples of the Validation Function using the passed-in selection parameter to identify selected items:
Validation Function
action.validate = function(selection, sender){// validation codereturn a value that is either true or false};
OmniFocus: Single Task whose Name begins with “Call”
action.validate = function(selection, sender){return (selection.tasks.length === 1 &&selection.tasks[0].name.startsWith("Call"))};
OmniPlan: One or More Resources Selected
action.validate = function(selection, sender){return (selection.resources.length > 0)};
OmniGraffle: Single Selected Shape with Text
action.validate = function(selection, sender){return (selection.solids.length === 1 &&selection.solids[0].text != "")};
OmniOutliner: One or More Columns Selected
action.validate = function(selection, sender){return (selection.columns.length > 0)};
IMPORTANT: The validation function is meant to provide confirmation of application state. Avoid using complex or process-intensive statements within the function as they may cause the application to become unresponsive.
For example, calling the flattenedTasks property of Database class in OmniFocus may cause delays for instances where the application database contains a large number of items.
Avoid Intensive Validation
action.validate = function(selection, sender){return (flattenedTasks.length > 0)};
Validating Plug-In Forms
See the section on Form Validation for a detailed explanation of how to validate plug-in forms.
File Extensions
The file extensions used for Omni Automation plug-ins include four app-specific extensions for single-file plug-ins, matching those currently used for plug-in bundles. In addition, for plug-ins that have two or more Omni applications as targets, the generic “omnijs” file extension is used.
The five supported file extensions are:
- omnijs - Used for plug-ins that target more than one of the Omni applications.
- omnifocusjs - Used for plug-ins (both single-file and bundles) that are to be hosted by the OmniFocus application.
- omniplanjs - Used for plug-ins (both single-file and bundles) that are to be hosted by the OmniPlan application.
- omnigrafflejs - Used for plug-ins (both single-file and bundles) that are to be hosted by the OmniGraffle application.
- omnioutlinerjs - Used for plug-ins (both single-file and bundles) that are to be hosted by the OmniOutliner application.
NOTE: It is recommended to not use spaces in plug-in or action file names. Hyphens ( - ) and underscore ( _ ) characters work well as replacements for spaces: og-my-graphics-plug-in.omnigrafflejs
Installation
For single-file plug-in fies using an app-specific file extension, the installation process is simple:
- Download the plug-in
- Open|Tap the plug-in file
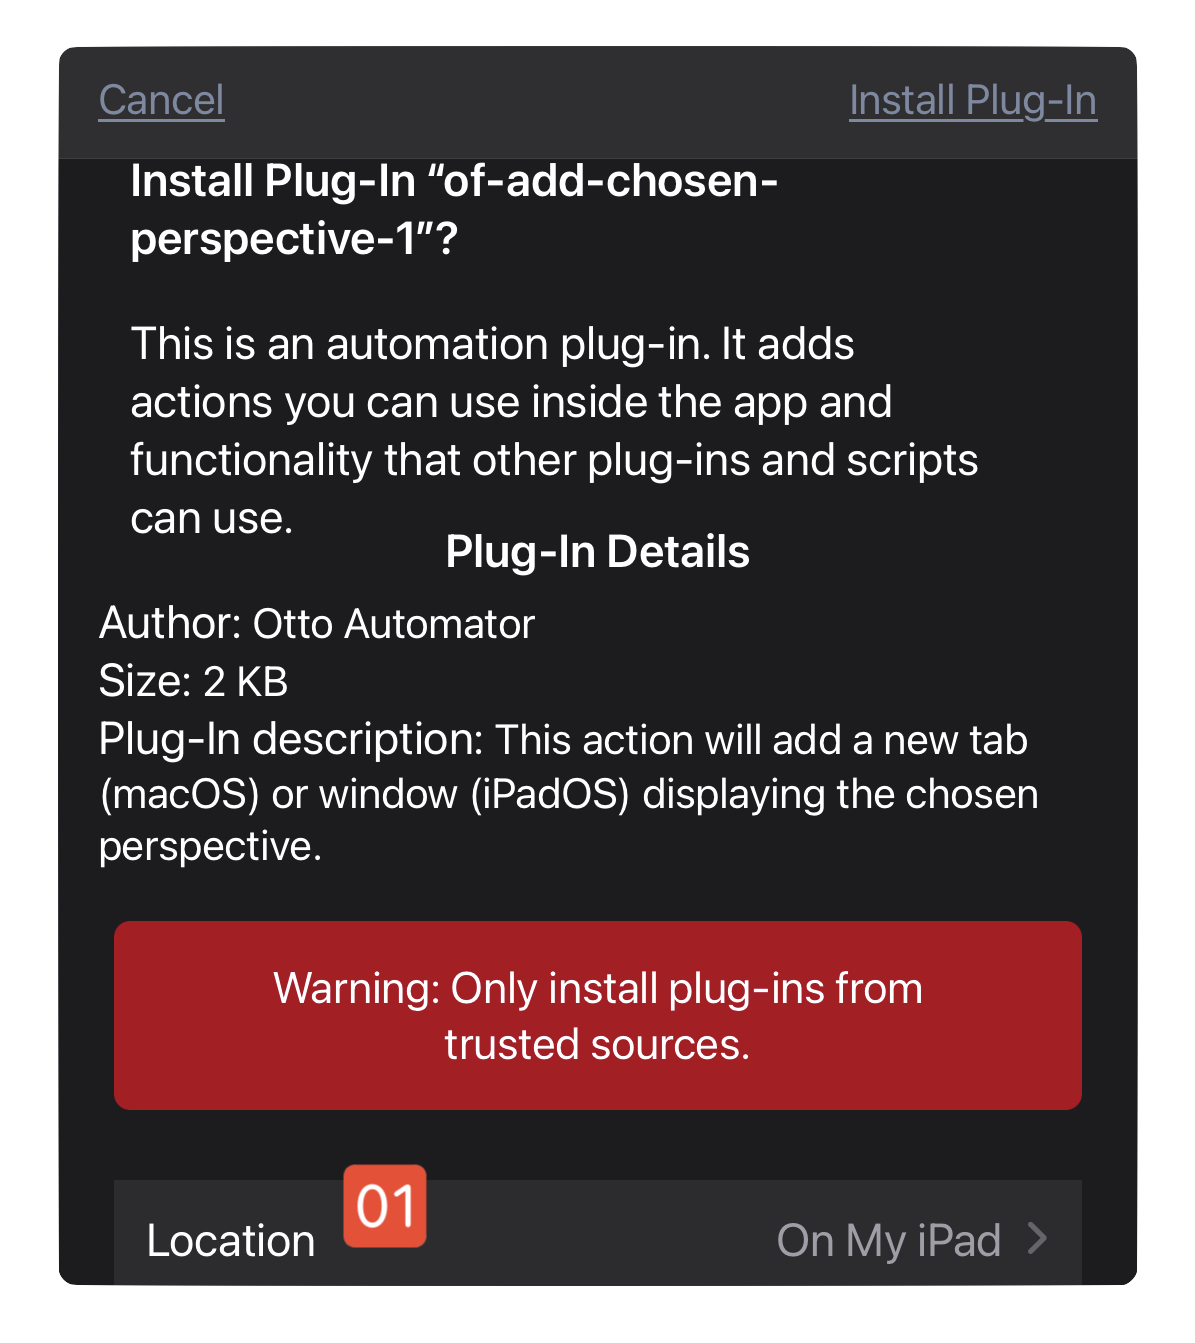
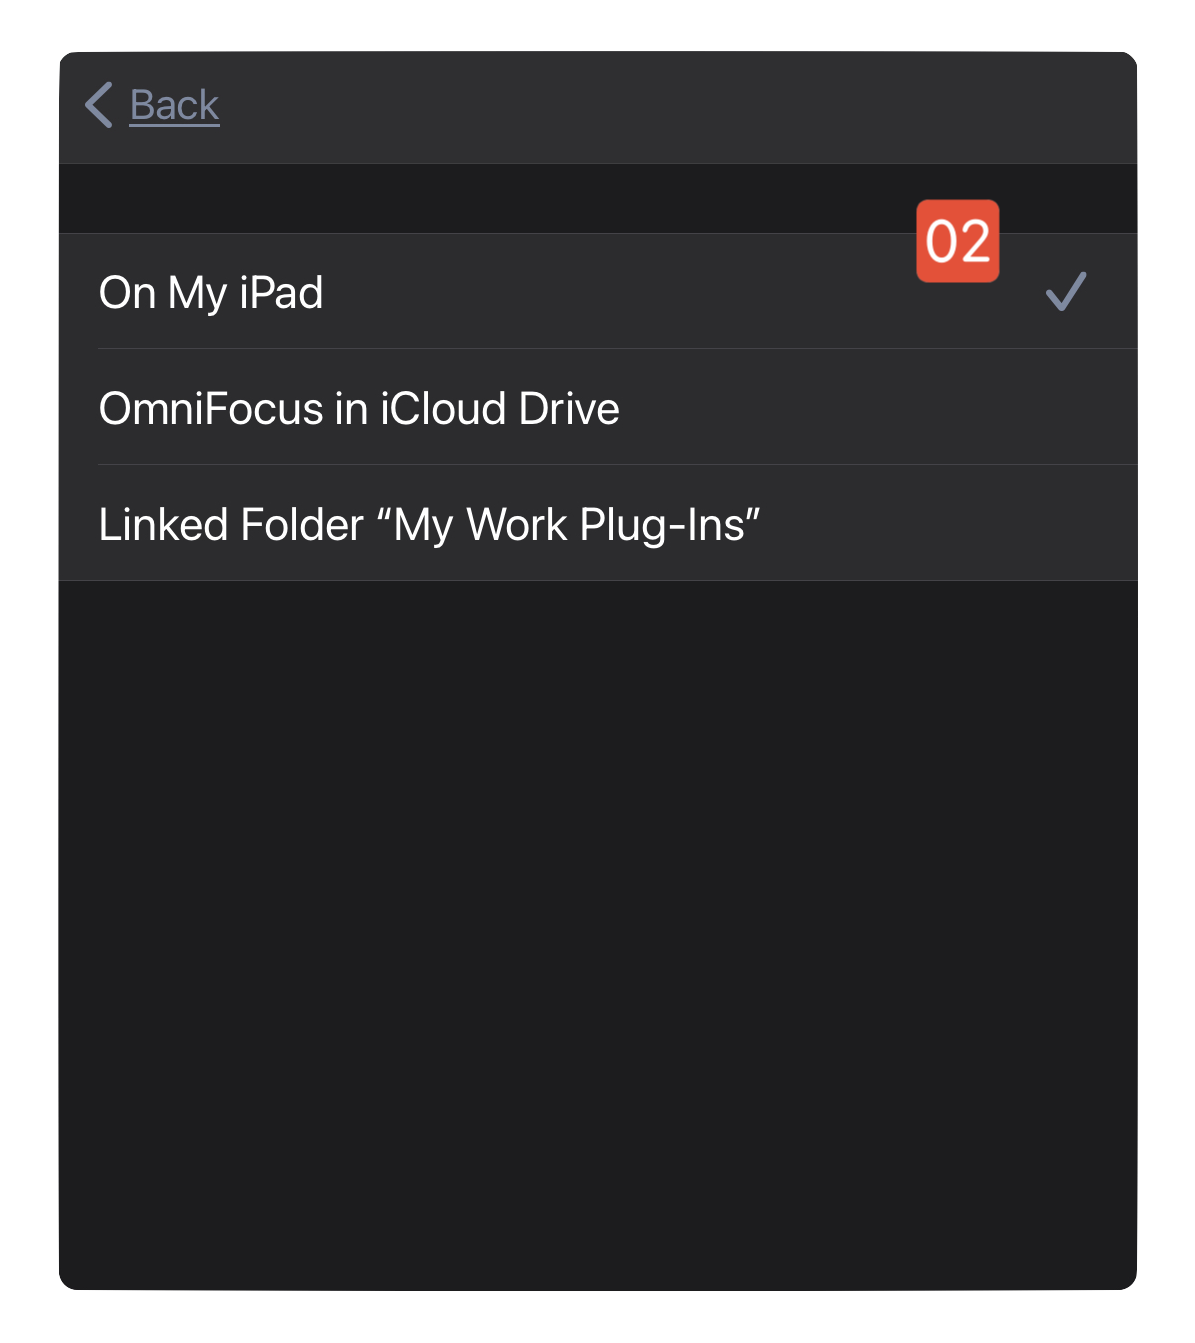
- Complete the forthcoming installation security dialogs to indicate your approval to install the plug-in, and select the location in which the file is to be stored.
(⬇ see below ) Security installation dialogs on iPadOS/iOS. CLICK|TAP Location button 01 to select the folder 02 in which to store the plug-in file:
(⬇ see below ) Security installation dialogs on macOS. Click “Location” menu 01 to select the folder in which to store the plug-in file:
IMPORTANT: To install single-file plug-ins whose file extension is the generic “omnijs” on iPadOS or iOS, copy their files into a folder identified as a linked folder in “Configure Plug-Ins” panel in the application’s “Settings” window.
For more information about “linked” plug-in folders, see the section on Plug-In Installation and Manegement.