Installing Plug-Ins
For the most part, installing Omni Automation plug-in is a simple process that is based upon the file extension used by the plug-in.
Plug-In File Extensions
The file extensions used for Omni Automation plug-ins include four app-specific extensions for single-file plug-ins, matching those currently used for plug-in bundles. In addition, for plug-ins that have two or more Omni applications as targets, the generic “omnijs” file extension is used.
The five supported file extensions are:
- omnijs - Used for plug-ins that target more than one of the Omni applications.
- omnifocusjs - Used for plug-ins (both single-file and bundles) that are to be hosted by the OmniFocus application.
- omniplanjs - Used for plug-ins (both single-file and bundles) that are to be hosted by the OmniPlan application.
- omnigrafflejs - Used for plug-ins (both single-file and bundles) that are to be hosted by the OmniGraffle application.
- omnioutlinerjs - Used for plug-ins (both single-file and bundles) that are to be hosted by the OmniOutliner application.
The installation technique used for a plug-in depends upon it file extension and the operating system of the host device.
macOS: omnifocusjs, omnigrafflejs, omniplanjs, omnioutlinerjs
To install a plug-in that uses an application-specific file extension, onto a macOS device, you may either:
- Select the plug-in file in the Finder and choose “Open” from the File menu.
- Double-Click the plug-in file to trigger the installation process.
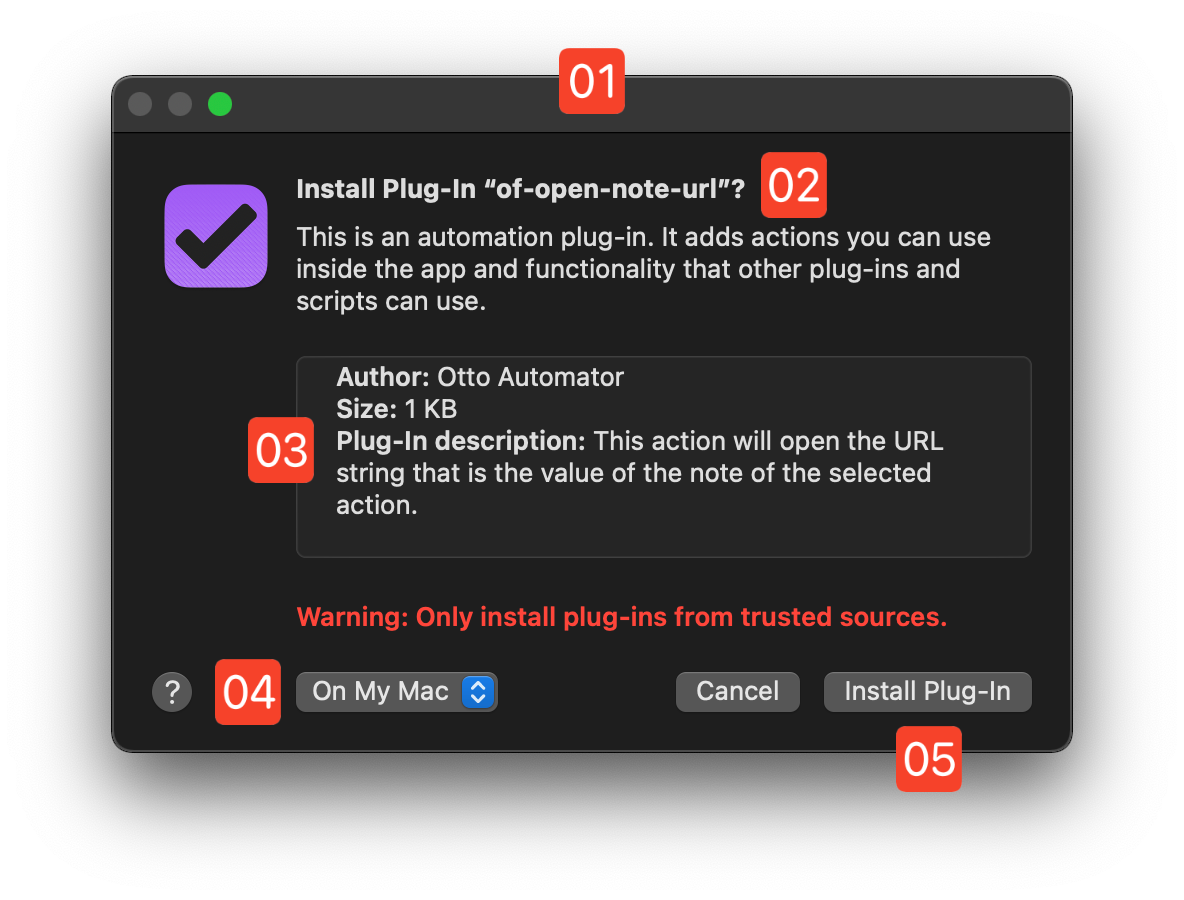
1 Plug-In Installation Dialog • This dialog is presented when a plug-in using an application-specific file extension is opened. The host Omni application will correspond to the file extension used by the plug-in.
2 Plug-In File Name • The file name (or plug-in title if a bundle) of the plug-in shown without the file extension. If this plug-in has been previously installed, this name may be appended with an incrementing number.
3 Plug-In Description • The developer-supplied description of the plug-in.
4 Storage Destination • The folder in which the plug-in is to be installed. By default, On My Mac indicated the use of the host application’s plug-ins folder within the Application Support directory. If the current user is signed into an iClound account, the “iCloud Drive” option will be offerred along with any other linked folders.
5 Complete Installation • Select this button to complete the copying of the chosen plug-in into the indicated destination directory.

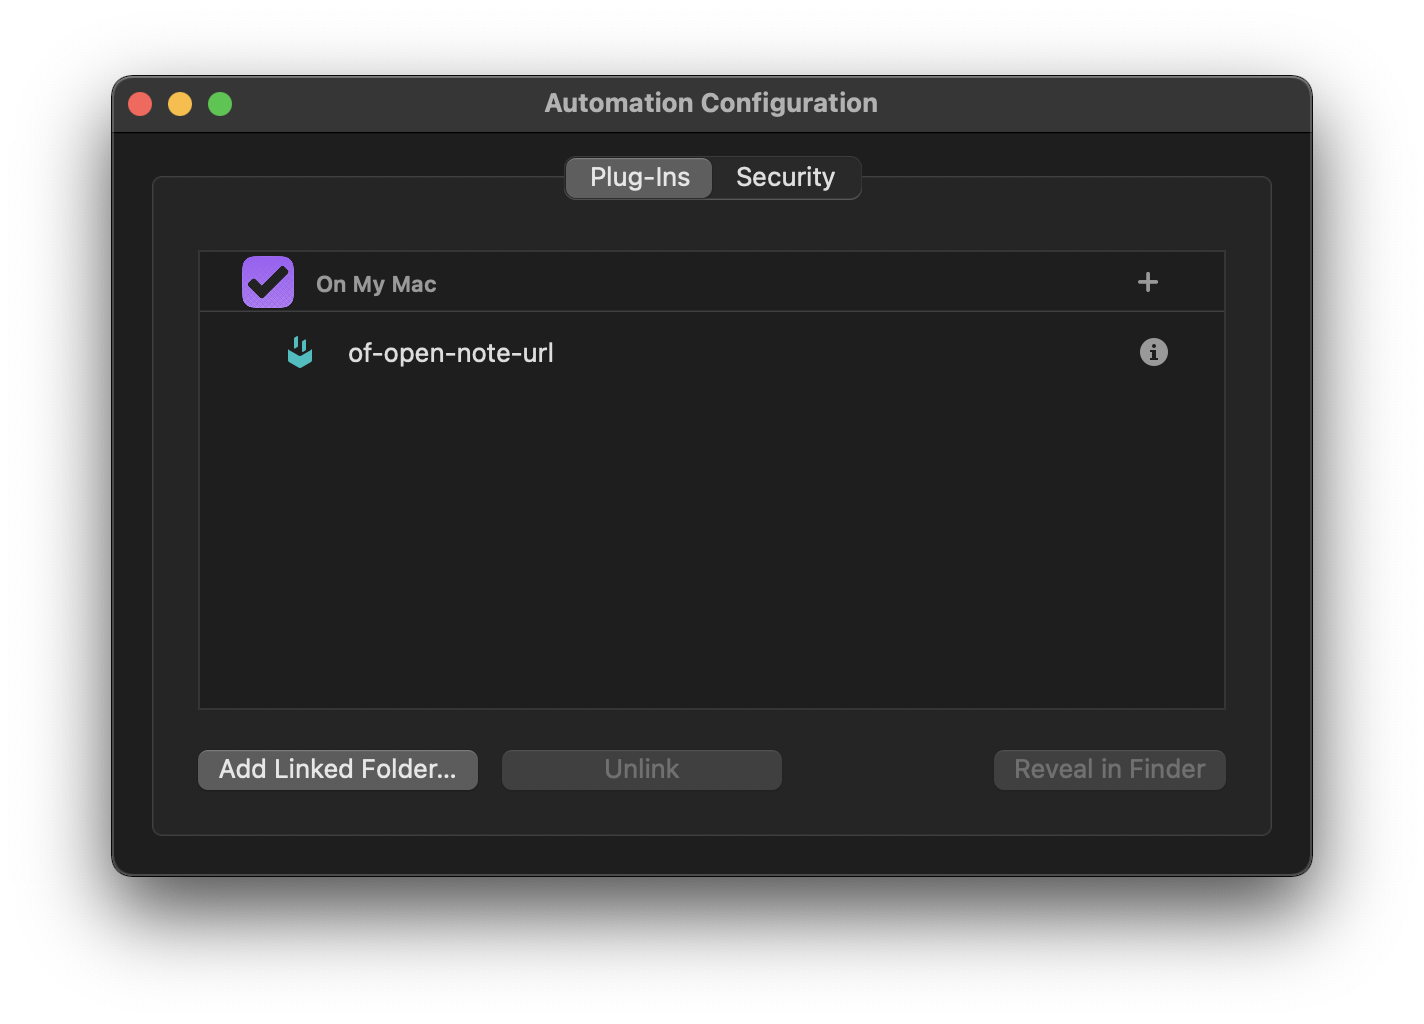
The installed plug-in is now listed in the Automation Configuration dialog.
macOS: omnijs
Plug-ins using the generic “omnijs” file extension will not install using the previously mentioned open command or double-click.
To install plug-ins using the generic “omnijs” file extension, drag their icons into the Automation Configuration dialog.
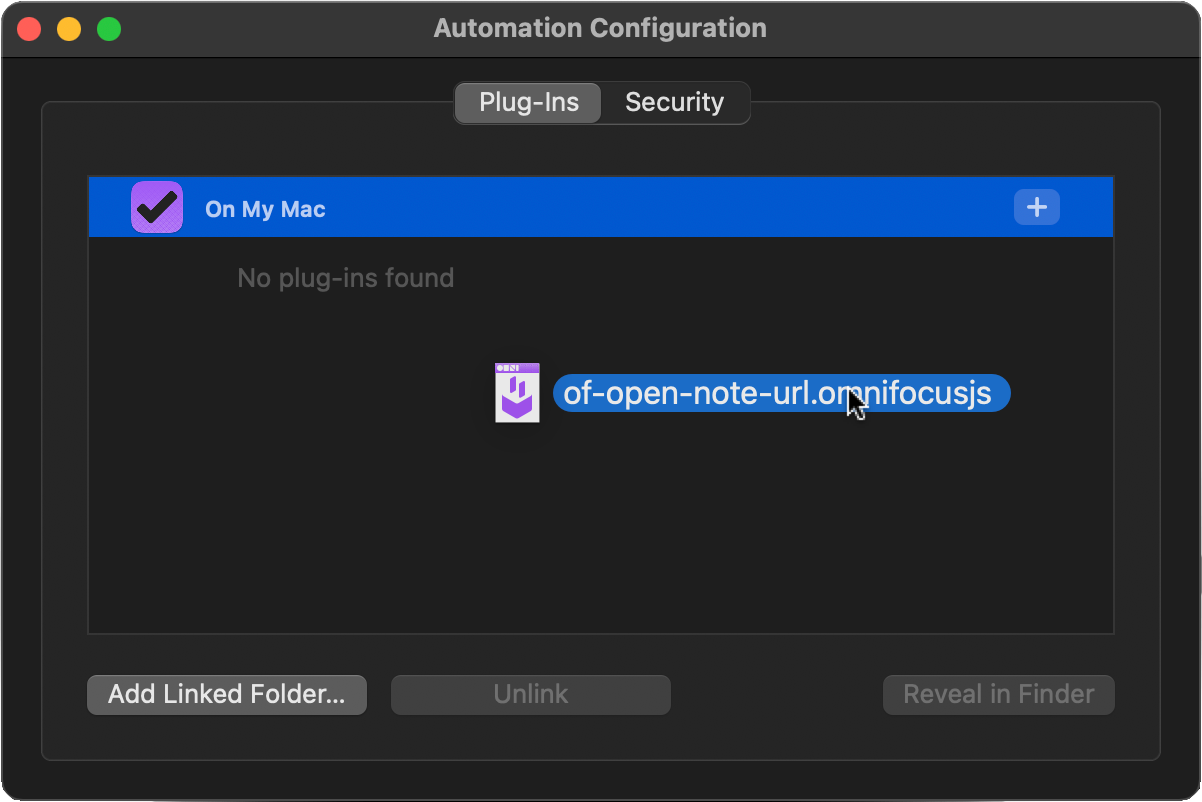
After releasing the cursor, the plug-in will be automatically be copied into the destination folder the icon was dragged over.
NOTE: Optionally, Plug-Ins can be moved between linked plug-in folders by dragging their icons in the Automation Configuration window.
Uninstalling Plug-Ins
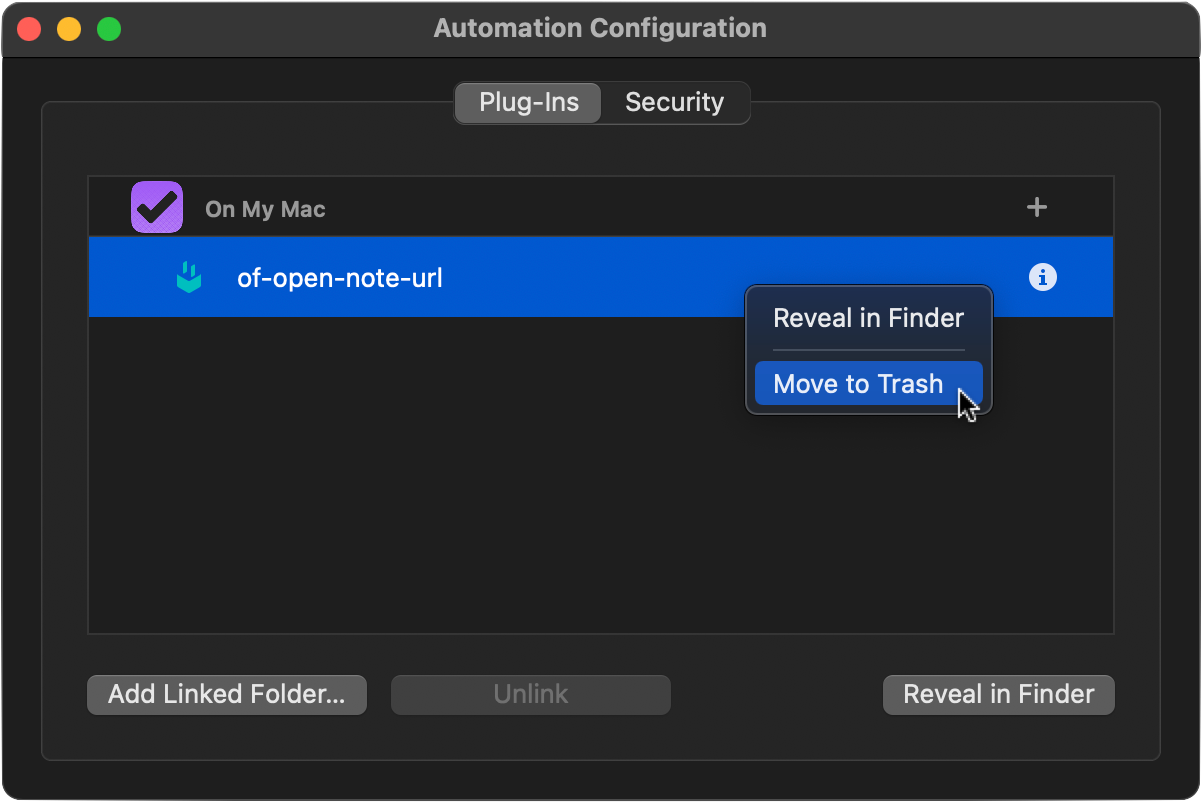
To delete an installed plug-in, right-click (Control-click) the plug-in in the Automation Configuration dialog and select the “Move to Trash” option from the forthcoming contextual menu:
iPadOS/iOS: omnifocusjs, omnigrafflejs, omniplanjs, omnioutlinerjs
To install a plug-in using an app-specific file extension, simply tap the plug-in’s icon and the installation dialog will be summoned:
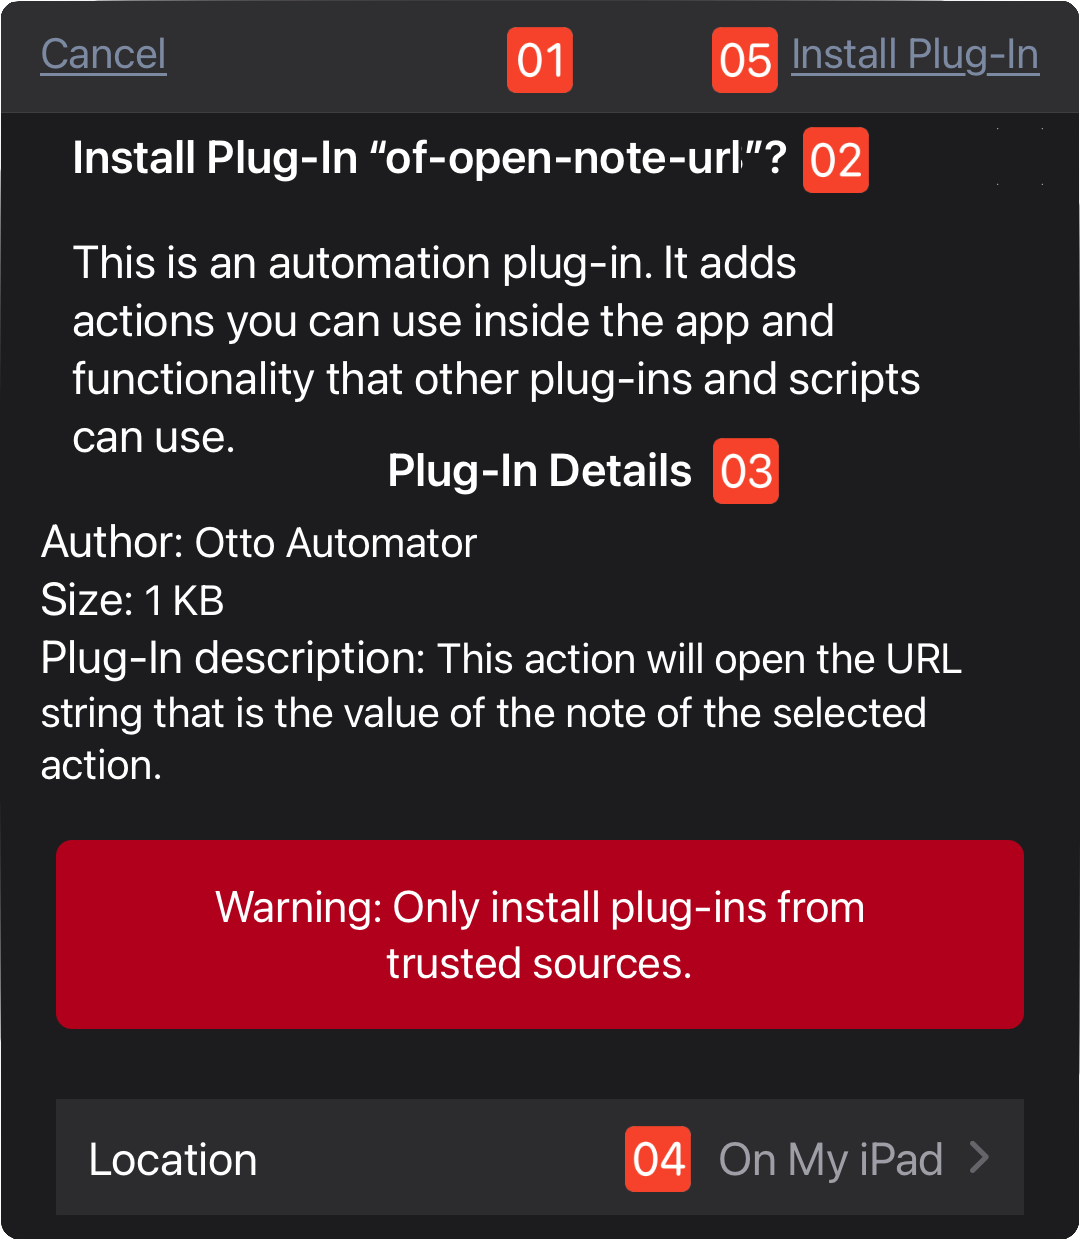
1 Plug-In Installation Dialog • This dialog is presented when a plug-in using an application-specific file extension is opened. The host Omni application will correspond to the file extension used by the plug-in.
2 Plug-In File Name • The file name (or plug-in title if a bundle) of the plug-in shown without the file extension. If this plug-in has been previously installed, this name may be appended with an incrementing number.
3 Plug-In Details • The developer-supplied description of the plug-in.
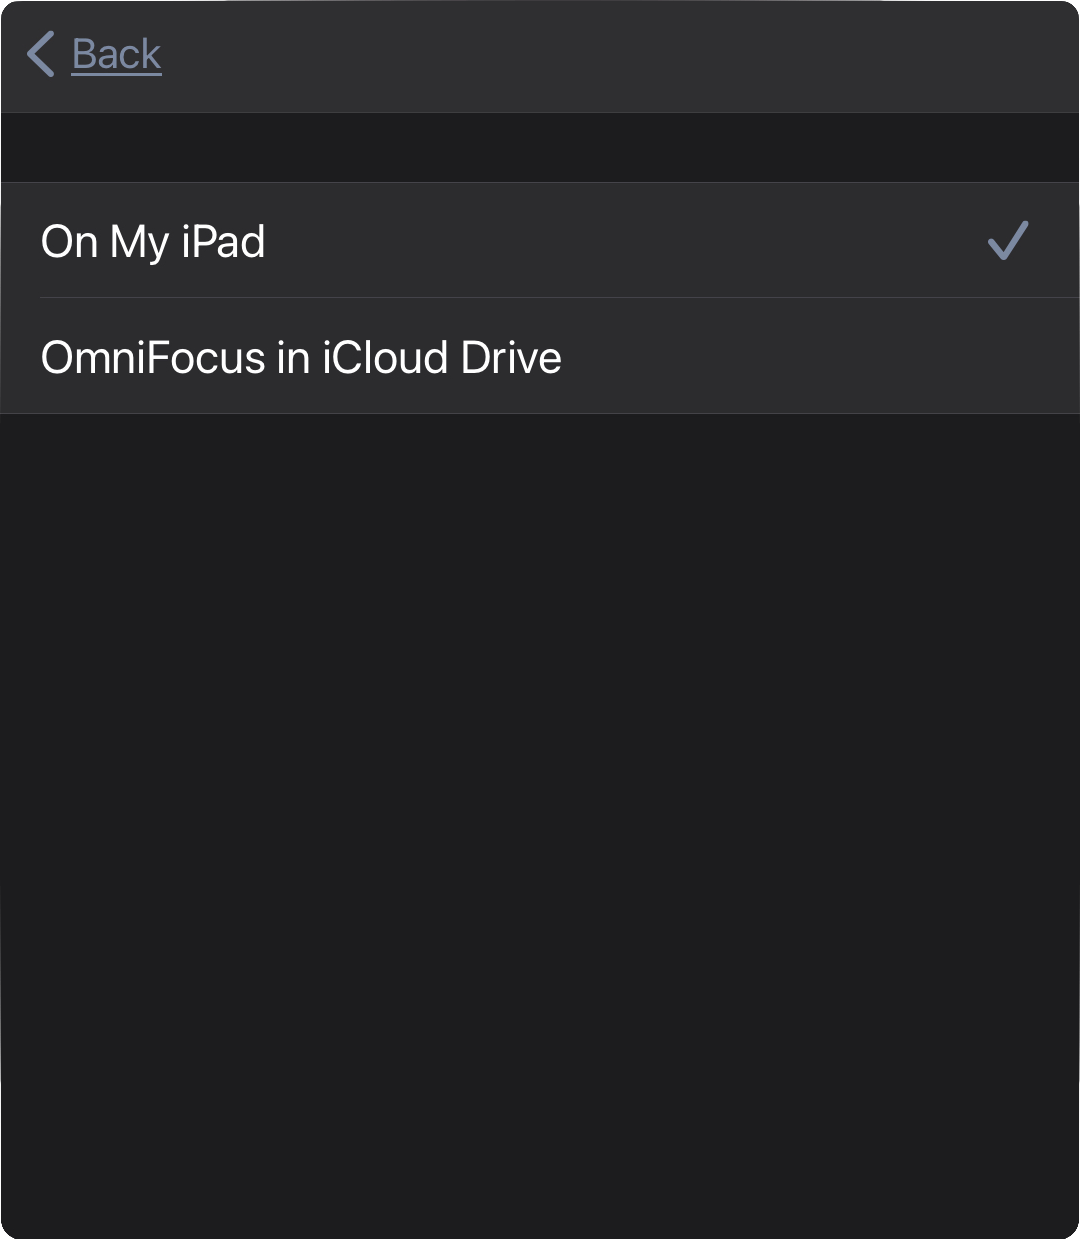
4 Storage Destination • The folder in which the plug-in is to be installed. By default, On My Mac indicated the use of the host application’s plug-ins folder within the Application Support directory. If the current user is signed into an iClound account, the “iCloud Drive” option will be offerred along with any other linked folders (see below).
5 Complete Installation • Select this button to complete the copying of the chosen plug-in into the indicated destination directory.
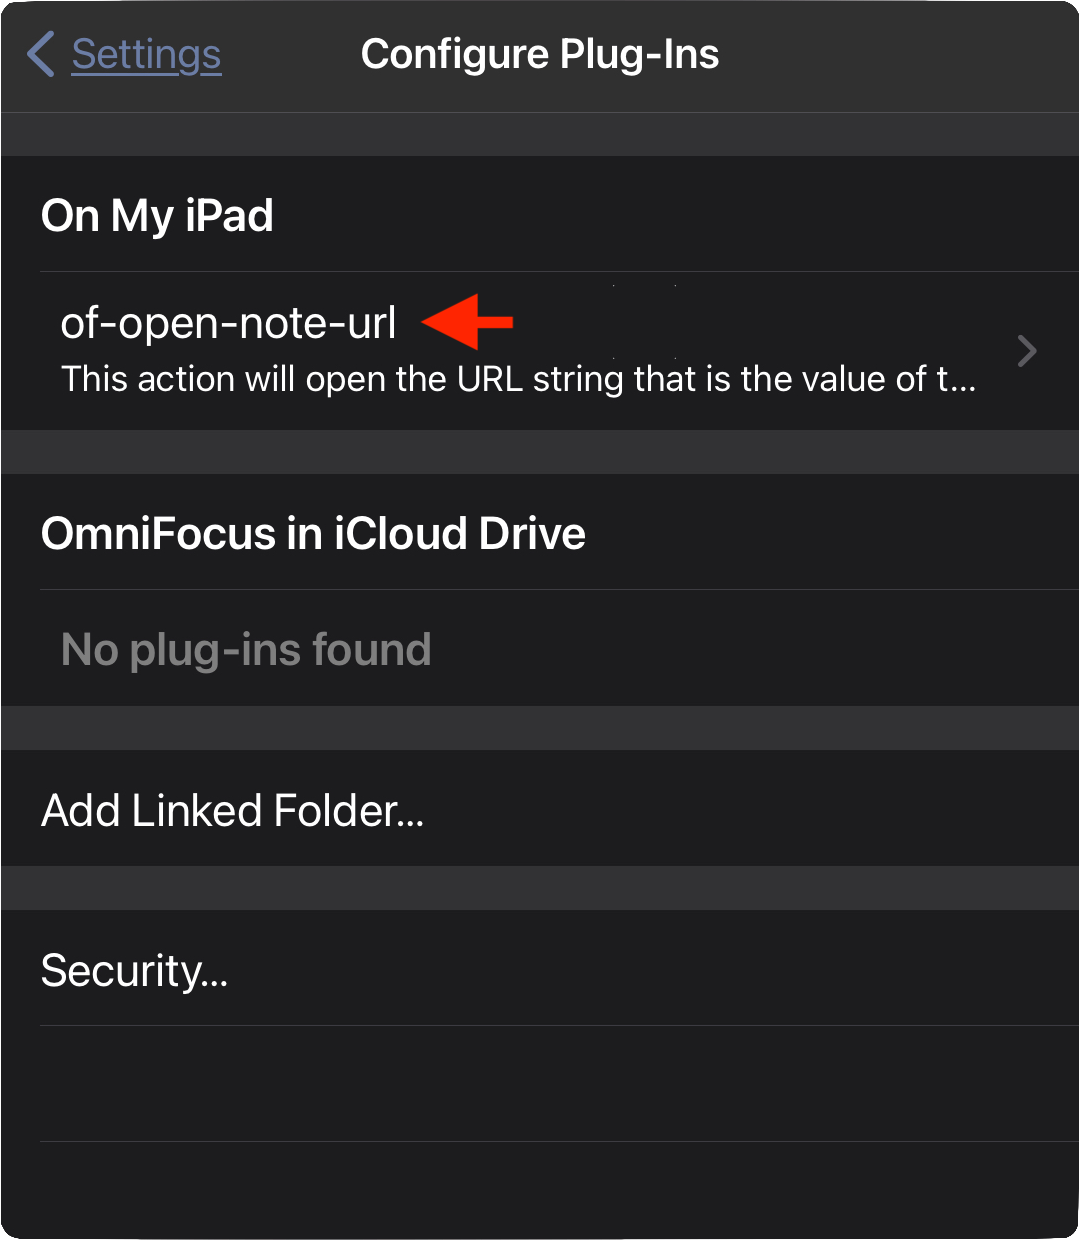
The installed plug-in is now listed in the Automation Configuration dialog.
iPadOS/iOS: omnijs
Installing plug-ins that use the generic “omnijs” file extension is done easily by following this process:
- In the iPadOS/iOS Files app, drag the icon of the “omnijs” plug-in file into the targeted Omni application’s support folder revealed in the On My iPad view:

The installed plug-in will appear in the target application’s Automation or Share menu.
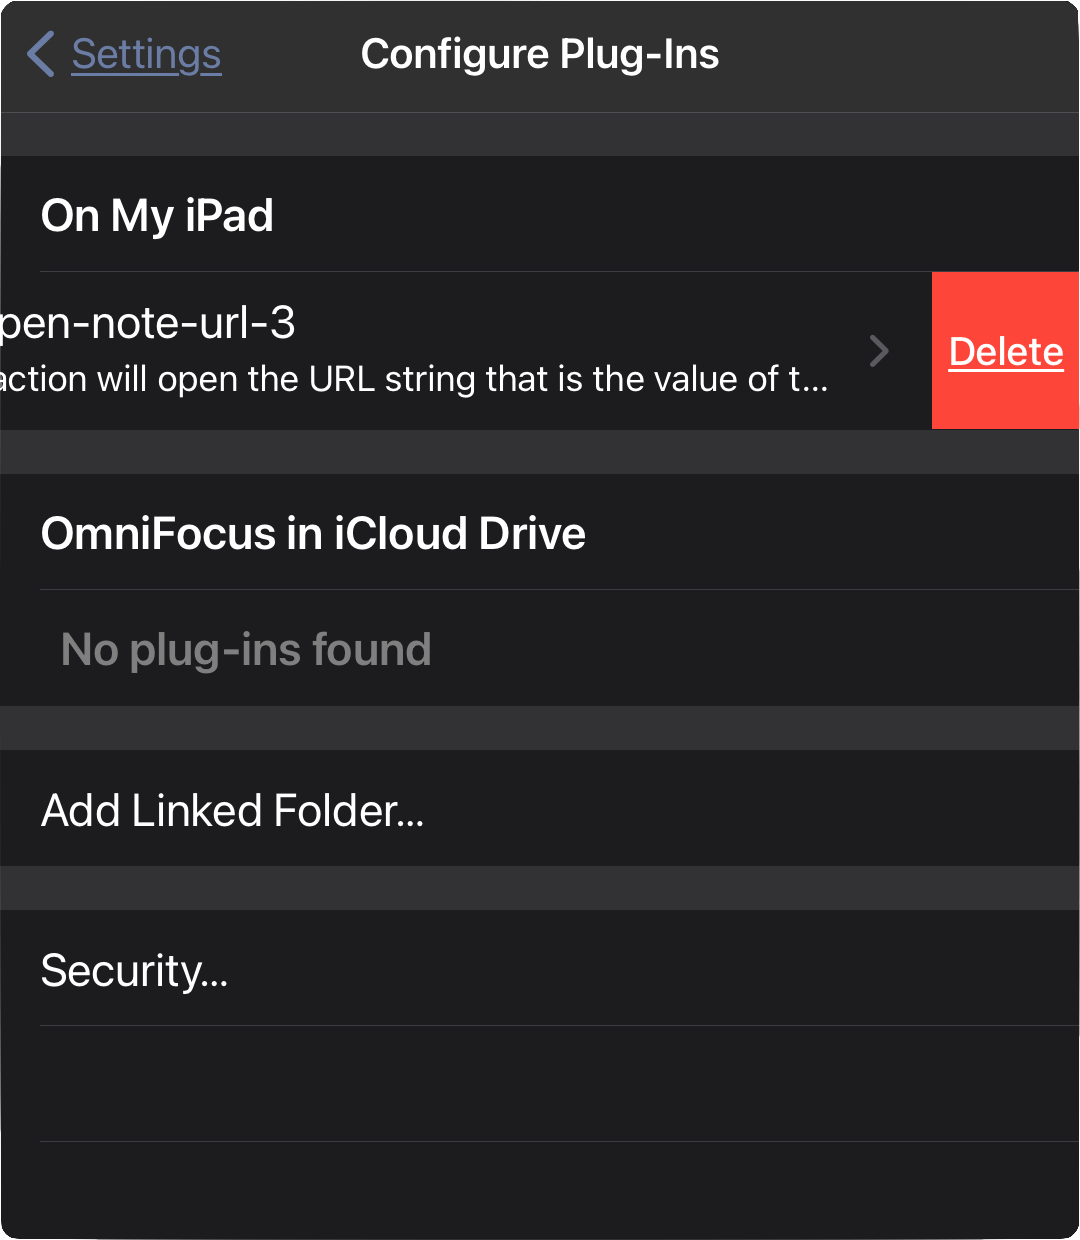
Uninstalling Plug-Ins
To delete an installed plug-in, swipe left on the plug-in in the “Configure Plug-Ins” dialog, and then tap the “Delete” button: