
Omni Automation Tutorial for OmniOutliner iOS
Welcome to the Omni Automation tutorial for OmniOutliner iOS!
This documentation is designed to provide you with an interactive tour of Omni Automation integration in OmniOutliner for macOS. You will be presented with detailed explanations and code examples in a step-by-step process of learning the basics of Omni Automation in OmniOutliner.
Requirements:
- Familiarity with basic JavaScript. For instruction in JavaScript, we recommend the excellent tutorials at w3schools.com.
- Installation of OmniOutliner 3 or higher. If you don’t yet own OmniOutliner, you can download the full-featured application with a free 14-day trial.
- A second device for viewing the tutorial documentation. Trying to switch between reading documentation and applying the lessons on a single screen is challenging. Reading from a second screen is helpful.
Tip
To maximize the readability of this documentation tap the Omni Automation banner at the top of this page to toggle the display of the sidebar view.
Let’s Begin
To begin the tutorial, we‘ll setup a new blank default document to work with.
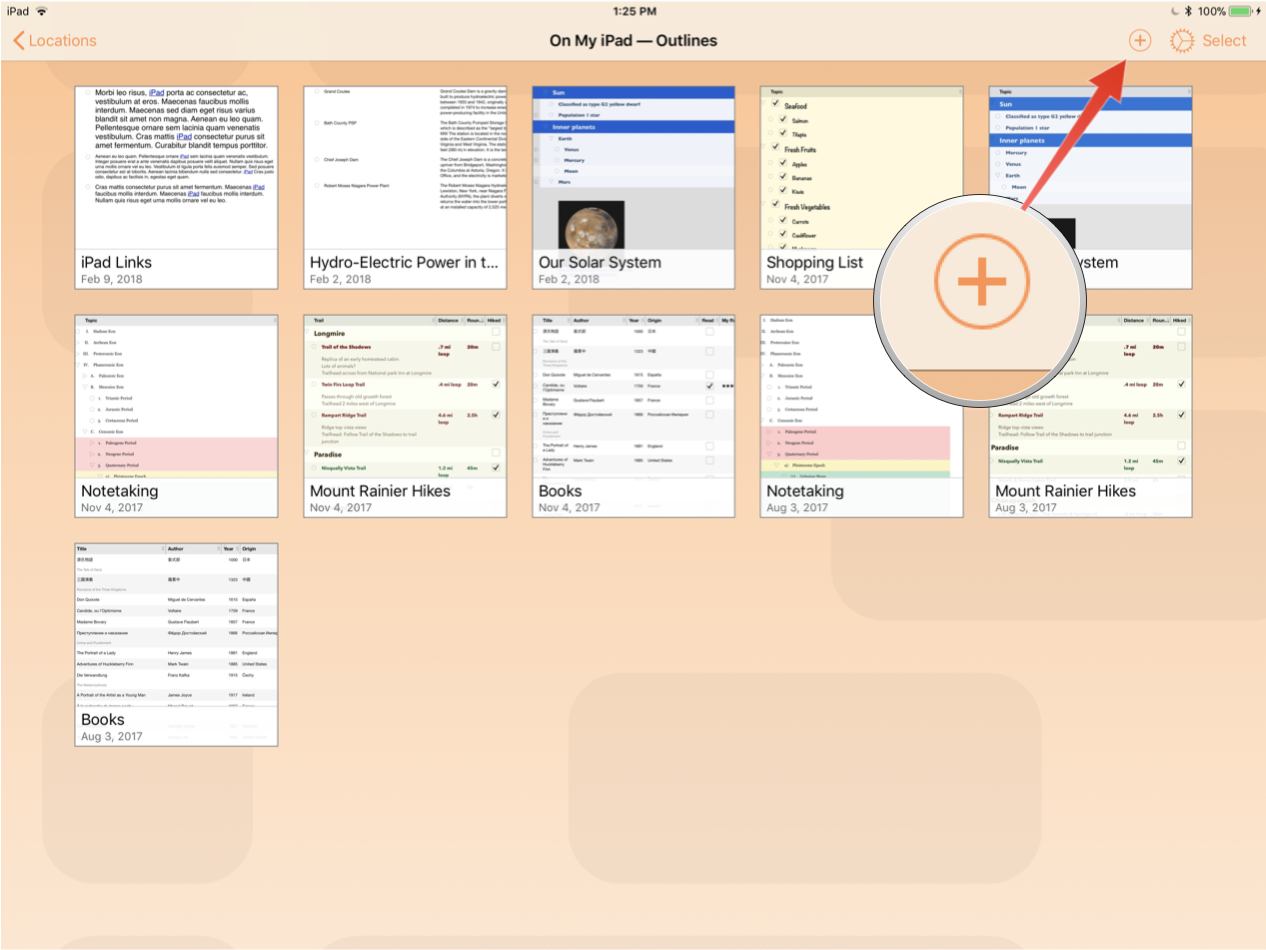
| DO THIS ► | Navigate to the local documents viewer (On My iPad), and tap the plus sign to create a new document. (see below) |
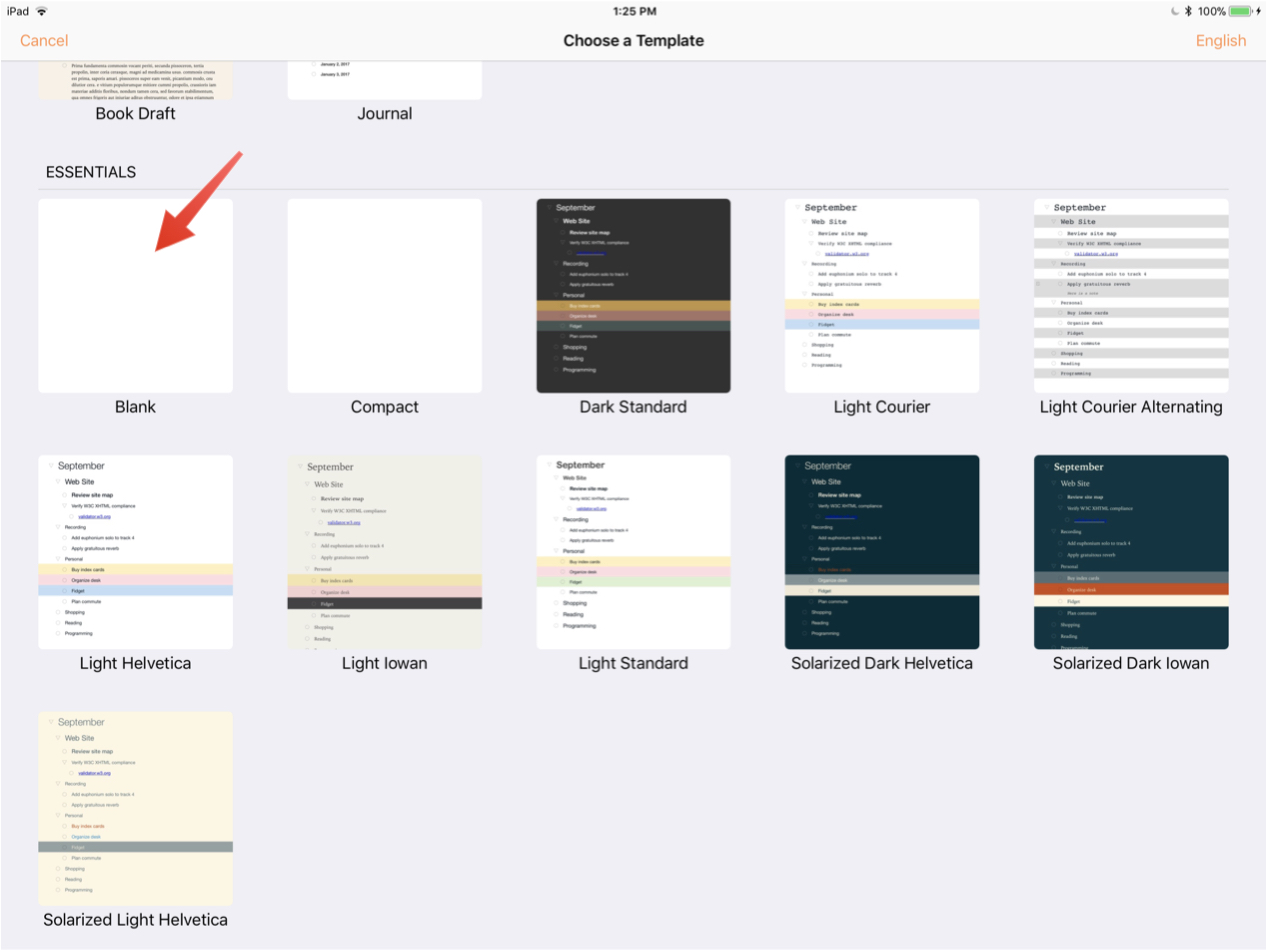
| DO THIS ► | In the forthcoming template viewer, scroll to the Essentials section, and tap the Blank template. (see below) |
A new blank outline document will be opened with the first outline item selected and ready for input.
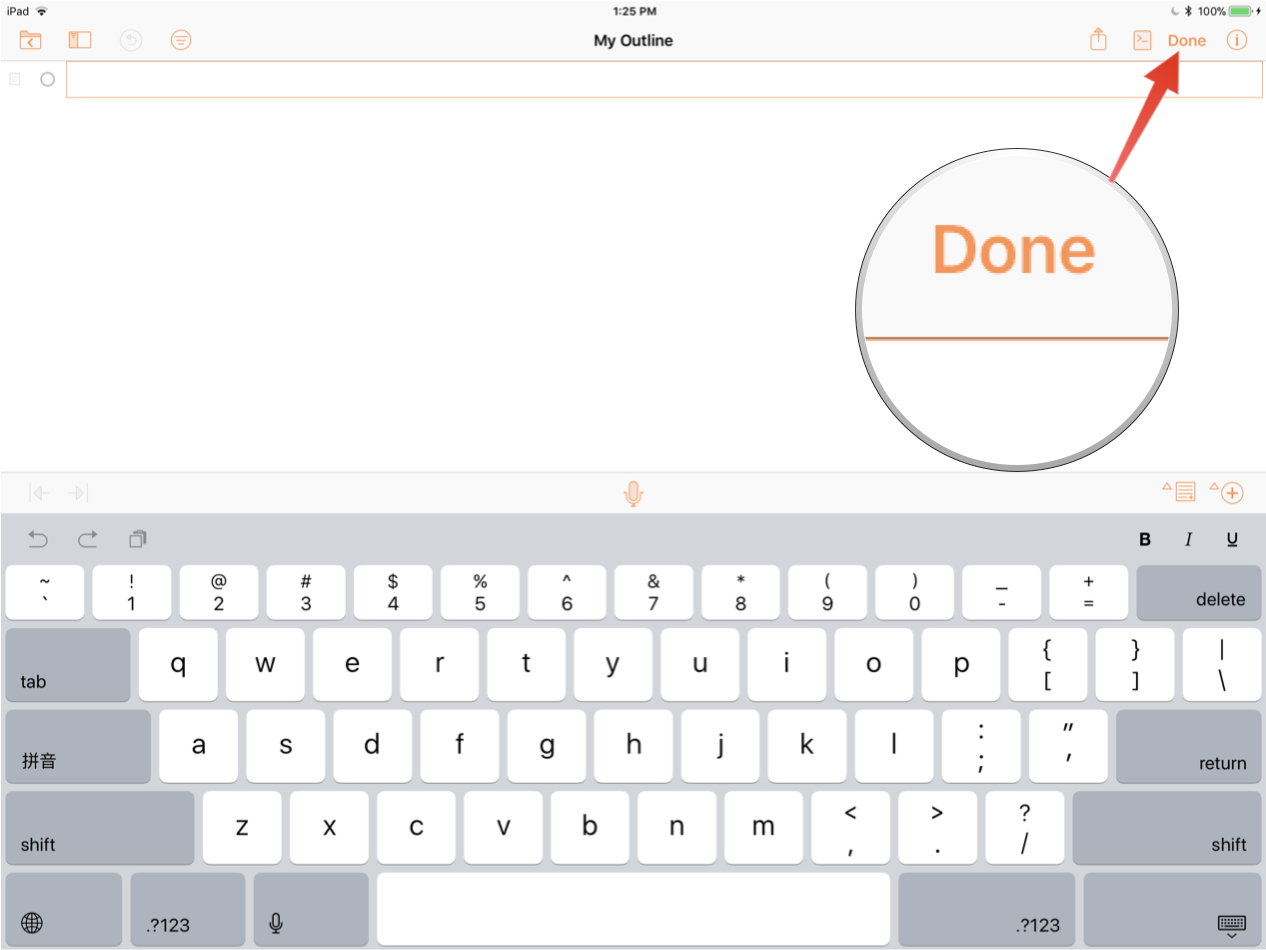
| DO THIS ► | Exit the edit mode by tapping the Done button (see above) at the top right of the document window. |
What’s Next?
You are now ready to begin the tutorial by selecting the Console link from the navigation menu.
This webpage is in the process of being developed. Any content may change and may not be accurate or complete at this time.
DISCLAIMER