
HTML Forms
Omni Automation is based upon the JavaScriptCore framework found within the WebKit open source web browser engine that Apple includes with its iOS and macOS devices.
JavaScript is also used by web browsing applications like Safari, Chrome, and Microsoft Edge, to provide an interactive experience when viewing HTML-based content, like the pages found on this and many other websites.
And since JavaScript and Omni Automation are both stored in files and within web pages as text that is dynamically loaded and executed, they can easily be used together to provide the ability to insert and manipulate data from webpages into Omni application documents. The following example demonstrates this cooperative potential.
An HTML Form
In the simple HTML form shown below, the user chooses both the fill and stroke colors to be applied to an OmniGraffle shape created when the image of a shape type is tapped or clicked by the user.
In this example, standard HTML elements and browser JavaScript are used to present and extract the user’s preferences, transfer that data into an Omni Automation script, and execute the script to perform addition of a new graphic in an OmniGraffle document.
Try it yourself using your copy of OmniGraffle, and the form below:
Add a Shape:
TAP|CLICK popup menus to select a fill color and a stroke color:
TAP|CLICK a shape to add it to the current OmniGraffle document:
 |
 |
 |
 |
(TAP|CLICK to view the above example form on its own webpage)
Very cool! Now that you’ve seen “Omni-Interactive HTML” in action, let’s examine the webpage elements that make this dynamic interplay possible.
The Shape Creation Function
To begin with, here’s the Omni Automation script function used for creating a shape on the current cavas in an open OmniGraffle document. This function is passed along with the form choices as arguments for the function, to the targeted Omni application (OmniGraffle) for execution by the app. A line-by-line explanation is placed below the script.
| Shape Creation Function | ||
| 01 | function createStyledShape(args){ | |
| 02 | var cnvs = document.windows[0].selection.canvas; | |
| 03 | var aRect = new Rect(100,100,200,200); | |
| 04 | var fcv = args["FILLCOLORVALUE"]; | |
| 05 | var aFillColor = Color.RGB(fcv[0],fcv[1],fcv[2],fcv[3]); | |
| 06 | var scv = args["STROKECOLORVALUE"]; | |
| 07 | var aStrokeColor = Color.RGB(scv[0],scv[1],scv[2],scv[3]); | |
| 08 | var aShape = cnvs.addShape(args["SHAPETYPEVALUE"], aRect); | |
| 09 | aShape.strokeThickness = 12; | |
| 10 | aShape.fillColor = aFillColor; | |
| 11 | aShape.strokeColor = aStrokeColor; | |
| 12 | }; | |
IMPORTANT: The createStyledShape() function is placed in the HTML of the webpage HEAD section within a pair of SCRIPT tags.
IMPORTANT: Since the createStyledShape() function will stored in the HTML of the hosting webpage, each script statement is ended with the standard JavaScript semi-colon delimiter.
1-12 The named function for creating the shape includes the passed parameter args that will be a JavaScript object containing identified properties and their corresponding values. {key:value, key:value, etc.}
2 An object reference to the current canvas is stored in the variable: cnvs
3 The page geometry (position and width/height) of the created shape is stored as a Rect in the variable: aRect
4 An array of fill color values (0 to 1) are extracted from the args parameter using the key: "FILLCOLORVALUE" In Omni Automation, RGB color values are expressed in an array: [R, G, B, Alpha]
5 The extracted fill color values are used to create a color instance.
6 An array of stroke color values (0 to 1) are extracted from the args parameter using the key: "STOKECOLORVALUE" In Omni Automation, RGB color values are expressed in an array: [R, G, B, Alpha]
7 The extracted stroke color values are used to create a color instance.
8 The addShape() function of the Canvas class is used to create a new shape on the current canvas using the shape type identifier extracted from the args parameter using the key: "SHAPETYPEVALUE"
9 The stroke thickness of the created shape is set to 12 points.
X The fill color of the created shape is set to corresponding color object.
X The stroke color of the created shape is set to corresponding color object.
Next, let’s examine the webpage’s HTML elements that enable the user to select color and shape options to use with the encoded Omni Automation script.
The Popup Menus HTML
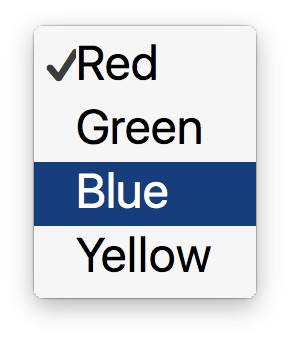
In this example, the user selects both the fill and stroke colors for the created shape. This selection is done by choosing from lists of color names presented on menus.
A standard HTML form is created to hold the two drop down menus.
Note that each of the menus (the select elements) are assigned a unique name and id. This enables them to be easily identified by the main JavaScript function in order to retrieve their current user-chosen values.
Also note that the color values are in two formats, either as the names of standard colors (like red, yellow, etc.), or as RBG color values comprised of an array of four numbers. Omni Automation color values are described in detail on this page.
| Popup Menus HTML | ||
| 01 | <form id="colors"> | |
| 02 | Fill: <select id="fill-color-menu" name="fill-color"> | |
| 03 | <option value="[1,0,0,1]">Red</option> | |
| 04 | <option value="[0,1,0,1]">Green</option> | |
| 05 | <option value="[0,0,1,1]">Blue</option> | |
| 06 | <option value="[1,1,0,1]">Yellow</option> | |
| 07 | </select> | |
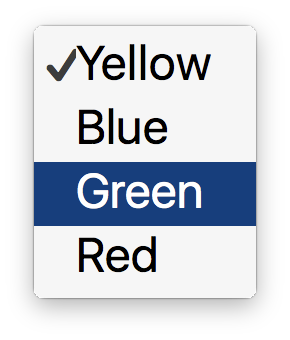
| 08 | Stroke: <select id="stroke-color-menu" name="stroke-color"> | |
| 09 | <option value="[1,1,0,1]">Yellow</option> | |
| 10 | <option value="[0,0,1,1]">Blue</option> | |
| 11 | <option value="[0,1,0,1]">Green</option> | |
| 12 | <option value="[1,0,0,1]">Red</option> | |
| 13 | </select> | |
| 14 | </form> | |
01-14 An HTML form containing two popup menus enabling the user to choose fill and stroke colors.
02-07 A popup menu where the possible fill color values are in the form of RGB (red, green, blue, alpha) values as an array of numbers from 0 to 1, such as RGB(1, 0, 0, 1) for 100% red. The fourth number indicates the color’s alpha (transparency) value.
08-13 A popup menu where the possible stroke color values are in the form of RGB (red, green, blue, alpha) values as an array of numbers from 0 to 1, such as RGB(1, 0, 0, 1) for 100% red. The fourth number indicates the color’s alpha (transparency) value.
Now that you’ve examined how the create the HTML for choosing color values, let’s examine how to create the HTML that enables the user to choose the shape to create.
The Buttons HTML
A logical way for the user to select the type of shape to create, it to have them tap or click an image representing the type of shape they wish to create.
The following is the HTML code for creating a table containing the four images. Note that each image is assigned the JavaScript onClick() event handler that is triggered when the image is tapped (iOS) or clicked (macOS). The name of the shape type to create is passed into the called main JavaScript function addChosenGraphic(). Also note the shape type begins with a capital letter.
| The Buttons HTML | ||
| 01 | <table style="width:100%;table-layout:fixed;"> | |
| 02 | <tr> | |
| 03 | <td><a href="javascript:void(0);" onClick="addChosenGraphic('Star')"> | |
| 04 | <img style="width:140px;" src="star.png"></a> | |
| 05 | </td> | |
| 06 | <td><a href="javascript:void(0);" onClick="addChosenGraphic('Circle')"> | |
| 07 | <img style="width:140px;" src="circle.png"></a> | |
| 08 | </td> | |
| 09 | <td><a href="javascript:void(0);" onClick="addChosenGraphic('Diamond')"> | |
| 10 | <img style="width:140px;" src="diamond.png"></a> | |
| 11 | </td> | |
| 12 | <td><a href="javascript:void(0);" onClick="addChosenGraphic('Rectangle')"> | |
| 13 | <img style="width:140px;" src="square.png"></a> | |
| 14 | </td> | |
| 15 | </tr> | |
| 16 | </table> | |
01-16 A table containing four images that are triggers for calling the main JavaScript function embedded in the webpage.
03-05 A table cell containing an image of a star shape that when tapped or clicked, triggers the addChosenGraphic() function, passing in the string Star as the parameter for the function.
06-08 A table cell containing an image of a star shape that when tapped or clicked, triggers the addChosenGraphic() function, passing in the string Circle as the parameter for the function.
09-11 A table cell containing an image of a star shape that when tapped or clicked, triggers the addChosenGraphic() function, passing in the string Diamond as the parameter for the function.
12-14 A table cell containing an image of a star shape that when tapped or clicked, triggers the addChosenGraphic() function, passing in the string Rectangle as the parameter for the function.
The Main JavaScript Function
Added to the HEAD section of the webpage within a pair of SCRIPT tags, the function addChosenGraphic() performs the task of gathering the form data, generating and executing the Omni Automation script URL that passes the createStyledShape() function and its corresponding arguments to the targeted Omni app to be processed. A line-by-line description of the function statements appears below the function code.
| The Main JavaScript Function | ||
| 01 | function addChosenGraphic(shapeName){ | |
| 02 | // GET CURRENT FORM SETTINGS | |
| 03 | var shapeName = encodeURIComponent(shapeName); | |
| 04 | var fillColor = document.getElementById('fill-color-menu').value; | |
| 05 | var strokeColor = document.getElementById('stroke-color-menu').value; | |
| 06 | fillColor = JSON.parse(fillColor); | |
| 07 | strokeColor = JSON.parse(strokeColor); | |
| 08 | // CREATE ARGUMENTS OBJECT | |
| 09 | var argumentsObject = new Object(); | |
| 10 | argumentsObject["SHAPETYPEVALUE"] = shapeName; | |
| 11 | argumentsObject["FILLCOLORVALUE"] = fillColor; | |
| 12 | argumentsObject["STROKECOLORVALUE"] = strokeColor; | |
| 13 | // GENERATE SCRIPT URL | |
| 14 | var functionCode = createStyledShape.toString(); | |
| 15 | functionCode = encodeURIComponent(functionCode); | |
| 16 | var argumentsString = JSON.stringify(argumentsObject); | |
| 17 | var targetURL = `omnigraffle://localhost/omnijs-run?script=(${functionCode})(${argumentsString})` | |
| 18 | window.location = targetURL; | |
| 19 | } | |
IMPORTANT: The addChosenGraphic() function is placed in the HTML of the webpage HEAD section within a pair of SCRIPT tags.
IMPORTANT: Since the addChosenGraphic() function will stored in the HTML of the hosting webpage, and executed locally by the document, each script statement is ended with the standard JavaScript semi-colon delimiter.
01-19 The addChosenGraphic('ShapeName') function is triggered when the user taps or clicks one of the shape images. It is passed a string that is the name of the shape to create. Note that the shape title begins with a capital letter.
3 Encode the passed in shape type string and store in a variable.
4 Extract the fill color string value from the “fill-color-menu” form element and store it in the variable: fillColor
5 Extract the stroke color string value from the “stroke-color-menu” form element and store it in the variable: strokeColor
6-7 Use the parse() method of the JSON class to convert the passed array string into an array of numbers: "[1, 0, 0, 1]" becomes: [1, 0, 0, 1]
9-12 Create a new JavaScript object and assign it keys and values using the passed and extracted form element values.
14-15 Convert the stored createStyledShape() function into a string, and percent-encode it for inclusion in the generated Omni Automation script URL.
16 Use the stringify() function of the JSON class to convert the arguments object into a string for inclusion in the generated script URL.
17 Construct the Omni Automation script URL, making it self-executing by placing both the function and arguments in contiguous paren sets: (function)(arguments)
18 Execute the script by setting the location of the webpage to the Omni Automation script URL.
The generated script URL looks something like this:
| Script URL | ||
| 01 | omnigraffle://localhost/omnijs-run?script=(function%20createStyledShape(args)%7B%0A%09%09%09cnvs%20%3D%20document.windows%5B0%5D.selection.canvas%3B%0A%09%09%09aRect%20%3D%20new%20Rect(100%2C100%2C200%2C200)%3B%0A%09%09%09fcv%20%3D%20args.FILLCOLORVALUE%3B%0A%09%09%09aFillColor%20%3D%20Color.RGB(fcv%5B0%5D%2Cfcv%5B1%5D%2Cfcv%5B2%5D%2Cfcv%5B3%5D)%3B%0A%09%09%09scv%20%3D%20args.STROKECOLORVALUE%3B%0A%09%09%09aStrokeColor%20%3D%20Color.RGB(scv%5B0%5D%2Cscv%5B1%5D%2Cscv%5B2%5D%2Cscv%5B3%5D)%3B%0A%09%09%09aShape%20%3D%20cnvs.addShape(args.SHAPETYPEVALUE%2C%20aRect)%3B%0A%09%09%09aShape.strokeThickness%20%3D%2012%3B%0A%09%09%09aShape.fillColor%20%3D%20aFillColor%3B%0A%09%09%09aShape.strokeColor%20%3D%20aStrokeColor%3B%0A%09%09%7D)({"SHAPETYPEVALUE":"Star","FILLCOLORVALUE":[1,0,0,1],"STROKECOLORVALUE":[1,1,0,1]}) | |
Summary
As this example shows, you can add “Omni-Interactive” HTML elements to your webpages, enabling your viewers to quickly select and create styled content.
And, it works on both macOS and iOS! Here's this example performed on an iPad Pro:
This webpage is in the process of being developed. Any content may change and may not be accurate or complete at this time.
DISCLAIMER