Plug-In Forms: Menus (Form.Field.Option)
One of the most common user interface elements for Apple systems is the popup menu on macOS, and its iOS counterpart, the list menu. The Form class in Omni Automation provides the Form.Field.Option sub-class so that users can select an option from a menu or menu list.
Instances of the form menu element are created using the new item constructor with provided parameters that include the menu label (title), identifying key, and either an array of objects or strings as the display content for the menu:
Constructor
new Form.Field.Option(key: String, displayName: String or null, options: Array of Object, names: Array of String or null, selected: Object or null, nullOptionTitle: String or null) → (Form.Field.Option) • Returns a new Option field, allowing the user to pick from a list of option objects. A list of names may also be given, which must have the same length as the options array if so. If no names are given, the objects are converted to strings for display. An initially selected object (which must be a member of the options array) may also be given. If the field is not configured to allow a null value and no initially selected value is specified, the user must select a value before the field is considered valid under the default form validation.
Form Menu/List Element
menuElement = new Form.Field.Option("elementID", //(String) identifying key used in the form values record"elementLabel", //(String or null) field label for the form dialogmenuItemOptions, //(Array of Object) an array of objects to display, or index values corresponding to the provided namesmenuItemNames, //(Array of String or null) an array of custom menu item titlesselectedItem //(Object or null) the menu item object to be selected when the form dialog is displayed)
Here is an example of a basic options menu/list, allowing the user to choose a day of the week:
Basic Options Menu/List
(async () => {try {weekDays = ["Sunday","Monday", "Tuesday", "Wednesday", "Thursday", "Friday", "Saturday"] basicOptionsMenu = new Form.Field.Option("menuID",null,[0,1,2,3,4,5,6],weekDays,0)inputForm = new Form()inputForm.addField(basicOptionsMenu)formPrompt = "Choose a day:"buttonTitle = "Continue"formObject = await inputForm.show(formPrompt,buttonTitle)index = formObject.values["menuID"]weekday = weekDays[index]console.log(weekday)}catch(err){if(!err.causedByUserCancelling){new Alert(err.name, err.message).show()}}})();
Instance Properties
The Form.Field.Option class offers two properties for enabling the use of a “null or none” selection by the user.
allowsNull (Boolean) • If set to true, an option will be added to allow selecting null.
nullOptionTitle (String or null) • If null is allowed, this will be used for the title of that option. Otherwise a default title will be used.
NOTE: The Form validate function previously was required to return a value, but it may now return null. If there is no validation function specified or it returns null, some default per-field validation is performed. Currently all fields are considered valid except for option fields that don't allow null but haven't had a value set yet. This can occur if an option field is constructed without an initial selection.
Here is an example of an options menu/list, allowing the user to choose a day of the week or nothing:
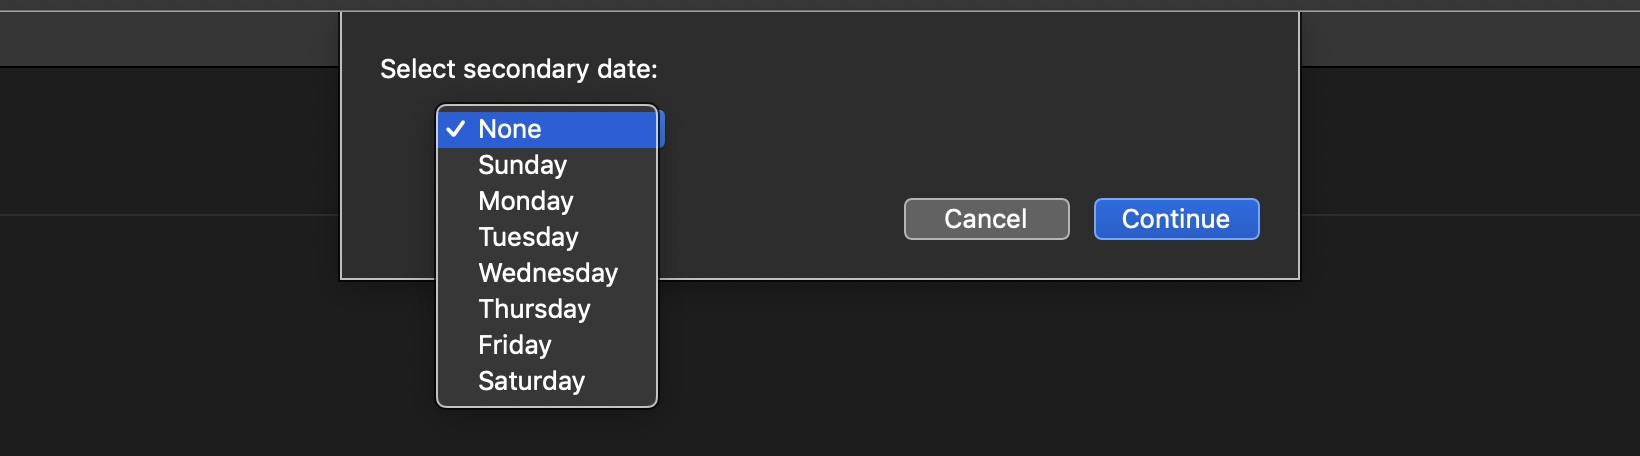
Allowing a Null Option
(async () => {try {weekDays = ["Sunday","Monday", "Tuesday", "Wednesday", "Thursday", "Friday", "Saturday"] optionsMenu = new Form.Field.Option("menuID",null,[0,1,2,3,4,5,6],weekDays,0)optionsMenu.allowsNull = trueoptionsMenu.nullOptionTitle = "None"inputForm = new Form()inputForm.addField(optionsMenu)formPrompt = "Choose a day:"buttonTitle = "Continue"formObject = await inputForm.show(formPrompt,buttonTitle)index = formObject.values["menuKey"]if (index === undefined){var day = "NONE"} else {var day = weekDays[index]}console.log(day)}catch(err){if(!err.causedByUserCancelling){new Alert(err.name, err.message).show()}}})();
In Summary
The Form.Field.Option class constructor returns an instance of the Option Field class, allowing the user to pick from a list of option objects. A list of names may also be given, which must have the same length as the options array. If no names are given, the objects are converted to strings for display or their localized titles are used if available. An initially selected object (which must be a member of the options array) may also be given.
In summary, the source contents of the Option Field (menu) can be either an array of Omni application objects, or an array of menu item titles. Let’s examine each type of menu.
Menu of Objects
The use of objects as the source for the menu’s contents is very useful and easy-to-create. Here is an example using the OmniGraffle HorizontalAlignment class:
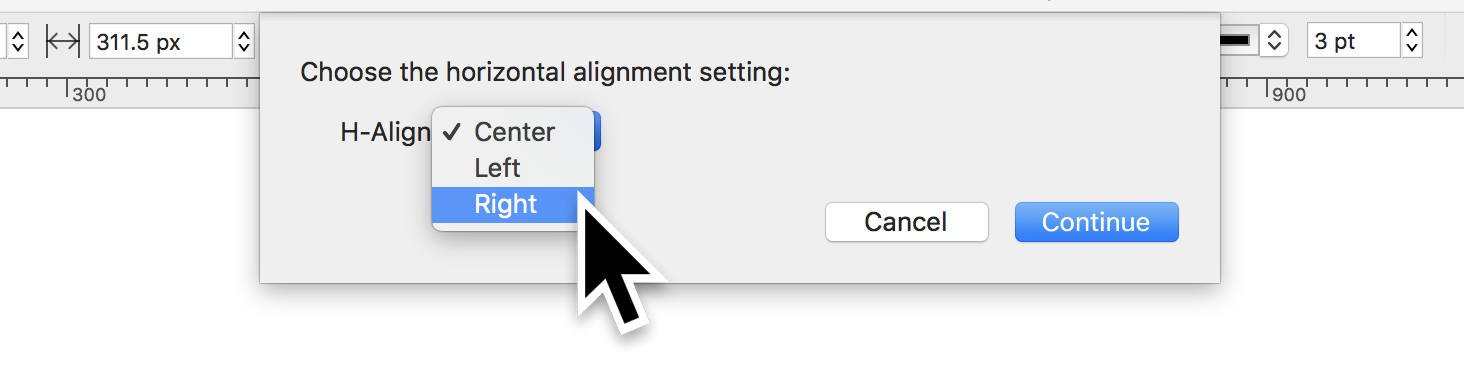
Objects for Menu Items
alignmentMenu = new Form.Field.Option("horizontalAlignment","H-Align",HorizontalAlignment.all,null,HorizontalAlignment.all[0])
1 The new constructor is called on the Form.Field.Option class and the created form element is stored in a variable, in this example alignmentMenu. This variable can be used in the parent action as the parameter for the addField() method of the Form class to add the menu to a form.
2 The menu is assigned a unique identifying key (string) that is used to extract the current displayed menu item object when the form is validated or processed.
3 The text to use as the label for the menu.
4 An array of Omni application objects. In this example, calling the all property of the HorizontalAlignment class returns an array of HorizontalAlignment options representing left, center, and right alignments. This array of objects will be used to populate the menu.
5 Since a null value is used instead of an array of menu titles, the localized built-in titles for the objects will be displayed as the contents of the menu.
6 Indicate which menu object is to be pre-selected when the form is displayed, by providing one of the objects from the source list of objects as the value of this parameter.
X The result of the creation of the menu element is an object reference to the form element.
The result of the form will be the HorizontalAlignment option object corresponding to the menu selection, which can then be used to change the value of the canvas rowAlignment property.
Form Result


//-> [object HorizontalAlignment: Right]
The technique shown works the same with many other Omni application classes as well.
Menu of Strings (names)
The other type of Form.Field.Option uses an array of strings as the source content of the menu. In this example, the user selects a weekday from a list.
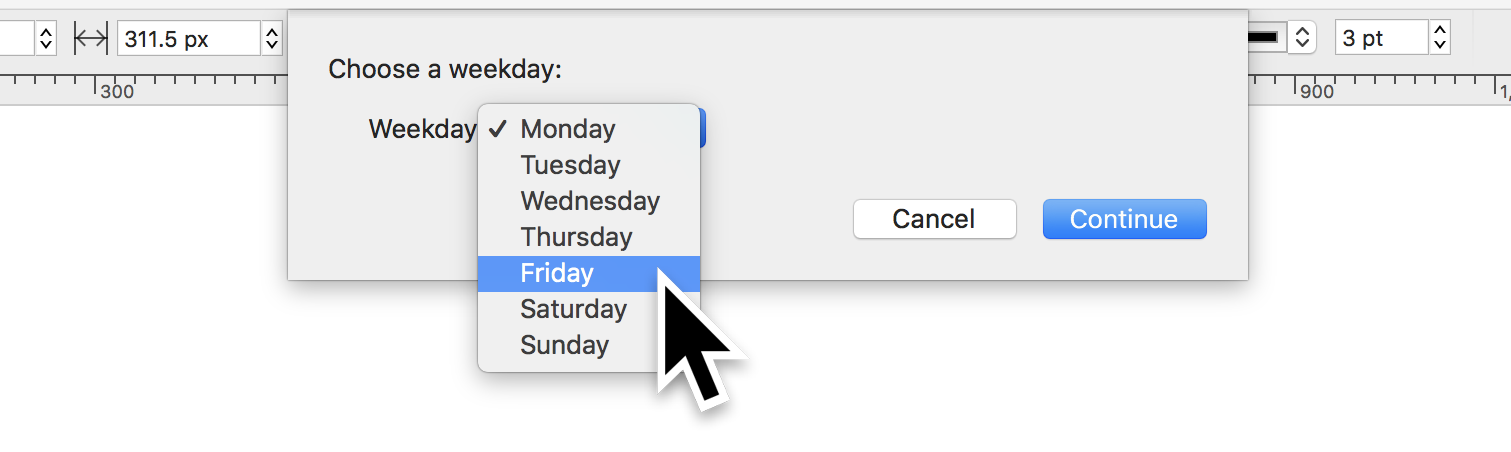
Menu of Strings
weekdays = ["Monday","Tuesday", "Wednesday", "Thursday", "Friday", "Saturday", "Sunday"] weekdayMenu = new Form.Field.Option("weekday","Weekday",[0,1,2,3,4,5,6],weekdays,0)
1 An array of strings, in this case the names of the days of the week, are stored in a variable: weekdays
2 The new constructor is called on the Form.Field.Option class and the created form element is stored in a variable, in this example weekdayMenu. This variable can be used in the parent action as the parameter for the addField() method of the Form class to add the menu to a form.
3 The menu is assigned a unique identifying key (string) that is used to extract the current displayed menu item object when the form is validated or processed.
4 The text to use as the label for the menu.
5 Since the content of the menu will be a list of weekday names, the required object list is used instead as an array of index values, indicating the chosen weekday’s position in the array of weekday names. Since JavaScript considers the first item in an array to have a position (index) of 0, begin the sequential array of indexes with 0.
6 The content of the menu (menu items) is the weekday list, represented by the variable: weekdays
7 Indicate which menu object is to be pre-selected when the form is displayed, by providing one of the indexes from the objects array as the value of this parameter. In this example, the index 0 is used to indicate that the first menu item should be pre-selected when the form is displayed.
9 The result of the creation of the menu element is an object reference to the form element.
The result of the form will be the object index value corresponding to the chosen menu item:
Form Result
//-> returns: 4//-> use to get corresponding name: weekdays[4]
Stroke Properties Form
The following example action displays a form whose elements are all menus, and can be used to change the stroke properties of the graphics selected in the frontmost OmniGraffle document. Both menu creation options (objects and string) are used in the construction of the menu form elements.
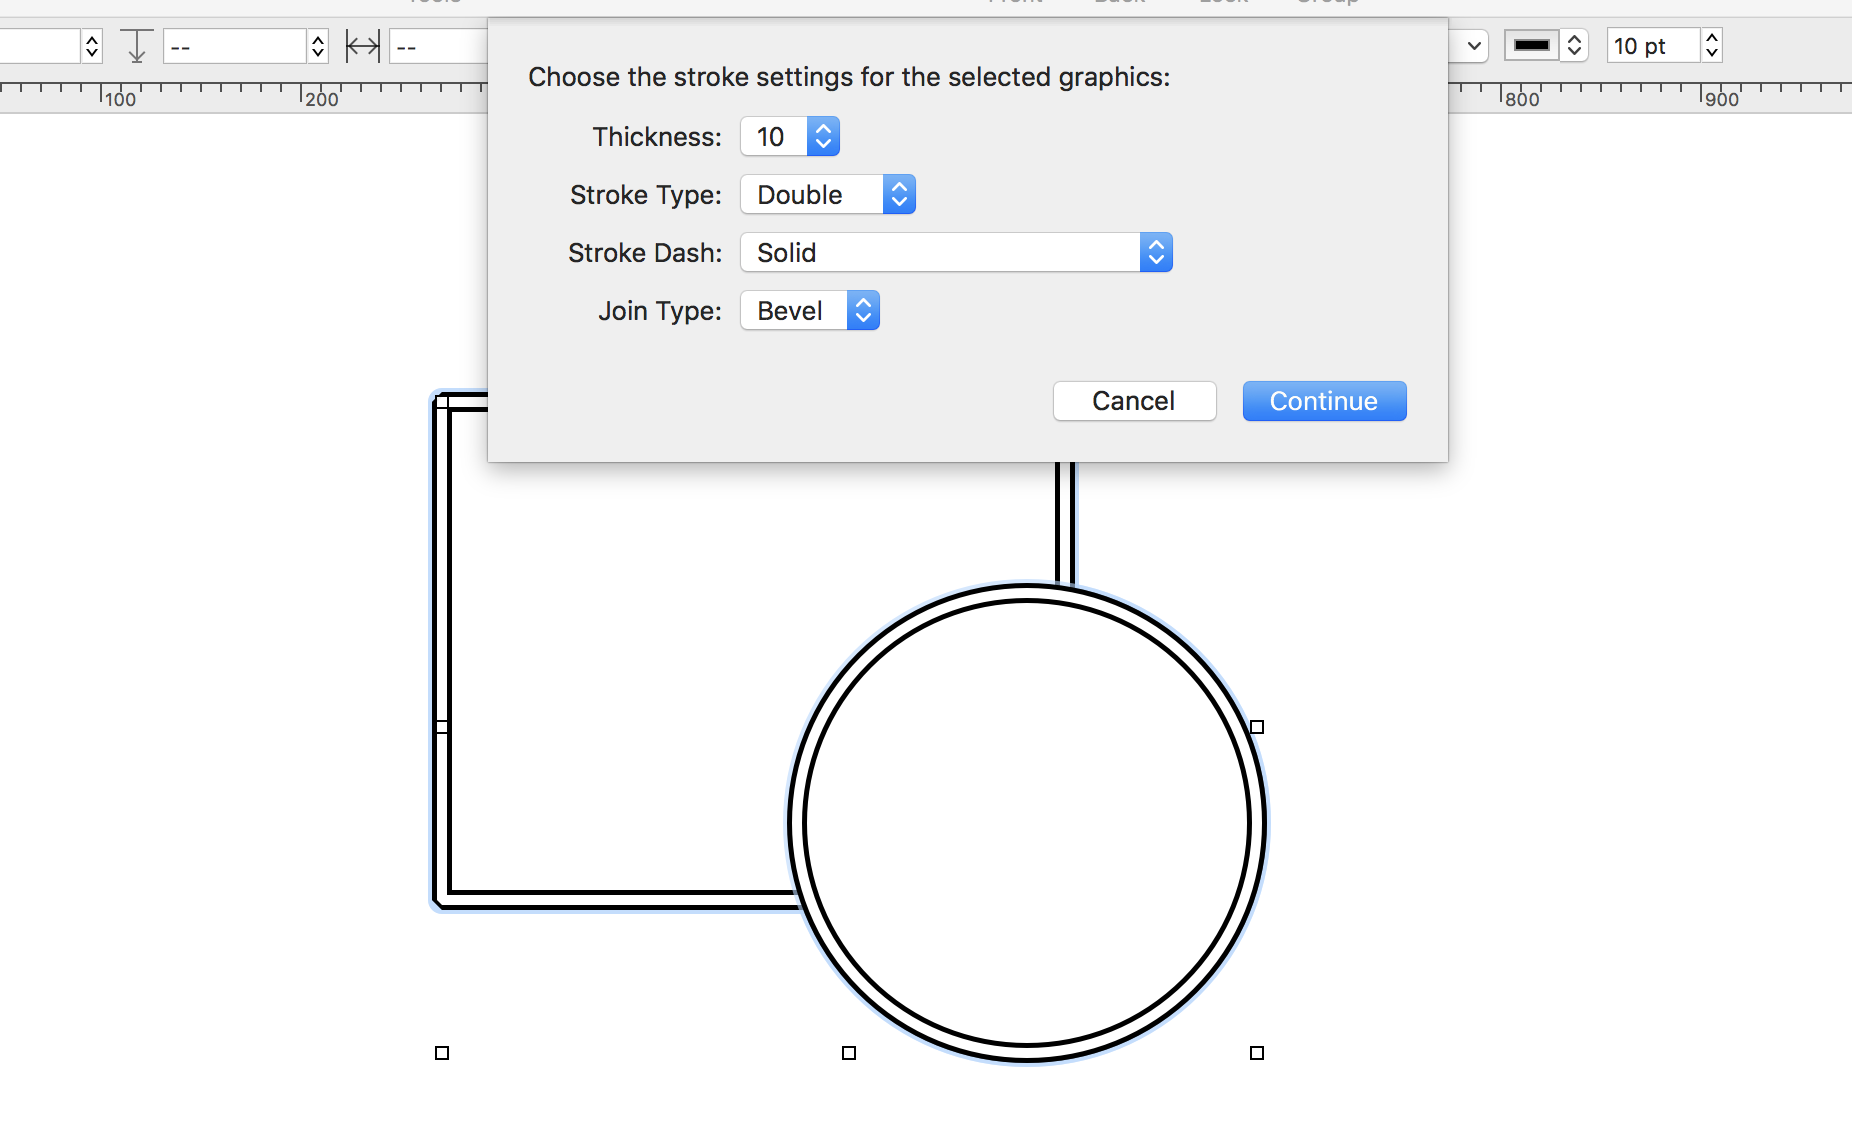
Stroke Properties Form
/*{"type": "action","targets": ["omnigraffle"],"author": "Otto Automator","identifier": "com.omni-automation.og.stroke-form","description": "Applies chosen stroke settings to selected graphics.","version": "1.2","label": "Stroke Properties","shortLabel": "Stroke","paletteLabel": "Stroke","image": "text.line.first.and.arrowtriangle.forward"}*/(() => {const action = new PlugIn.Action(async function(selection, sender){// DIALOG TITLE AND OK BUTTON TITLEformPrompt = "Choose the stroke settings for the selected graphics:"buttonTitle = "Continue"// CONSTRUCT THE FORMform = new Form()pointSizes = ["0.5","1","2","3","4","5","6","7","8","9","10","11","12"]thicknessMenu = new Form.Field.Option("strokeThickness","Thickness",[0,1,2,3,4,5,6,7,8,9,10,11,12],pointSizes,1)firstJoinType = LineJoin.all[0] // LineJoin['Bevel']joinMenu = new Form.Field.Option("strokeJoin","Join Type",LineJoin.all,null,firstJoinType)firstStrokeType = StrokeType.all[0] // StrokeType['Single']typeMenu = new Form.Field.Option("strokeType","Stroke Type",StrokeType.all,null,firstStrokeType)firstStrokePattern = StrokeDash.all[0] // StrokeDash['Dash4on4off']patternMenu = new Form.Field.Option("strokePattern","Stroke Pattern",StrokeDash.all,null,firstStrokePattern)form.addField(thicknessMenu)form.addField(typeMenu)form.addField(patternMenu)form.addField(joinMenu)// VALIDATE FORM CONTENTform.validate = function(formObject){return true}// SHOWING THE FORM RETURNS A JAVASCRIPT PROMISEformObject = await form.show(formPrompt, buttonTitle)// RETRIEVE CHOSEN VAUESstrokeThickness = formObject.values['strokeThickness']strokeThickness = Number(pointSizes[strokeThickness])strokeTypeValue = formObject.values['strokeType']strokePatternValue = formObject.values['strokePattern']strokeJoinValue = formObject.values['strokeJoin']// PERFORM TASKSselection.graphics.forEach(function(graphic){graphic.strokeThickness = strokeThicknessgraphic.strokeType = strokeTypeValuegraphic.strokePattern = strokePatternValuegraphic.strokeJoin = strokeJoinValue})});// VALIDATE GRAPHIC(S) SELECTIONaction.validate = function(selection, sender){return (selection.graphics.length > 0)};return action;})();
20-27 A new menu form element is created using a list of strings (numeric strings representing stroke thicknesses) as the source of the menu’s content.
29-36 A new form element is created using an array of object options from the LineJoin class. The built-in localized option titles for this class will be displayed as the menu’s contents.
38-45 A new form element is created using an array of object options from the Stroketype class. The built-in localized option titles for this class will be displayed as the menu’s contents.
47-54 A new form element is created using an array of object options from the StrokeDash class. The built-in localized option titles for this class will be displayed as the menu’s contents.
56-59 The created form elements are added to the blank form object using the addField(…) method of the Form class.
62-64 The form validation function is used to determine the state of the form’s approval button. In this example, the validation value is set to always return true, leaving the button always active.
67 The form is displayed using the show(…) method of Form class.
70-84 The form settings are extracted from the form values record returned from the stored promise object, and the extracted stroke settings are applied to the selected graphics. NOTE: the value returned by the strokeThickness key is the array index of the chosen menu item. The next statement (73) uses that index to retrieve the stored numeric string value, and then convert it to a number.
Interactive Form
The next action example is a variation of the previous action. But instead of applying the chosen stroke settings after the form has been approved, the settings are applied to the selected graphic as the settings are changed by the user in the form dialog. Should the user decide to cancel the form, the stroke settings are returned to the values that existed before the form was displayed.
|
|
Stroke Form (interactive)
/*{"type": "action","targets": ["omnigraffle"],"author": "Otto Automator","identifier": "com.omni-automation.og.stroke-form-live","version": "1.2","description": "Applies chosen stroke settings to selected graphics.","label": "Stroke Properties (live)","shortLabel": "Form","paletteLabel": "Form","image": "text.line.first.and.arrowtriangle.forward"}*/(() => {const action = new PlugIn.Action(async function(selection, sender){selectedGraphic = selection.graphics[0]storedStrokeThickness = selectedGraphic.strokeThicknessstoredStrokeType = selectedGraphic.strokeTypestoredStrokePattern = selectedGraphic.strokePatternstoredStrokeJoin = selectedGraphic.strokeJoin// DIALOG TITLE AND OK BUTTON TITLEformPrompt = "Choose the stroke settings for the selected graphics:"buttonTitle = "Continue"// CONSTRUCT THE FORMform = new Form()initialValue = parseInt(storedStrokeThickness)initialIndex = (initialValue > 18) ? 18:initialValuepointSizes = ["0.5","1","2","3","4","5","6","7","8","9","10","11","12","13","14","15","16","17","18"]thicknessMenu = new Form.Field.Option("strokeThickness","Thickness",[0,1,2,3,4,5,6,7,8,9,10,11,12,13,14,15,16,17,18],pointSizes,initialIndex)joinMenu = new Form.Field.Option("strokeJoin","Join Type",LineJoin.all,null,storedStrokeJoin)typeMenu = new Form.Field.Option("strokeType","Stroke Type",StrokeType.all,null,storedStrokeType)patternMenu = new Form.Field.Option("strokePattern","Stroke Pattern",StrokeDash.all,null,storedStrokePattern)form.addField(thicknessMenu)form.addField(typeMenu)form.addField(patternMenu)form.addField(joinMenu)// VALIDATE FORM CONTENTform.validate = function(formObject){// RETRIEVE CHOSEN VAUESstrokeThickness = formObject.values['strokeThickness']strokeThickness = Number(pointSizes[strokeThickness])strokeTypeValue = formObject.values['strokeType']strokePatternValue = formObject.values['strokePattern']strokeJoinValue = formObject.values['strokeJoin']// APPLY SETTINGSselectedGraphic.strokeThickness = strokeThicknessselectedGraphic.strokeType = strokeTypeValueselectedGraphic.strokePattern = strokePatternValueselectedGraphic.strokeJoin = strokeJoinValuereturn true}// SHOWING THE FORM RETURNS A JAVASCRIPT PROMISEformPromise = form.show(formPrompt, buttonTitle)// PROCESS THE FORM RESULTSformPromise.then(function(formObject){// NOTHING TO DO. SETTINGS ALREADY APPLIED!})// PROCESS FORM CANCELLATIONformPromise.catch(function(error){// RESTORE GRAPHIC’S ORGINIAL SETTINGSselectedGraphic.strokeThickness = storedStrokeThicknessselectedGraphic.strokeType = storedStrokeTypeselectedGraphic.strokePattern = storedStrokePatternselectedGraphic.strokeJoin = storedStrokeJoin})});// VALIDATE GRAPHIC SELECTIONaction.validate = function(selection, sender){return (selection.graphics.length === 1 ? true:false)};return action;})();
105-107 Due to the complexity of dealing with multiple graphics simultaneously, the action validation function is set to only be enabled if a single graphic is selected in the document.
13 A reference to the selected graphic is stored in the variable: selectedGraphic
15-18 The stroke properties of the selected graphic are stored in variables prior to the form being displayed to the user.
68-83 The form settings are extracted and applied to the selected graphic from within the form’s validate function rather than from within the form promise’s then(…) function. Every time the settings of any of the form elements are changed, the validation handler will be called and the selected graphics property values will be altered accordingly.
94-100 Should the user cancel the form dialog, the promise’s error handler (catch) is called and the stroke settings of the selected graphic are restored to the settings stored in the variables declared at the beginning of the action.
Follow-On Menus
A Follow-On Menu is one whose appearance and/or contents change based-upon the selection of another menu in the form dialog. Follow-On menus are described in detail in the section about Form Validation.
Filtered Menu
In this form, the contents of the menu is determined by filtering using the entered text. Designed for use in OmniFocus, the form filters existing projects using the entered string, and presents the results in a menu:
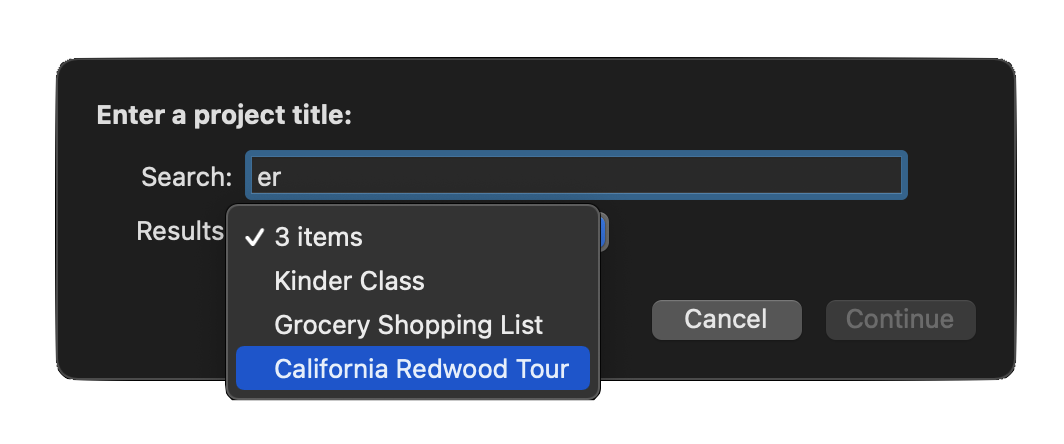
Filtered Menu Form (OmniFocus)
(async () => {try {// CREATE FORM FOR GATHERING USER INPUTinputForm = new Form()// CREATE TEXT FIELDtextField = new Form.Field.String("textInput","Search",null)// CREATE MENUpopupMenu = new Form.Field.Option("menuItem","Results",[],[],null)popupMenu.allowsNull = truepopupMenu.nullOptionTitle = "0 items"// ADD THE FIELDS TO THE FORMinputForm.addField(textField)inputForm.addField(popupMenu)// VALIDATE THE USER INPUTinputForm.validate = function(formObject){var textInput = formObject.values["textInput"]if(textInput !== currentValue){currentValue = textInput// remove popup menuif (inputForm.fields.length === 2){inputForm.removeField(inputForm.fields[1])}}if(inputForm.fields.length === 1){// search using provided stringif (!textInput){var searchResults = []} else {var searchResults = projectsMatching(textInput)}var searchResultNames = searchResults.map(item => item.name)var searchResultIDs = searchResults.map(item => item.id.primaryKey)var popupMenu = new Form.Field.Option("menuItem","Results",searchResultIDs,searchResultNames,null)popupMenu.allowsNull = truepopupMenu.nullOptionTitle = String(searchResults.length + " items")inputForm.addField(popupMenu)return false}if(!textInput){return false}if(inputForm.fields.length === 2){menuValue = formObject.values["menuItem"]if(menuValue === undefined || String(menuValue) === "null"){return false}return true}}// PRESENT THE FORM TO THE USERcurrentValue = nullformPrompt = "Enter a project title:"formObject = await inputForm.show(formPrompt,"Continue")// PROCESSING USING THE DATA EXTRACTED FROM THE FORMprojectID = formObject.values["menuItem"]projectObj = Project.byIdentifier(projectID)console.log(projectObj)}catch(err){if(!err.causedByUserCancelling){new Alert(err.name, err.message).show()}}})();