Plug-Ins
An outstanding feature of Omni Automation is its mechanism for integrating scripts with applications through the use of user-created and deployed plug-ins. An Omni Automation plug-in is a single-file script or script bundle that exposes script functionality contextually through the host Omni application’s “Automation” and “Share” menus. With a little bit of effort, you can create, deploy, and share your own plug-ins to add-to and automate the abilities of OmniFocus and the other Omni applications.
As an example, in this section you’ll learn how to create and install a plug-in that removes tags from all of the selected tasks selected in OmniFocus.
Editor Application
While the built-in automation console in OmniFocus is useful for writing and testing short script snippets, it is not designed to replace a full-featured editor application. To write Omni Automation plug-ins, you’ll need to use a text editor app or one of the 3rd-party JavaScript editor applications found on the iPad App Store or the Mac App Store.
For the purposes of documentation, this section will contain illustrations that feature the use of the Textastic Code Editor application from Alexander Blach.
(For those following this tutorial on a macOS device, a link to open the plug-in template in the BBEdit application is provided as well)
The Plug-In Template
Omni Automation plug-ins are divided into two sections: the plug-in metadata properties record (lines 1-12 below), and the plug-in function code (lines 13-27 beow).
Basic Plug-In Template
/*{"type": "action","targets": ["omnifocus"],"author": "Action Author","identifier": "com.youOrCompany.of.actionName","version": "1.0","description": "Action Description","label": "Menu Item Title","shortLabel": "Toolbar Item Title","paletteLabel": "Toolbar Item Title","image": "gearshape.fill"}*/(() => {const action = new PlugIn.Action(function(selection, sender){// action code// selection options: tasks, projects, folders, tags, allObjects, databaseObjects// PUT YOUR PROCESSING CODE HERE});action.validate = function(selection, sender){// validation code// selection options: tasks, projects, folders, tags, allObjects, databaseObjects// PUT YOUR VALIDATION CODE HERE};return action;})();
| DO THIS ► | Either 1) TAP|CLICK the “Copy Script” button to copy the plug-in template and paste into a new document in your designated editor application, OR… 2) TAP|CLICK the “Open in Textastic” button to open the template as a new document in Textastic. Regardless, be sure to use a file extension of “.omnifocusjs” for the saved plug-in file. |
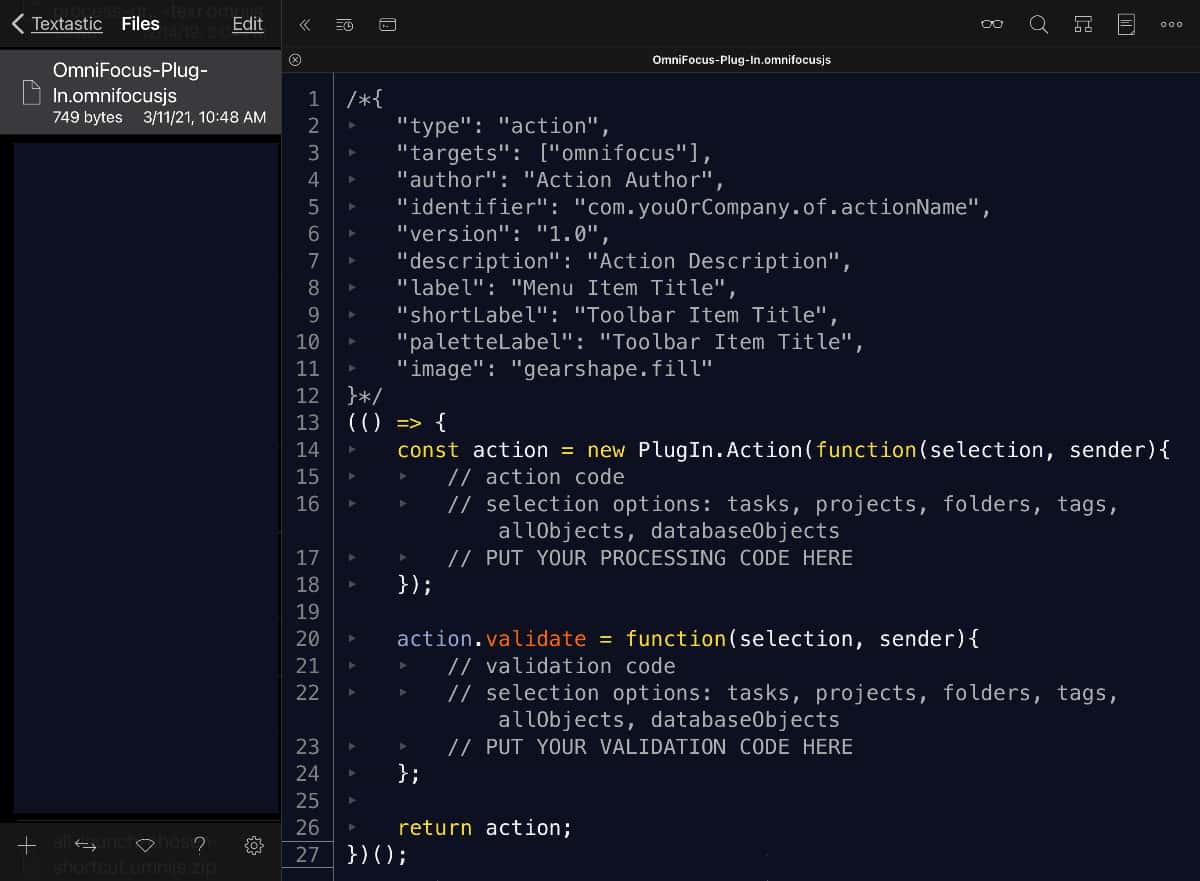
(see below) The plug-in template opened in the Textastic application:
Next, we’ll edit the plug-in’s metadata record.
The Plug-In Metadata Properties
A plug-in’s metadata properties define how a plug-in is integrated by the host Omni application. Here is an explanation of each metadata property:
Plug-In Metadata
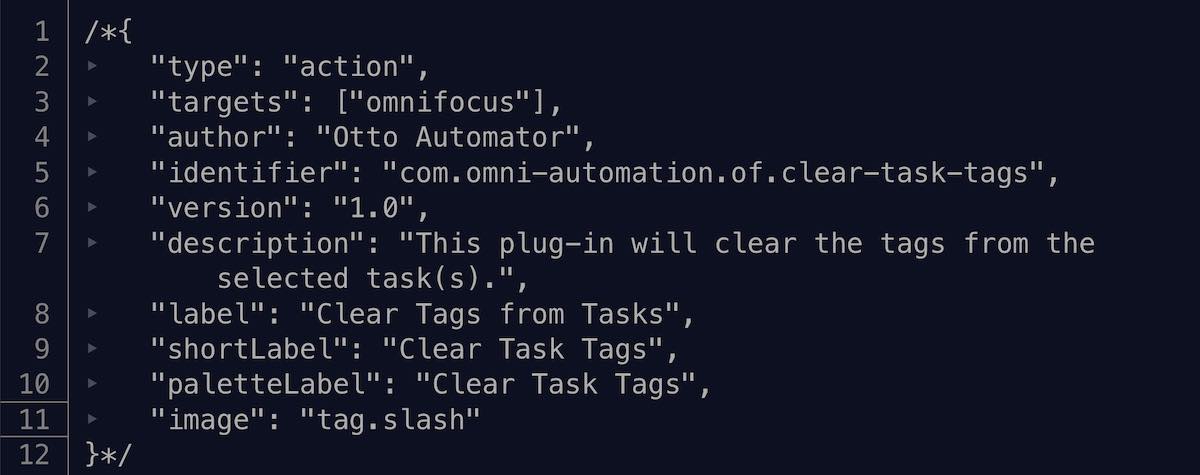
/*{"type": "action","targets": ["omnifocus"],"author": "Action Author","identifier": "com.youOrCompany.of.actionName","version": "1.0","description": "Action Description","label": "Menu Item Title","shortLabel": "Toolbar Item Title","paletteLabel": "Toolbar Item Title","image": "gearshape.fill"}*/
1-10 The plug-in metadata record (key/values) determine which Omni application(s) host the plug-in; what should be displayed as the plug-in menu item in the OmniFocus Automation menu or Sharing menu; and the author and identifier of the plug-in.
2 The plug-in type, which in this example is an "action". If the plug-in was to be used as a library, this value would be: "library"
3 The plug-in targets property is an array of the lowercase names of the Omni applications in which this plug-in should be made available.
4 The author property is the name of the user, developer, or company who created the plug-in.
5 The value of the identifier property is a unique text string that is used by OmniFocus to identify and integrate the plug-in. A general format to follow is: com.YourNameOrYourCompanyName.of.nameOfAction (“of” is for OmniFocus) TIP: Avoid using spaces and special characters in the identifier.
6 The version property is expressed as a numeric string and is important to update as you deploy your plug-in. OmniFocus compares versions when you install and updated version, and will automatically prompt for replacement.
7 The value of the description property is a short text string displayed to users in the OmniFocus Plug-In Management window.
8 The value of the label property is the text for the plug-in’s menu item displayed in the Automation and Share menus.
9 The value of the shortLabel property is used to display on toolbar buttons.
10 The value of the paletteLabel property is used to display on toolbar assignment dialog.
11 The value of the image property is the name of the SF Symbol character to be used as the icon for the plug-in.
| DO THIS ► | Keeping in mind that our plug-in example will clear all tags from the selected tasks, in the editor application, edit the metadata header to include your information: |
The Plug-In Validation Function
Optionally, plug-ins can be designed to be only be available when specific conditions exist within the application or the app’s selected objects.
For example, our example plug-in for clearing tags from selected tasks should only be enabled in the Automation or Sharing menus when one or more tasks are selected in the application interface.
Your code for performing the conditional checks is placed within the validation function in the template (lines 18-22 in the template)
Validation Function
action.validate = function(selection, sender){// validation code// selection options: tasks, projects, folders, tags, allObjects, databaseObjects// PUT YOUR VALIDATION CODE HERE};
To assist you in validating the plug-in, two items are automatically passed into the function:
The selection object that has a value that is an array of items currently selected in the application interface: tasks, projects, folders, tags, or a collection of selected database objects (folders, projects, and tasks)
The sender object that has a value indicating the mechanism used to trigger the execution of the plug-in. (Menu Item, Toolbar Button, or null if a remote script)
Since a validation function must return a boolean value (true or false) we can use the passed-in selection object to determine if one or more tasks are selected in OmniFocus, and return the appropriate boolean value.
If the validation function returns a value of false, the plug-in’s menu item will be disabled in the Automation Menu and will not appear on the Sharing Menu.
To determine whether one or more tasks are currently selected, we return the value of a script statement that counts the number of tasks returned by the tasks property of the selection object and compares it to zero (none):
The Validation Statement (true|false)
return (selection.tasks.length > 0)
If one or more tasks are selected in the application interface, this statement will return a value of true, otherwise it will return a value of false.
| DO THIS ► | Edit the plug-in template’s validation function (removing the existing comments) to contain the script statement: |

The Plug-In Action Function
The plug-in action function performs the work of the plug-in, which in the case of this example plug-in is clearing all tags from the tasks selected in the application interface.
The Action Function
const action = new PlugIn.Action(function(selection, sender){// action code// selection options: tasks, projects, folders, tags, allObjects, databaseObjects// PUT YOUR PROCESSING CODE HERE});
As with the validation function, the action function also receives the selection and sender objects as input to the function. (line 01 above)
The value of the selection object is an array of object references to the selected tasks. The script for processing each of the selected tasks uses the JavaScript forEach(…) function to iterate the list of tasks, applying the clearTags() function of the Task class to each selected task:
Clear Tags from Selected Tasks
selection.tasks.forEach(task => task.clearTags())
| DO THIS ► | Edit the plug-in template’s action function (removing the existing comments) to contain the script statement: |
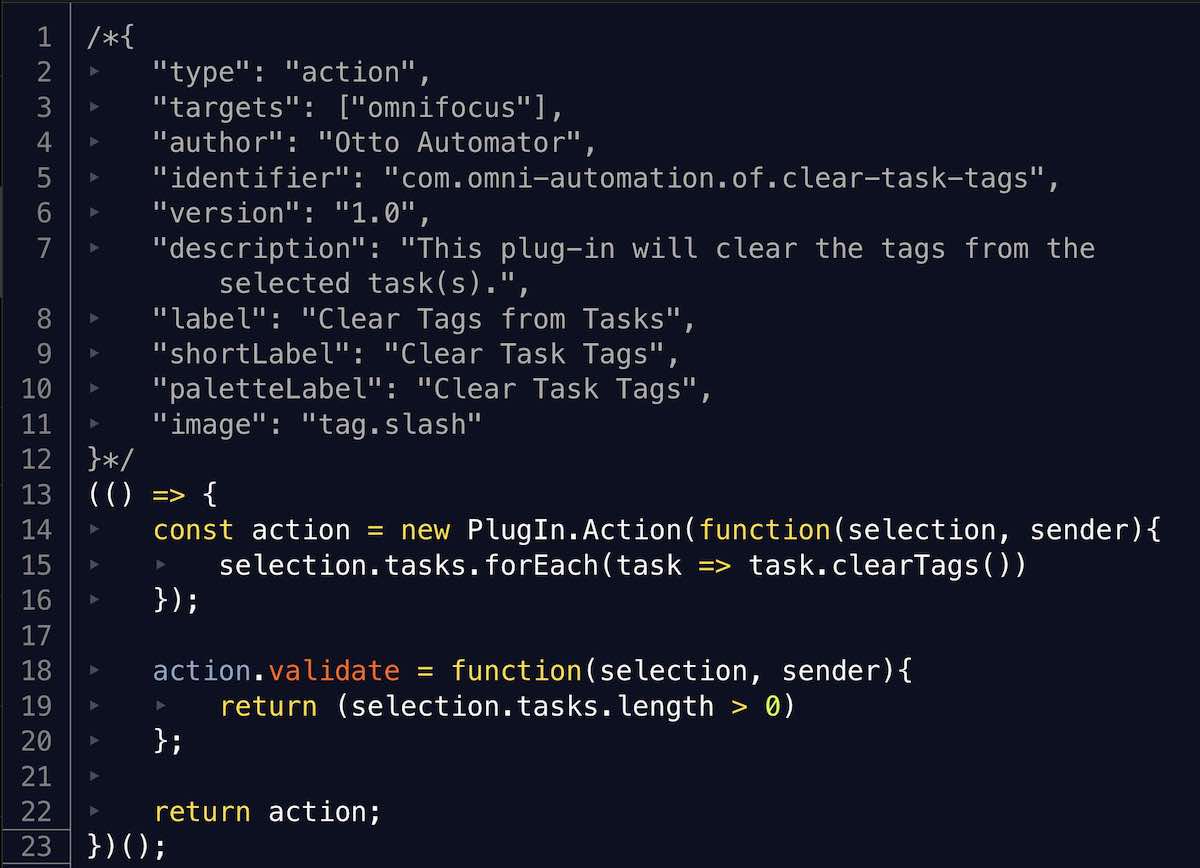
With your edits saved, the completed plug-in code should look similar to the example shown above.
Installing the Plug-In
Now that the plug-in has been created and edited, you’re ready to install the plug-in in OmniFocus.
| DO THIS ► | In your editor application, activate the Share menu for plug-in file, and TAP|CLICK the OmniFocus icon in the list of apps in which to open the plug-in. |
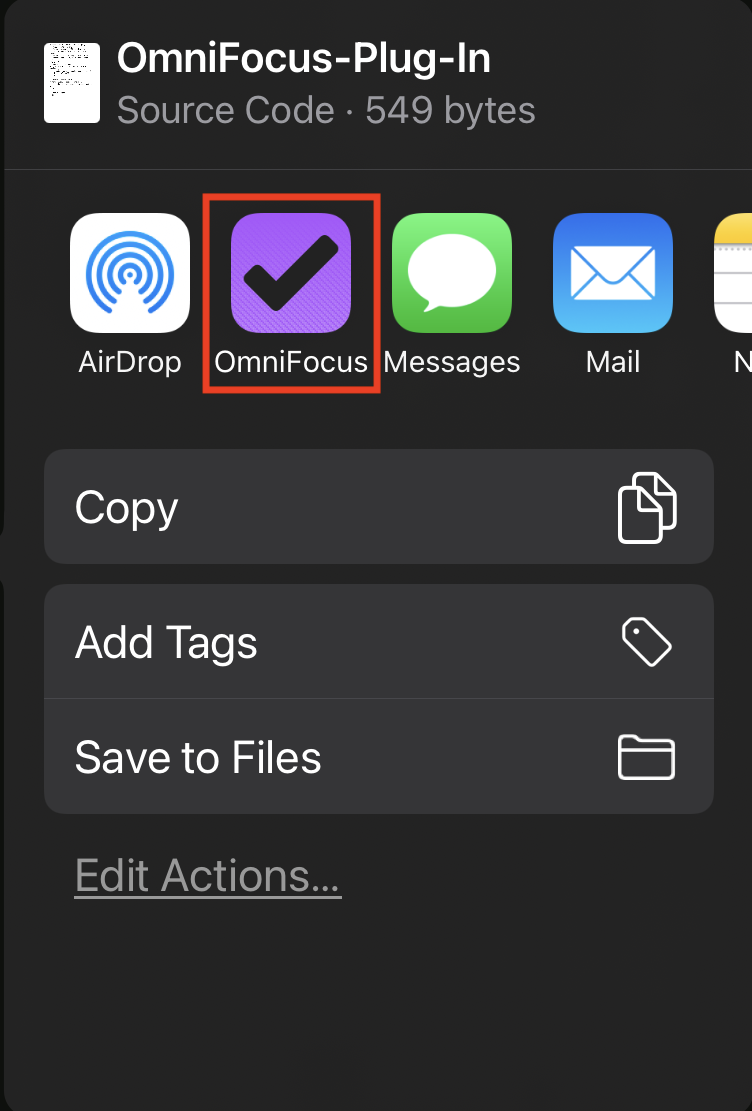
(above) Selecting the OmniFocus icon in the Share dialog will trigger the plug-in installation process in OmniFocus, which will display the installation security dialog shown below (left):
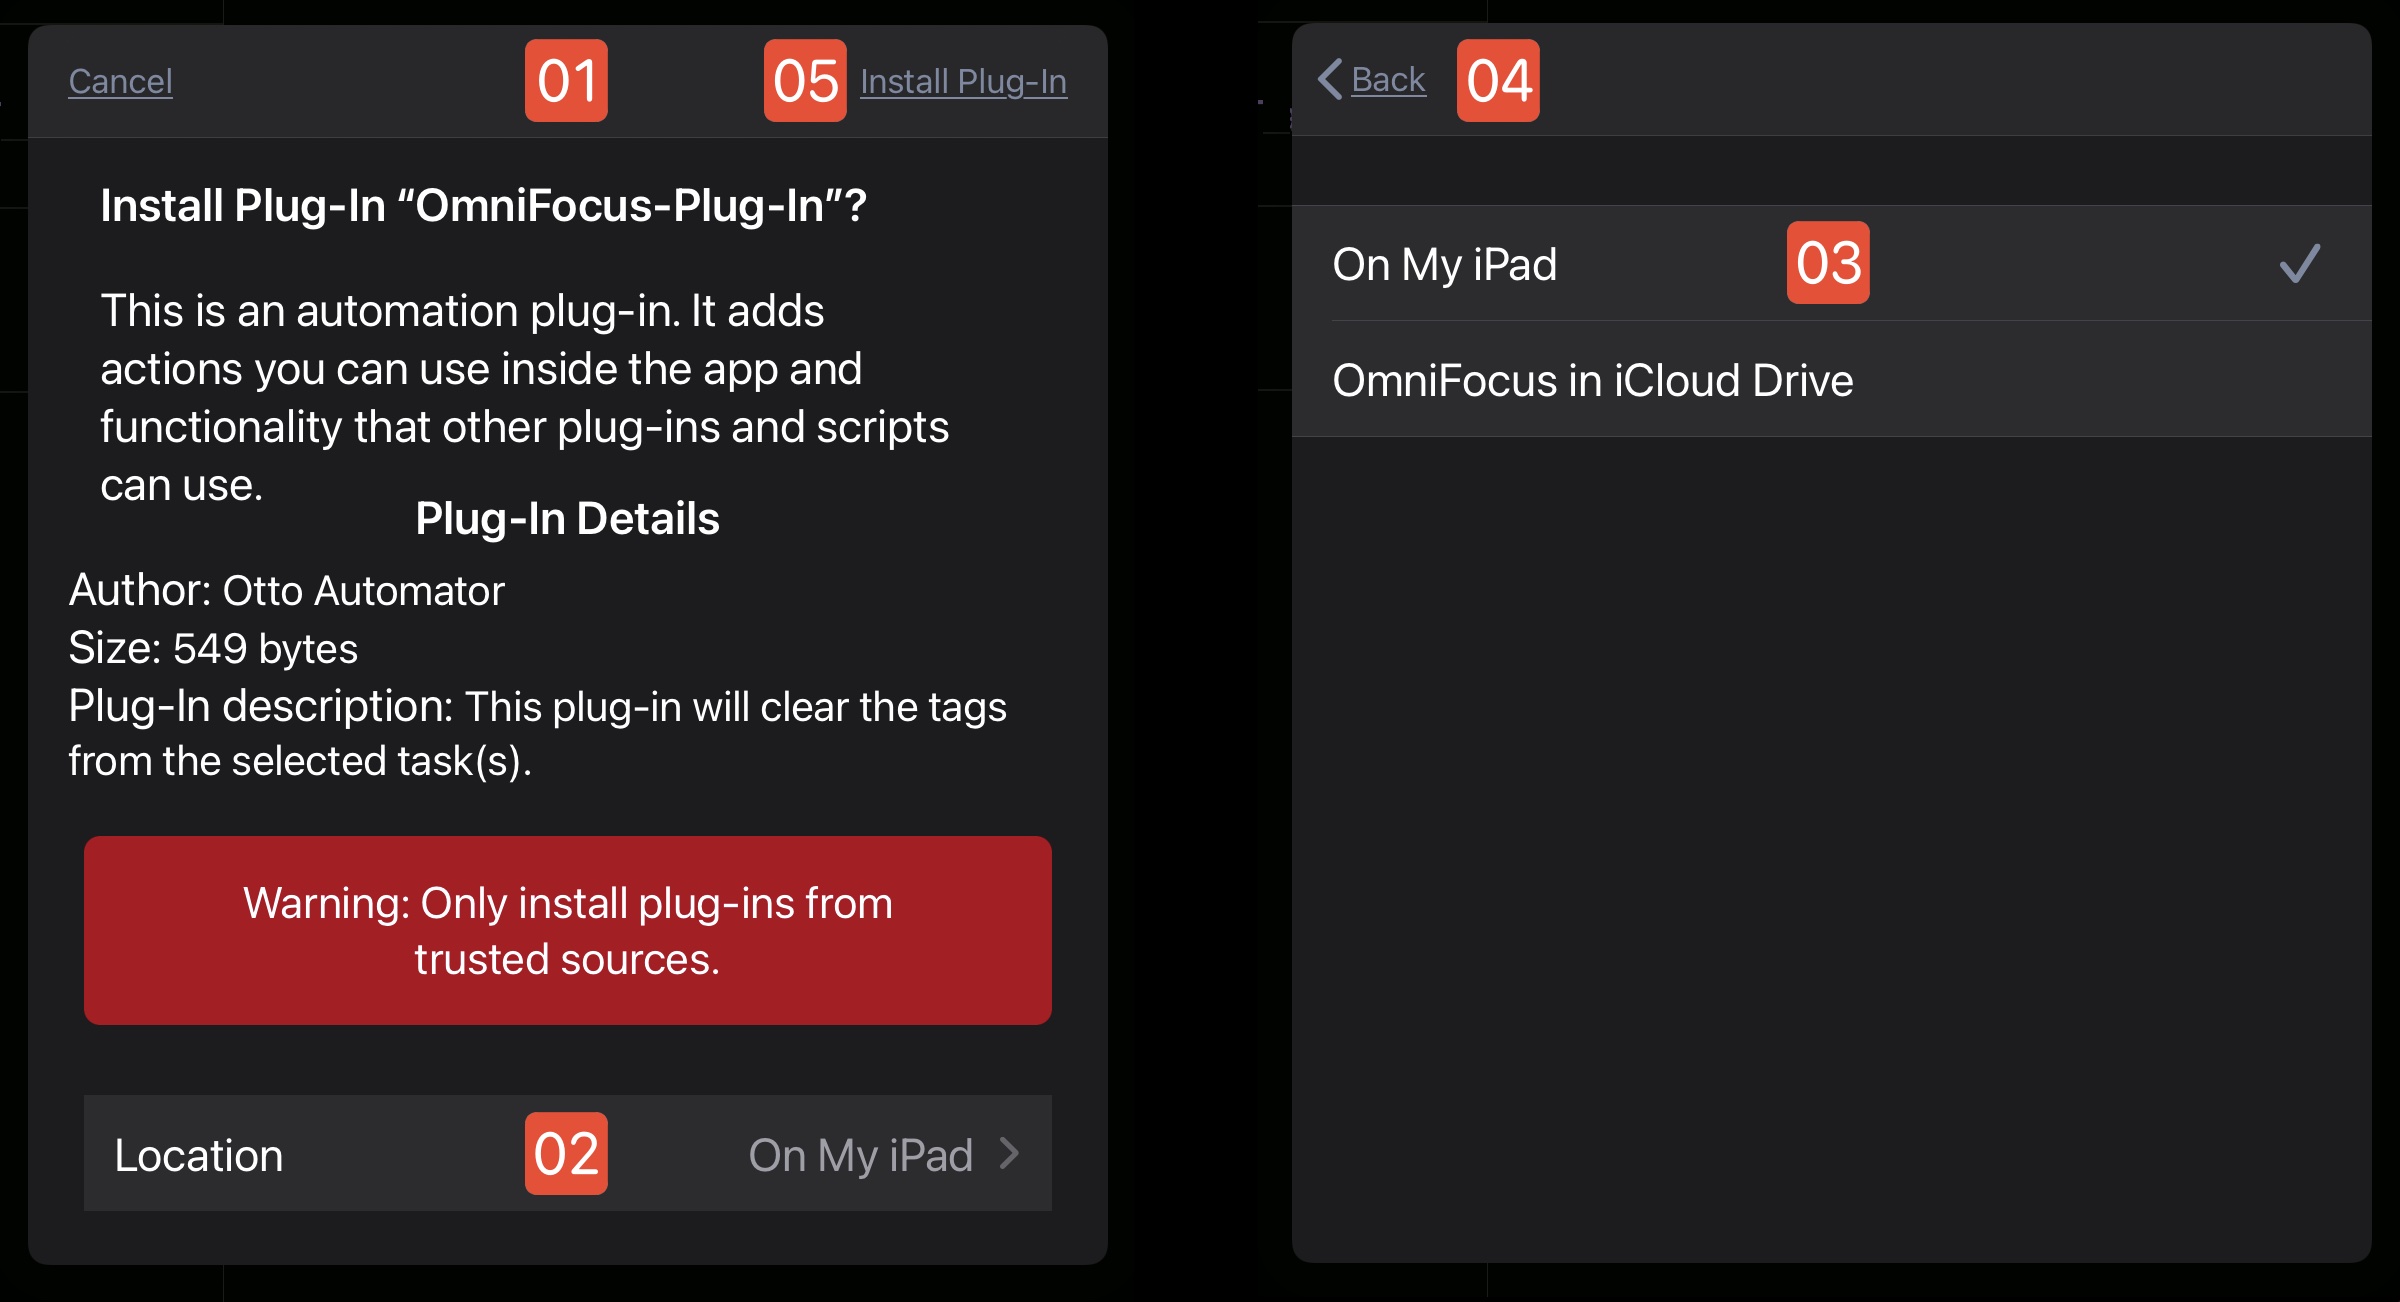
1 (above left) The OmniFocus Plug-In Installation Dialog presents information about the plug-in and asks for your confirmation before allowing the installation process to continue.
2 The current installation location is displayed on the Location control, which by default is set to: On My iPad
3 TAP|CLICK the current location setting to reveal a list of the available installation locations. If you have an active iCloud account on the device, the option to install in the OmniFocus folder on iCloud Drive will appear.
4 TAP|CLICK the Back button to return to the previous installation dialog.
5 To complete the installation process, TAP|CLICK the “Install Plug-In” button.
Using the Plug-In
Now that the plug-in is installed, let’s use it to remove the tags from the previously created task: “Staff Meeting”
| DO THIS ► | In OmniFocus, switch to the Inbox Perspective and select the previously created task: “Staff Meeting” |
| DO THIS ► | TAP|CLICK the Automation Menu at the bottom left of the window, and then TAP|CLICK the plug-in title: “Clear Tags from Tasks” |
All assigned tags will be cleared from the selected tasks.

1 The Automation Menu
2 The “Clear Tags from Tasks” menu item
3 Choosing the “Configure Plug-Ins” menu option will summon the plug-in management tools covered in the following segment.
Managing Plug-Ins
All of the Omni applications offer extensive control of installed plug-ins. Let’s examine the basics of plug-in management.
| DO THIS ► | Summon the plug-in management tools by selecting the “Configure Plug-Ins” menu option from the Automation Menu. |
The Configure Plug-Ins sheet will be displayed:
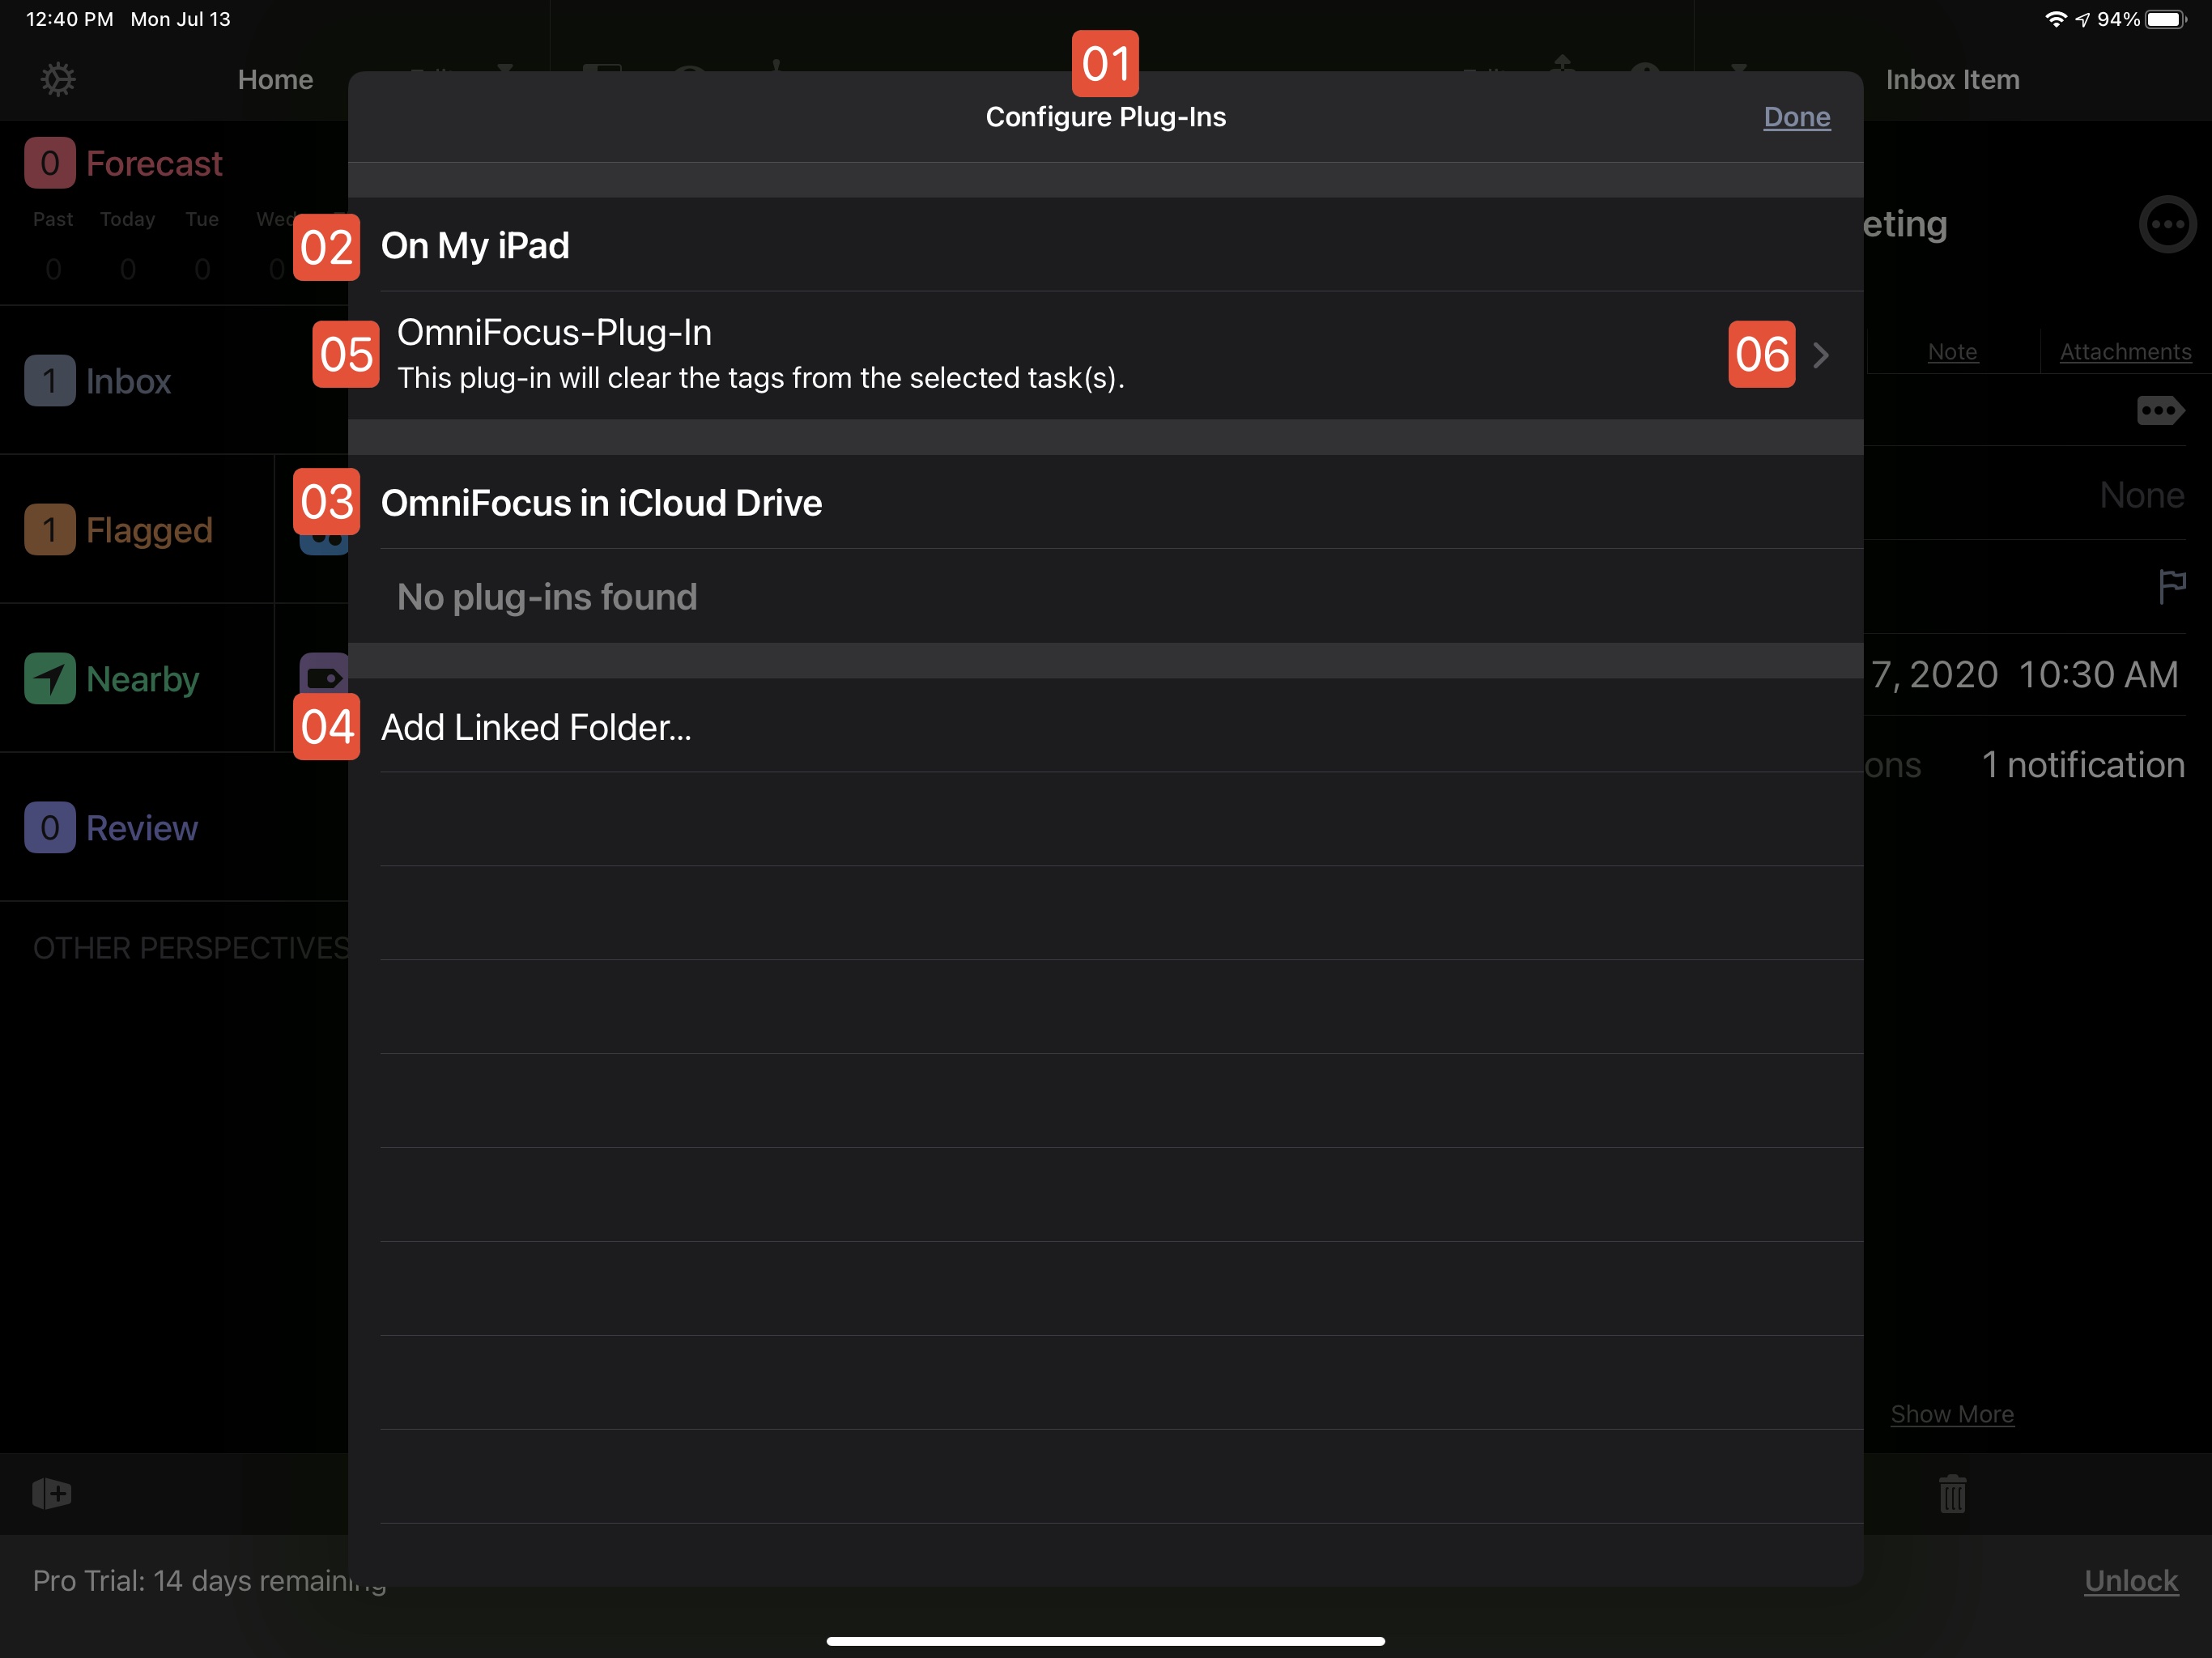
1 The Configure Plug-Ins sheet
2 The local OmniFocus storage location on the iPad.
3 The default OmniFocus iCloud Drive location on the iPad.
4 Linked folders containing plug-ins. You can add custom directories, such as your Dropbox folder, to be a source for OmniFocus plug-ins.
5 Our installed example plug-in. TIP: to remove this plug-in, swipe left and then TAP|CLICK the forthcoming “Delete” button.
6 TAP|CLICK the right-arrow button to reveal details and controls for the installed plug-in.
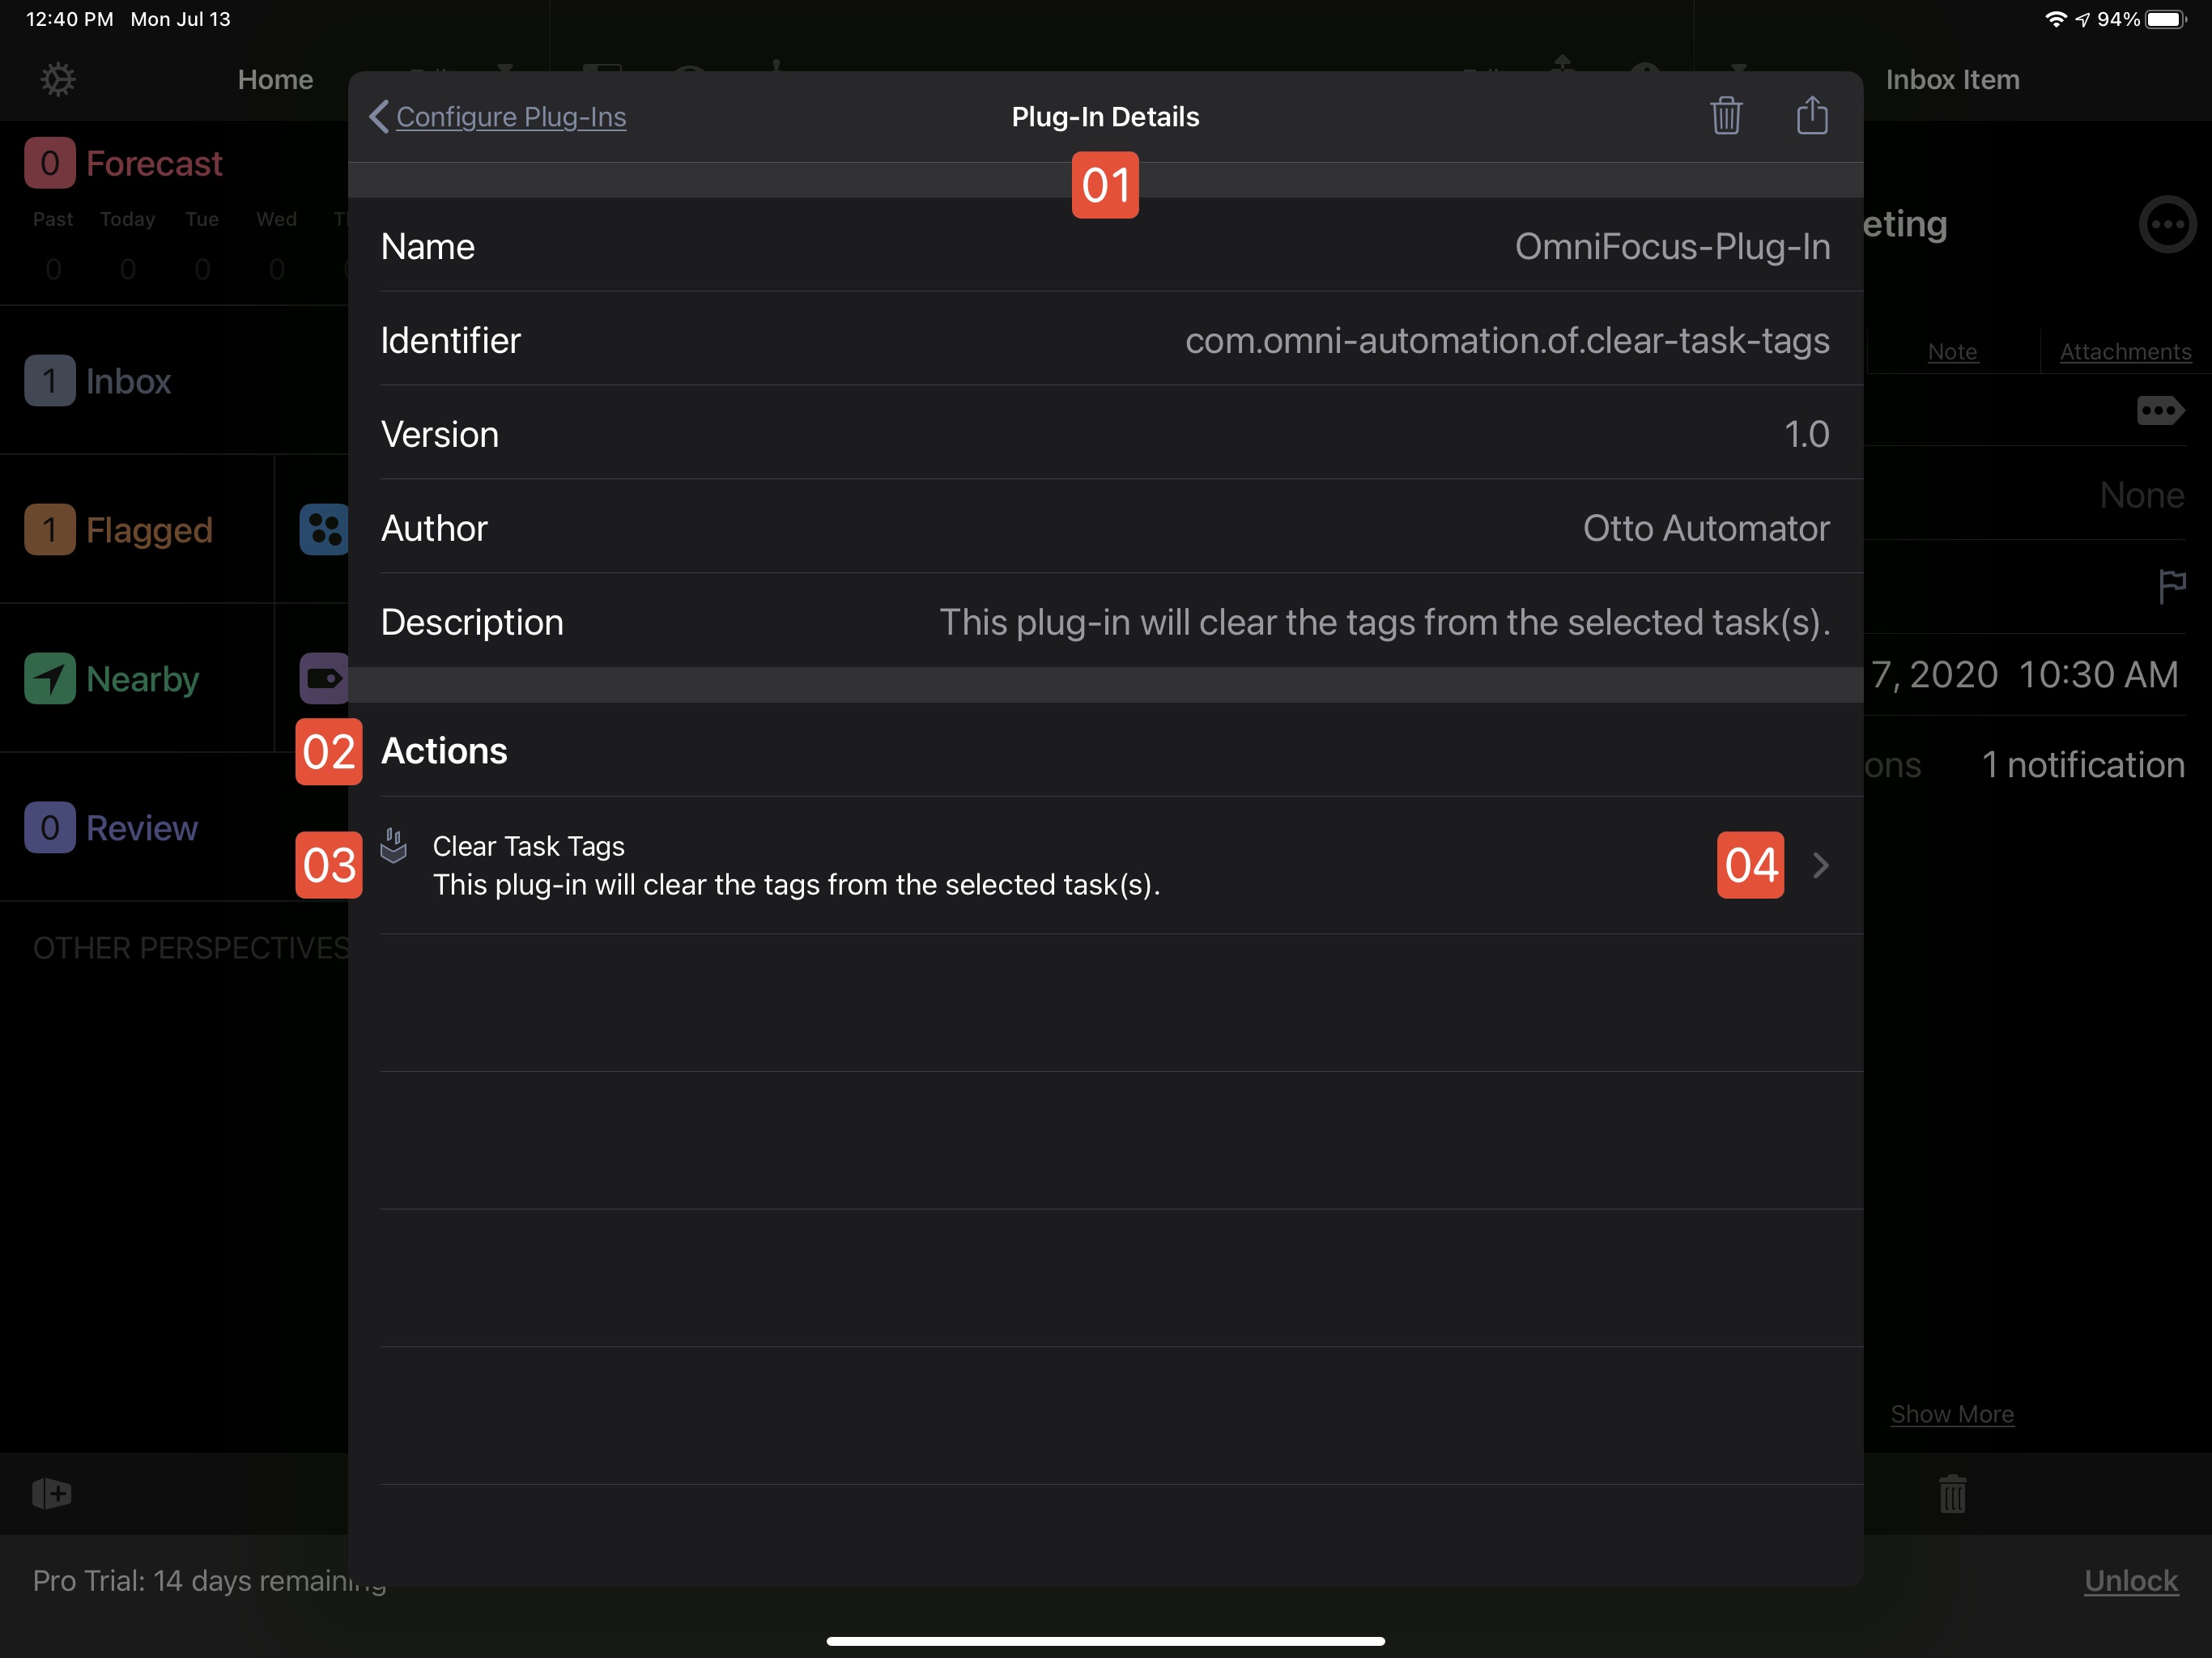
1 The Plug-In Details sheet that contains information about the installed plug-in, including the plug-in metadata properties and their corresponding values.
2 The Plug-In Actions lists the actions included in the installed plug-ins. Our example plug-in has a single action, but bundle plug-ins may contain many actions, each with its own description and menu.
3 The installed example plug-in.
4 TAP|CLICK the right-arrow button to summon the dialog for assigning a keyboard shortcut to the installed plug-in.
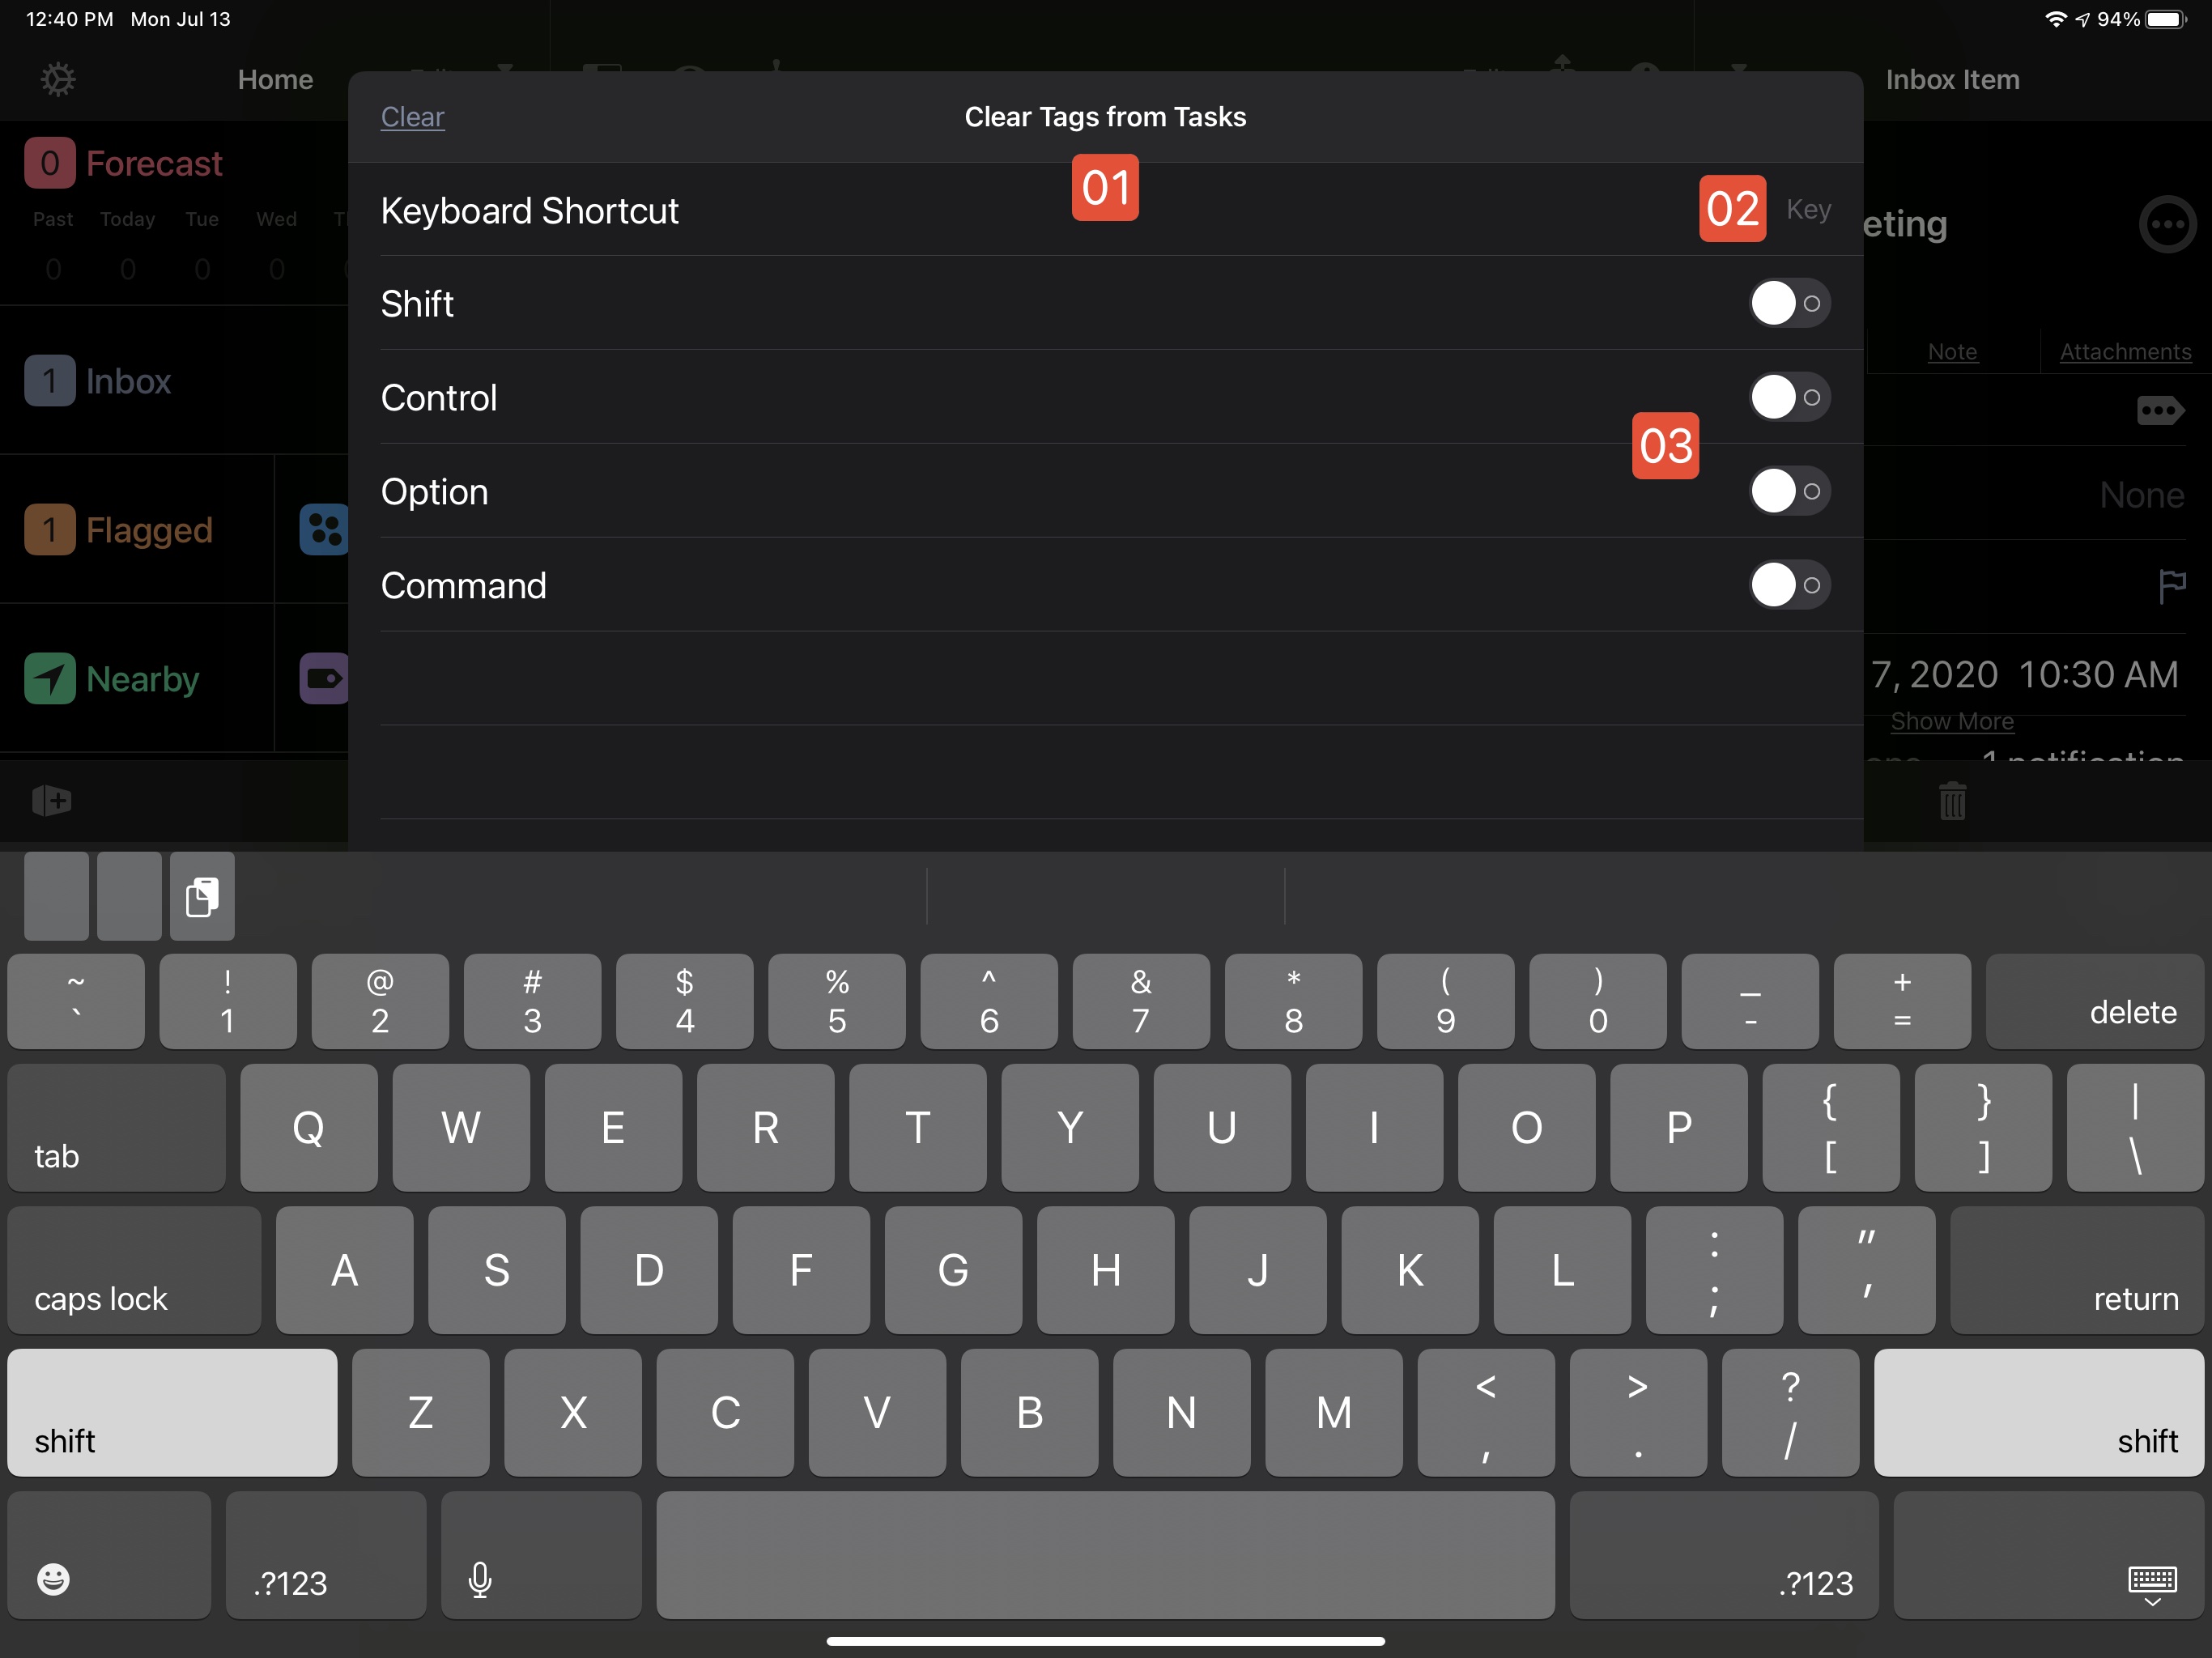
1 The Keyboard Assignment sheet.
2 Enter the keyboard character to use as the shortcut.
3 Select one or more modifier keys to use with the chosen keyboard character.
More OmniFocus Plug-In Templates
This website hosts online Template Generator forms for generating Omni Automation plug-ins for each of the Omni apps, including the Template Generator for OmniFocus that contains many preset plug-in templates for you to use.
Summary
In this section you learned:
How to create, install, and run an Omni Automation plug-in for OmniFocus.
How to access the built-in plug-in management tools.
In the next next section we’ll finish up and restore the Inbox.