Interoperability: Omni Automation and Raycast
DISCLAIMER: Mention of third-party websites and products is for informational purposes only and constitutes neither an endorsement nor a recommendation. OMNI-AUTOMATION.COM assumes no responsibility with regard to the selection, performance or use of information or products found at third-party websites. OMNI-AUTOMATION.COM provides this only as a convenience to our users. OMNI-AUTOMATION.COM has not tested the information found on these sites and makes no representations regarding its accuracy or reliability. There are risks inherent in the use of any information or products found on the Internet, and OMNI-AUTOMATION.COM assumes no responsibility in this regard. Please understand that a third-party site is independent from OMNI-AUTOMATION.COM and that OMNI-AUTOMATION.COM has no control over the content on that website. Please contact the vendor for additional information.
Raycast is a launcher for macOS that presents a text input window, similar in appearance to Apple’s Spotlight search feature. Within this interface you can perform a search, open files or applications, execute Shortcuts workflows, or even run custom commands you install as extensions or scripts.
Because an Omni Automation script can be expressed in a variety of formats, including as Script URL, it is easy to convert most Omni Automation scripts into Raycast extensions, available within its launcher interface.
Launch your Omni Automation scripts using Raycast!
How It Works
Using the encoding tools provided on this website, nearly any Omni Automation script can be easily converted into an encoded Omni Automation Script URL that can be executed by Raycast.
Simply encode the Omni Automation script and insert it into the provided Raycast extension template as a URL to be opened. Save and install the Raycast script, and it is ready to use!
In the following example, an Omni Automation script that switches to OmniFocus and selects the first item in the Inbox, is launched as a Raycast extension.
| Show First Inbox Item |
| Switch to OmniFocus and select the first item in the Inbox. |
|
|
Show First Inbox Item (OmniFocus)
(async () => {try {function createUtterance(textToSpeak){AlexID = ((app.platformName === "macOS") ?"com.apple.speech.synthesis.voice.Alex" :"com.apple.speech.voice.Alex")voiceObj = Speech.Voice.withIdentifier(AlexID)voiceRate = 0.4utterance = new Speech.Utterance(textToSpeak)utterance.voice = voiceObjutterance.rate = voiceRatereturn utterance}var synthesizer = new Speech.Synthesizer()var win = document.windows[0]win.perspective = Perspective.BuiltIn.Inboxif (app.platformName === "iOS" && app.userVersion.versionString === "3.13"){var task = inbox[0]if(task == undefined){throw {name: "Missing Items",message: "There are no Inbox items."}} else {win.selectObjects([task])}} else {tree = win.contenttree.select([])tree.rootNode.children.forEach(node => {node.collapse(true)})firstTask = tree.rootNode.children[0]if(firstTask){tree.select([firstTask])firstTask.expand(true)firstTask.expandNote()firstTask.children.forEach(node => {node.expandNote(true)})}}utterance = createUtterance("Ready!")synthesizer.speakUtterance(utterance)}catch(err){utterance = createUtterance(err.message)synthesizer.speakUtterance(utterance)//new Alert(err.name, err.message).show()}})();
Create an Omni Automation Raycast Script
Follow these steps to convert your Omni Automation scripts into Raycast script extensions:
- DOWNLOAD the Raycast Omni Automation template file. Rename the file to match your command, keeping the “.sh” file extension.
- DOWNLOAD the Omni Automation plug-in for encoding scripts on the clipboard into Script URLs. The plug-in will work with any of the Omni suite of applications: OmniFocus, OmniGraffle, OmniOutliner, or OmniPlan
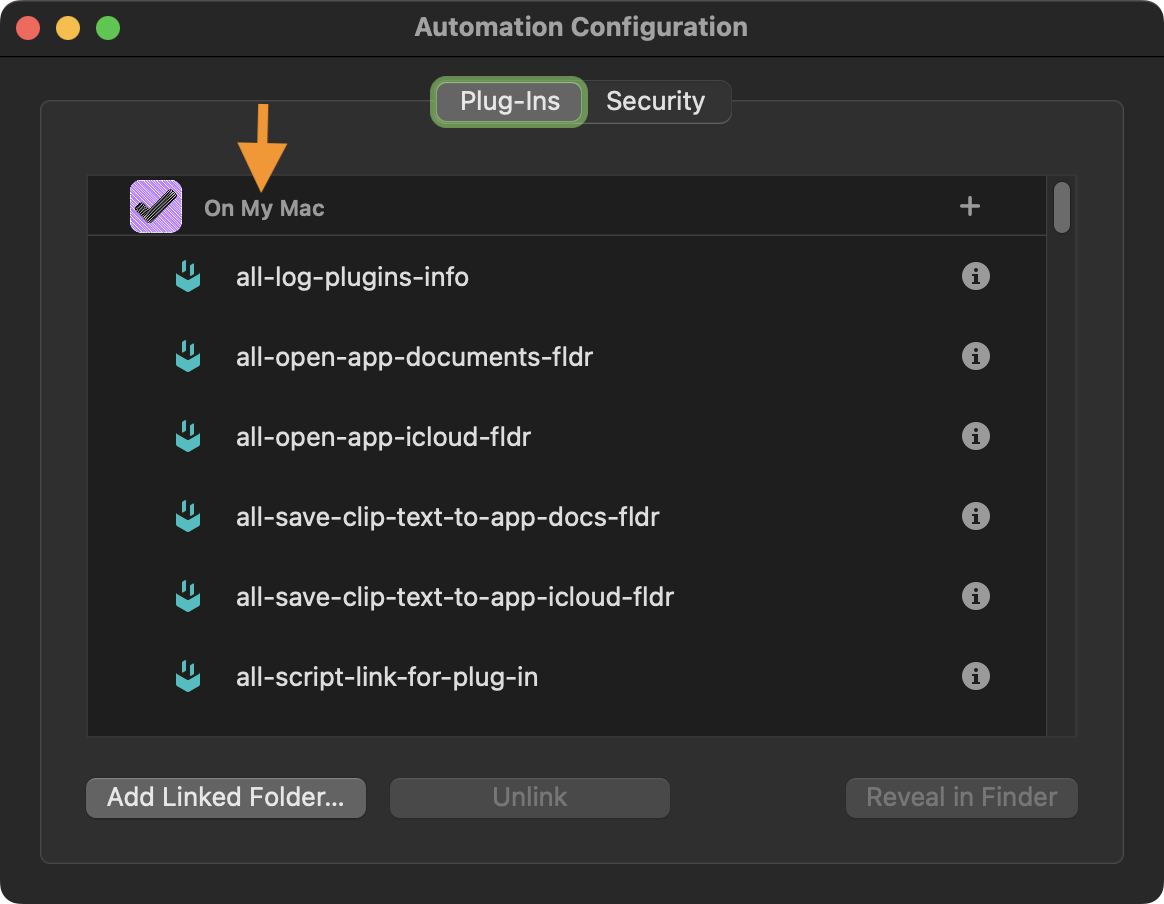
- To install the plug-in, select “Configure…” from the Automation menu in the Omni application. Drag the unarchived plug-in onto the “On My Mac” option in the Plug-Ins tab of the forthcoming Automation Configuration dialog. A new command “Encode Clipboard Script” will be added to the Automation menu.

- Copy the Omni Automation script you wish to convert to the clipboard.
- Execute the installed plug-in by selecting “Encode Clipboard Script” from the Automation menu. In the forthcoming dialog, select the name of the Omni application that will be the host (target) of the encoded script.
- In the downloaded template file, replace the placeholder text between the quote marks (below: line 11) with the encoded Omni Automation script URL now on the clipboard.
- Save the file and place it in your Raycast scripts folder designated in the Raycast “Settings > Extensions” dialog.
To use the command, summon the Raycast interface and type the title of the command you entered in line 5 of the Raycast script template (below).
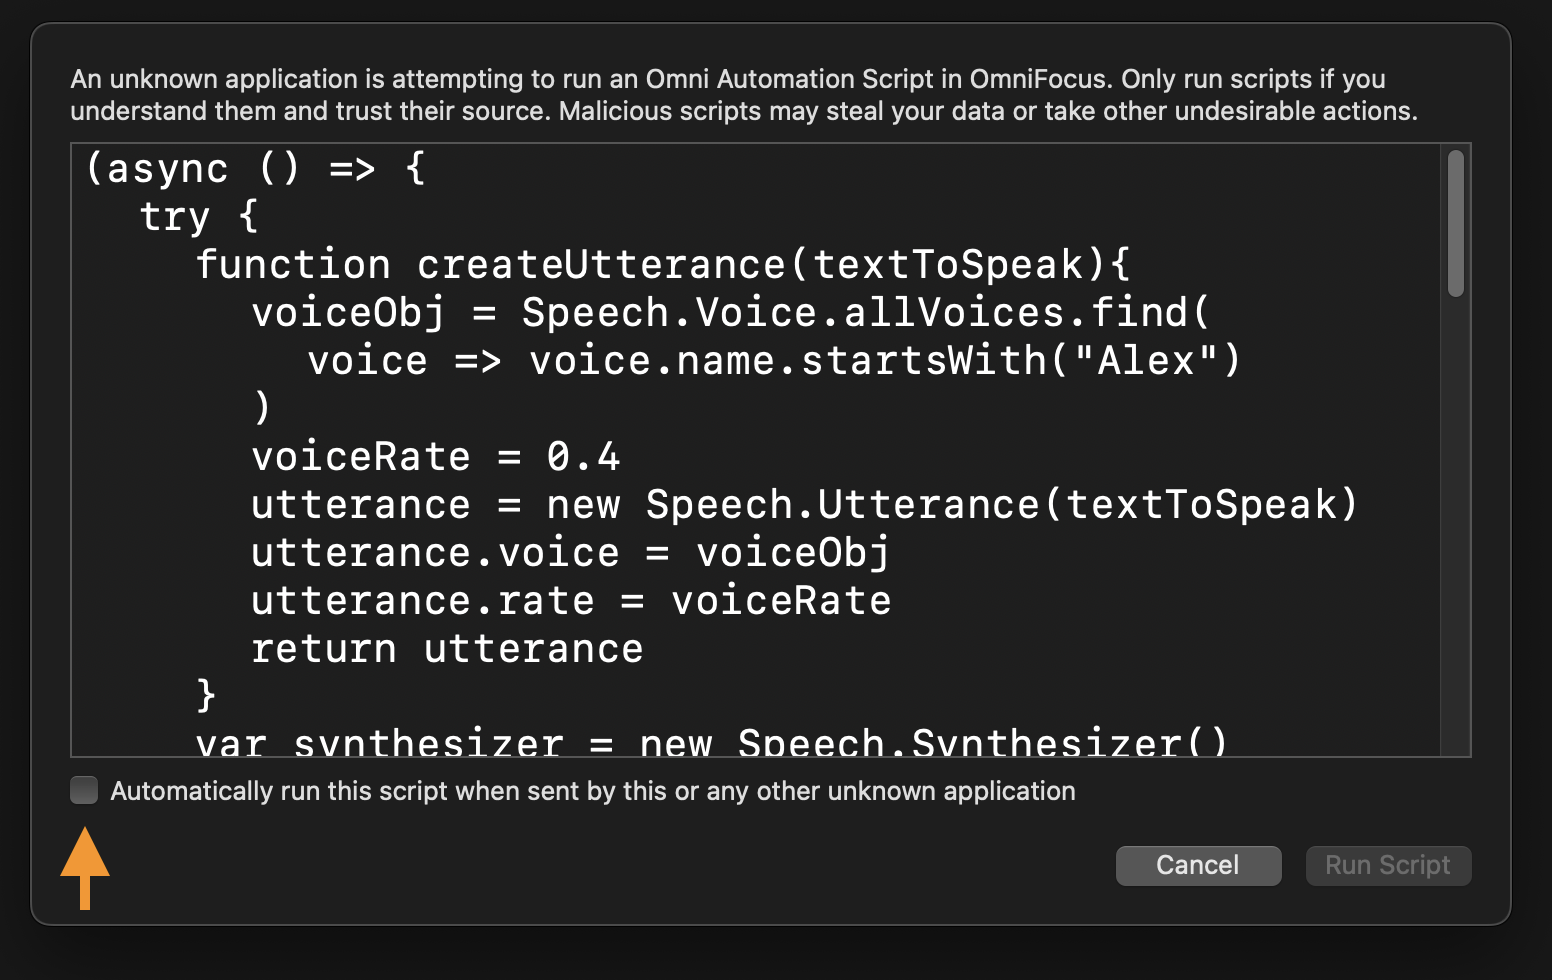
NOTE: Because the Omni Automation script is being executed externally, the first time it is run it will require user scanning and approval within a presented security dialog (DOCUMENTATION). To enable the script to be executed again without requiring approval, select the checkbox at the bottom left in the dialog.

Here are the Raycast template and the example Raycast script:
Raycast Template
#!/bin/bash# Required parameters:# @raycast.schemaVersion 1# @raycast.title TITLE OF COMMAND# @raycast.mode silent# Optional parameters:# @raycast.icon 💫open "REPLACE THIS WITH ENCODED OMNI AUTOMATION SCRIPT URL"
Example OmniFocus command:
Raycast Script: 1st Inbox Item
#!/bin/bash# Required parameters:# @raycast.schemaVersion 1# @raycast.title 1st Inbox Item# @raycast.mode silent# Optional parameters:# @raycast.icon 📥open "omnifocus://localhost/omnijs-run?script=%28async%20%28%29%20%3D%3E%20%7B%0D%09try%20%7B%0D%09%09function%20createUtterance%28textToSpeak%29%7B%0D%09%09%09voiceObj%20%3D%20Speech%2EVoice%2EallVoices%2Efind%28%0D%09%09%09%09voice%20%3D%3E%20voice%2Ename%2EstartsWith%28%22Alex%22%29%0D%09%09%09%29%0D%09%09%09voiceRate%20%3D%200%2E4%0D%09%09%09utterance%20%3D%20new%20Speech%2EUtterance%28textToSpeak%29%0D%09%09%09utterance%2Evoice%20%3D%20voiceObj%0D%09%09%09utterance%2Erate%20%3D%20voiceRate%0D%09%09%09return%20utterance%0D%09%09%7D%0D%09%09var%20synthesizer%20%3D%20new%20Speech%2ESynthesizer%28%29%0D%0D%09%09var%20win%20%3D%20document%2Ewindows%5B0%5D%0D%09%09win%2Eperspective%20%3D%20Perspective%2EBuiltIn%2EInbox%0D%09%09if%20%28app%2EplatformName%20%3D%3D%3D%20%22iOS%22%20%26%26%20app%2EuserVersion%2EversionString%20%3D%3D%3D%20%223%2E13%22%29%7B%0D%09%09%09var%20task%20%3D%20inbox%5B0%5D%0D%09%09%09if%28task%20%3D%3D%20undefined%29%7B%0D%09%09%09%09throw%20%7B%0D%09%09%09%09%09name%3A%20%22Missing%20Items%22%2C%0D%09%09%09%09%09message%3A%20%22There%20are%20no%20Inbox%20items%2E%22%0D%09%09%09%09%7D%0D%09%09%09%7D%20else%20%7B%0D%09%09%09%09win%2EselectObjects%28%5Btask%5D%29%0D%09%09%09%7D%0D%09%09%7D%20else%20%7B%0D%09%09%09tree%20%3D%20win%2Econtent%0D%09%09%09tree%2Eselect%28%5B%5D%29%0D%09%09%09tree%2ErootNode%2Echildren%2EforEach%28node%20%3D%3E%20node%2Ecollapse%28true%29%29%0D%09%09%09firstTask%20%3D%20tree%2ErootNode%2Echildren%5B0%5D%0D%09%09%09if%28firstTask%29%7B%0D%09%09%09%09tree%2Eselect%28%5BfirstTask%5D%29%0D%09%09%09%09firstTask%2Eexpand%28true%29%0D%09%09%09%09firstTask%2EexpandNote%28%29%0D%09%09%09%09firstTask%2Echildren%2EforEach%28node%20%3D%3E%20node%2EexpandNote%28true%29%29%0D%09%09%09%7D%0D%09%09%7D%0D%09%0D%09%09utterance%20%3D%20createUtterance%28%22Ready%21%22%29%0D%09%09synthesizer%2EspeakUtterance%28utterance%29%0D%09%7D%0D%09catch%28err%29%7B%0D%09%09utterance%20%3D%20createUtterance%28err%2Emessage%29%0D%09%09synthesizer%2EspeakUtterance%28utterance%29%0D%09%09%2F%2Fnew%20Alert%28err%2Ename%2C%20err%2Emessage%29%2Eshow%28%29%09%0D%09%7D%0D%7D%29%28%29%3B"
Passing Data into an Omni Automation Script
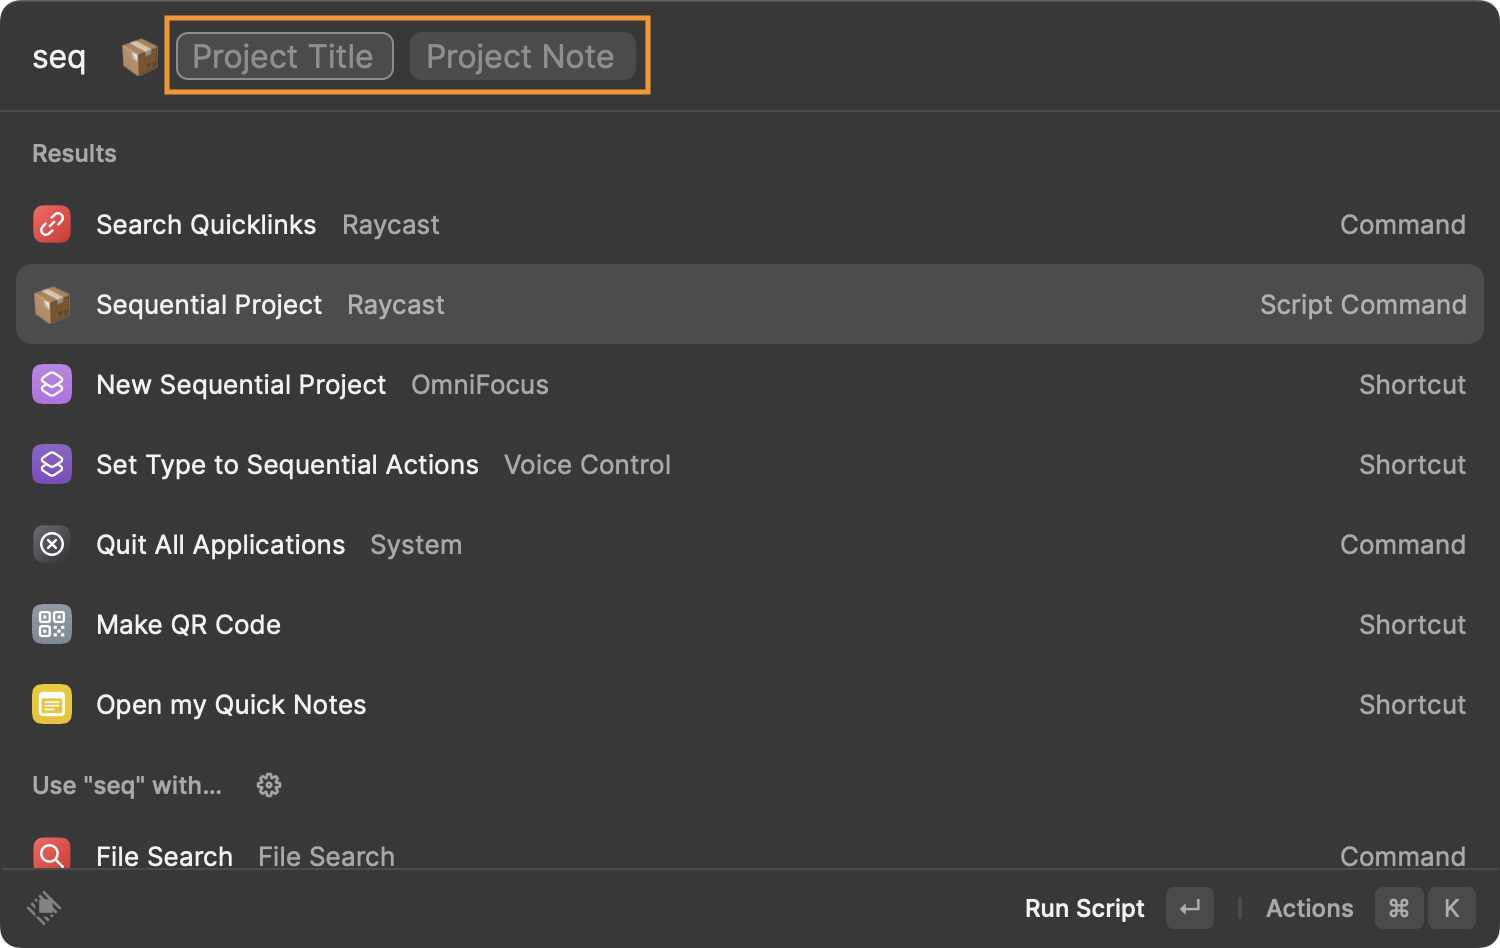
Raycast has the ability to present input tokens in its main window (see below). You can tab into these tokens and enter data to be passed into the Omni Automation script.
Your Raycast script can define which tokens to display, retrieve their input contents, and pass it into your encoded Omni Automation script URL stored within Shell script variables.

To have the Omni Automation script be able to receive the passed data and be “security approvable” for repeated use, it will need to be written as a self-invoking function that receives function arguments.
The Script Function
As an example, here is a function that will create and select a new sequential project. This function is self-invoking and will be automatically passed the input data through the special argument placeholder (below: line 10).
New Sequential Project
(function newSequentialProject(args){projectTitle = args[0]projectNote = args[1]project = new Project(projectTitle)project.sequential = trueproject.note = projectNoteprojectID = project.id.primaryKeyurl = "omnifocus:///task/" + projectIDURL.fromString(url).open()})(argument)
The passed in data (argument) will consist of two items in an array, the provided project title and the project note, which are represented in this example with XXX and YYY.
Placeholder Arguments
["XXX", "YYY"]
Using the function and argument encoding tools provided on this website, the resulting two encoded items are concatenated into a single URL: (below)
Encoded Function and Arguments
omnifocus://localhost/omnijs-run?script=%28function%20newSequentialProject%28args%29%7B%0A%09projectTitle%20%3D%20args%5B0%5D%0A%09projectNote%20%3D%20args%5B1%5D%0A%09project%20%3D%20new%20Project%28projectTitle%29%0A%09project%2Esequential%20%3D%20true%0A%09project%2Enote%20%3D%20projectNote%0A%09projectID%20%3D%20project%2Eid%2EprimaryKey%0A%09url%20%3D%20%22omnifocus%3A%2F%2F%2Ftask%2F%22%20%2B%20projectID%0A%09URL%2EfromString%28url%29%2Eopen%28%29%0A%7D%29%28argument%29&arg=%5B%22XXX%22%2C%20%22YYY%22%5D
NOTE: (above) The encoded arguments are appended to the script URL as the value for the arg= parameter
Replace the placeholders (XXX and YYY) with two consecutive Shell script variables: $1 and $2
Replace Arguments with Shell Script Variables
omnifocus://localhost/omnijs-run?script=%28function%20newSequentialProject%28args%29%7B%0A%09projectTitle%20%3D%20args%5B0%5D%0A%09projectNote%20%3D%20args%5B1%5D%0A%09project%20%3D%20new%20Project%28projectTitle%29%0A%09project%2Esequential%20%3D%20true%0A%09project%2Enote%20%3D%20projectNote%0A%09projectID%20%3D%20project%2Eid%2EprimaryKey%0A%09url%20%3D%20%22omnifocus%3A%2F%2F%2Ftask%2F%22%20%2B%20projectID%0A%09URL%2EfromString%28url%29%2Eopen%28%29%0A%7D%29%28argument%29&arg=%5B%22$1%22%2C%20%22$2%22%5D
The encoded Omni Automation script URL is now placed within the quotes following the Shell open command.
NOTE: The Shell script statements on line 10 and line 11 follow the Raycast documentation for defining data inputs in your Shell scripts.
New Sequential Project
#!/bin/bash# Required parameters:# @raycast.schemaVersion 1# @raycast.title Sequential Project# @raycast.mode silent# Optional parameters:# @raycast.icon 📦# @raycast.argument1 { "type": "text", "placeholder": "Project Title", "percentEncoded": true}# @raycast.argument2 { "type": "text", "placeholder": "Project Note", "percentEncoded": true, "optional": true}# Documentation:# @raycast.description Creates New Project with Tasks# @raycast.author Otto Automatoropen "omnifocus://localhost/omnijs-run?script=%28function%20newSequentialProject%28args%29%7B%0A%09projectTitle%20%3D%20args%5B0%5D%0A%09projectNote%20%3D%20args%5B1%5D%0A%09project%20%3D%20new%20Project%28projectTitle%29%0A%09project%2Esequential%20%3D%20true%0A%09project%2Enote%20%3D%20projectNote%0A%09projectID%20%3D%20project%2Eid%2EprimaryKey%0A%09url%20%3D%20%22omnifocus%3A%2F%2F%2Ftask%2F%22%20%2B%20projectID%0A%09URL%2EfromString%28url%29%2Eopen%28%29%0A%7D%29%28argument%29&arg=%5B%22$1%22%2C%20%22$2%22%5D"
When the installed script is summoned and selected in Raycast, the input tokens will be displayed. Tab into the tokens and enter the project title and project note, and press the Return key. The Omni Automation script will execute, then create and select a new sequential project using the data input in the Raycast interface!
