Managing Omni Automation Plug-Ins on iPadOS
Omni Automation Plug-Ins and solitary actions are designed to be easily installed and accessed. The following documentation details how to install and manage Omni Automation Plug-Ins locally on your iPadOS device.
Installing/Managing Plug-Ins Stored on the Device
The following describes how to create a new folder on the iPad, which will become the linked source folder for the Omni Automation plug-ins used by the Omni applications installed on your iPadOS device.
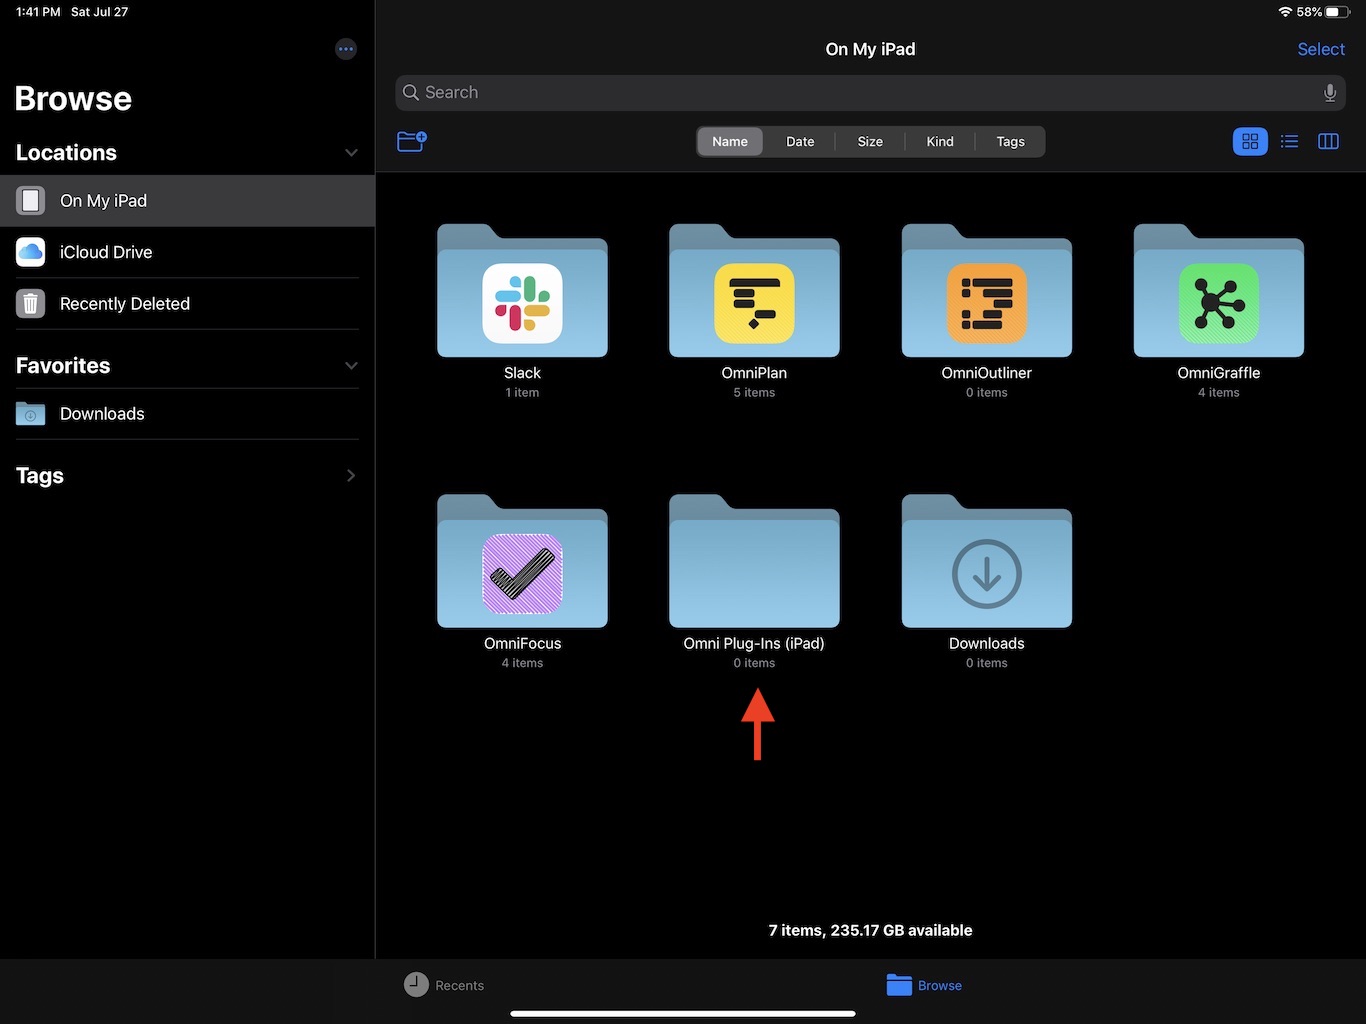
The Files app on iPadOS:
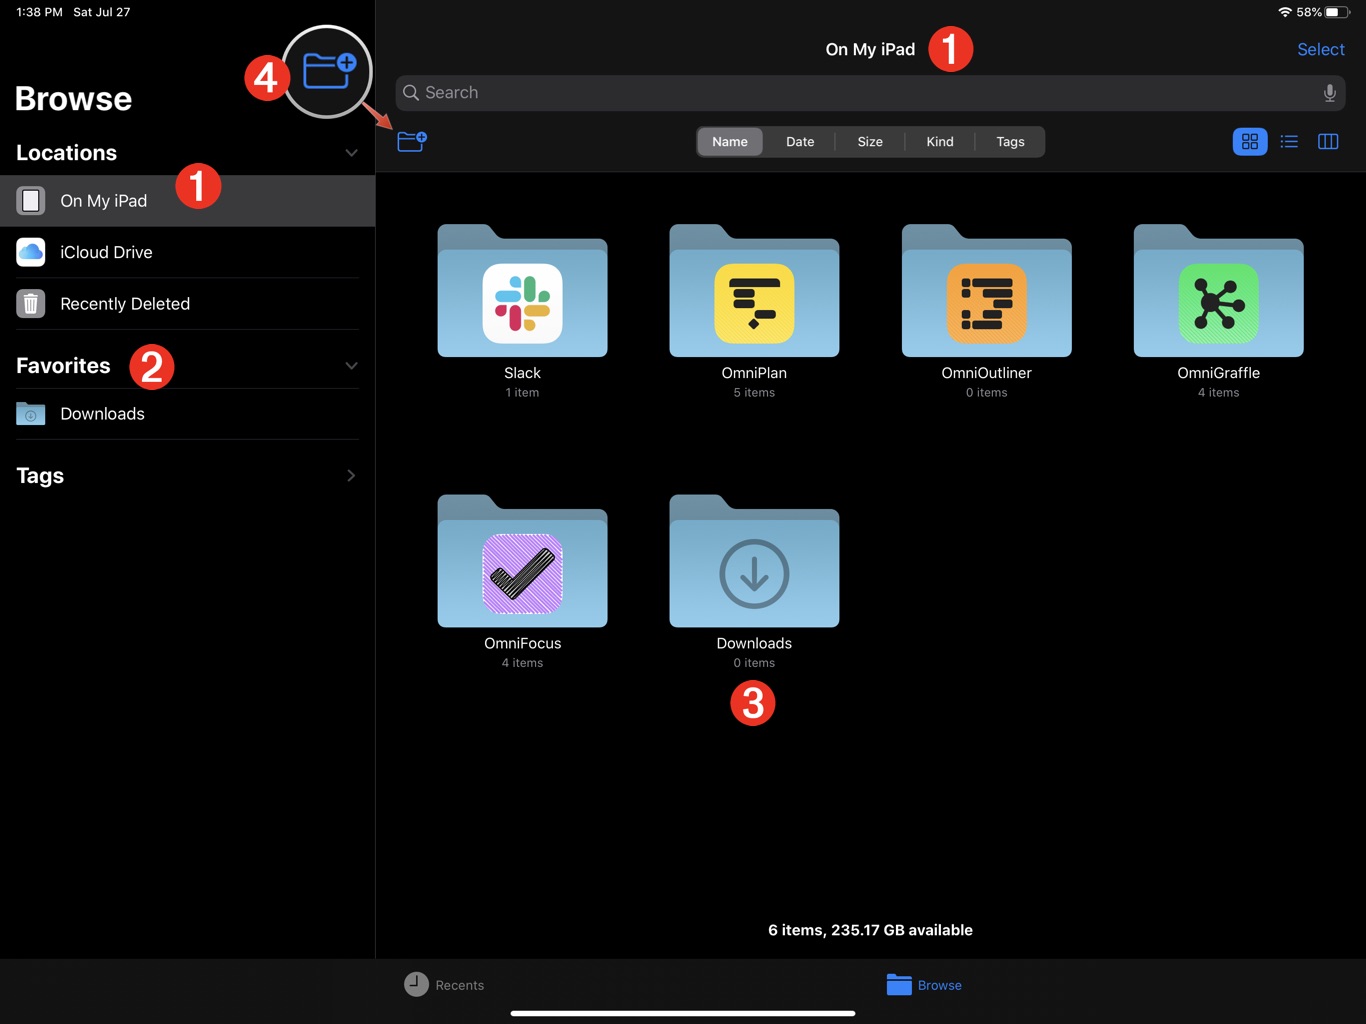
1 The current location in the Files app is set to On My iPad which will display the files stored locally on the device.
2 The Favorites sidebar category displays aliases to folders you want to access easily.
3 The on-device Downloads folder. You can set it to be the default downloads directory in the System Preferences app: Safari > Downloads > On My iPad
4 The New Folder button for creating a new directory in the directory or location whose contents are currently displayed in the view. TIP: if the New Folder button is not visible, swipe down within the contents view to make the control bar appear.
The first step is to create a new folder in the file storage area on the device.
| DO THIS ► | In the Files app, select the On My iPad location 1 and then tap the New Folder button 4 to create a new directory. |
A new folder will be created and the iPadOS naming sheet will be displayed:
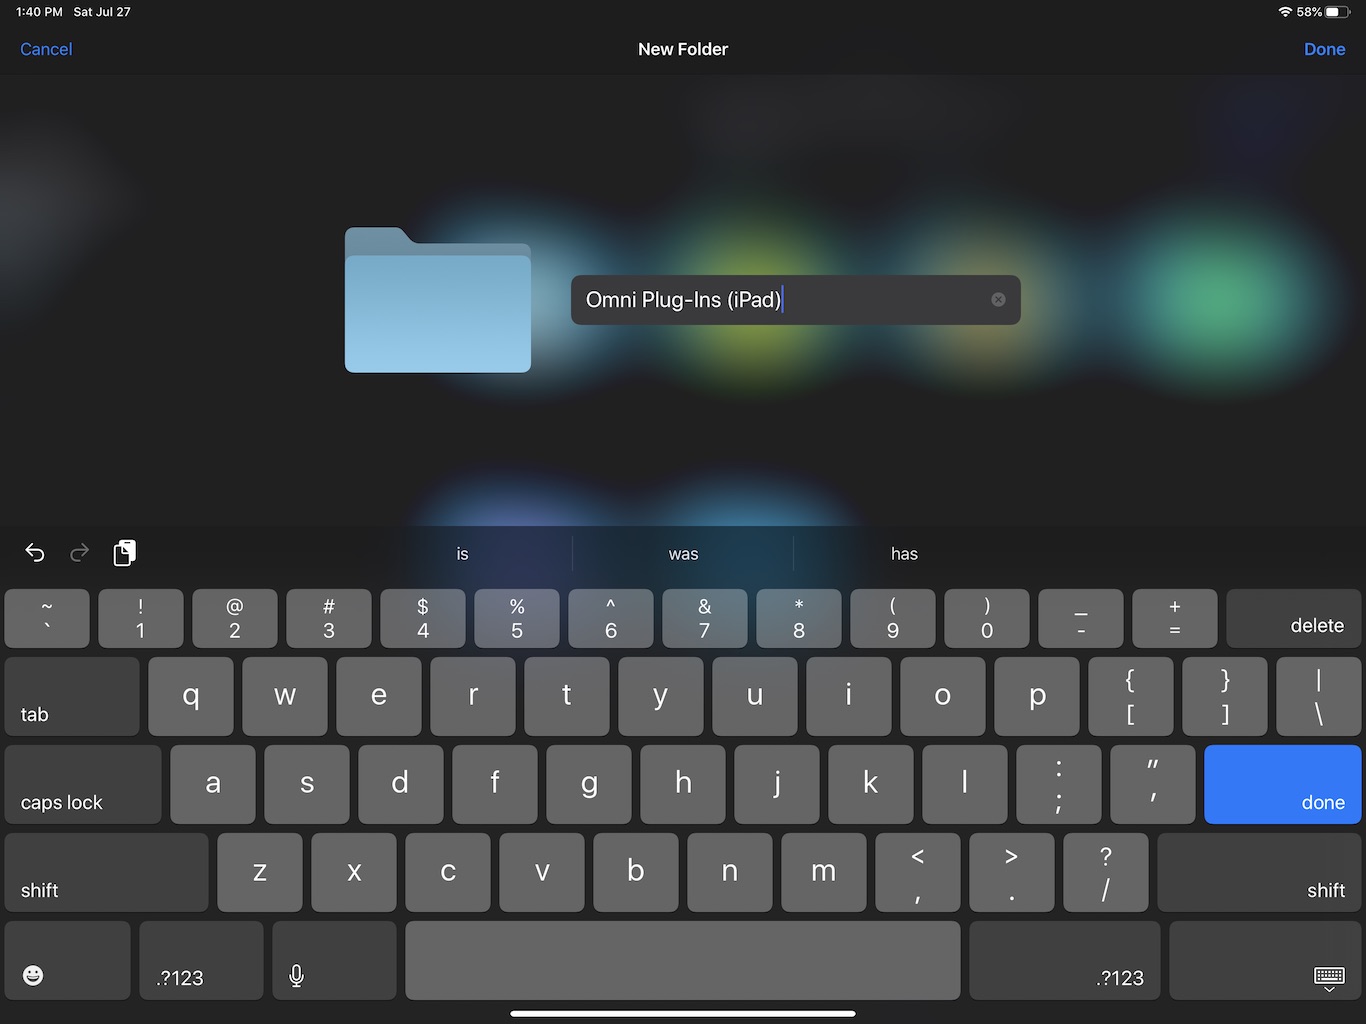
| DO THIS ► | In the naming sheet, enter the name for the new folder, for example: Omni Plug-Ins (iPad) |
The newly named folder is created on the iPad:
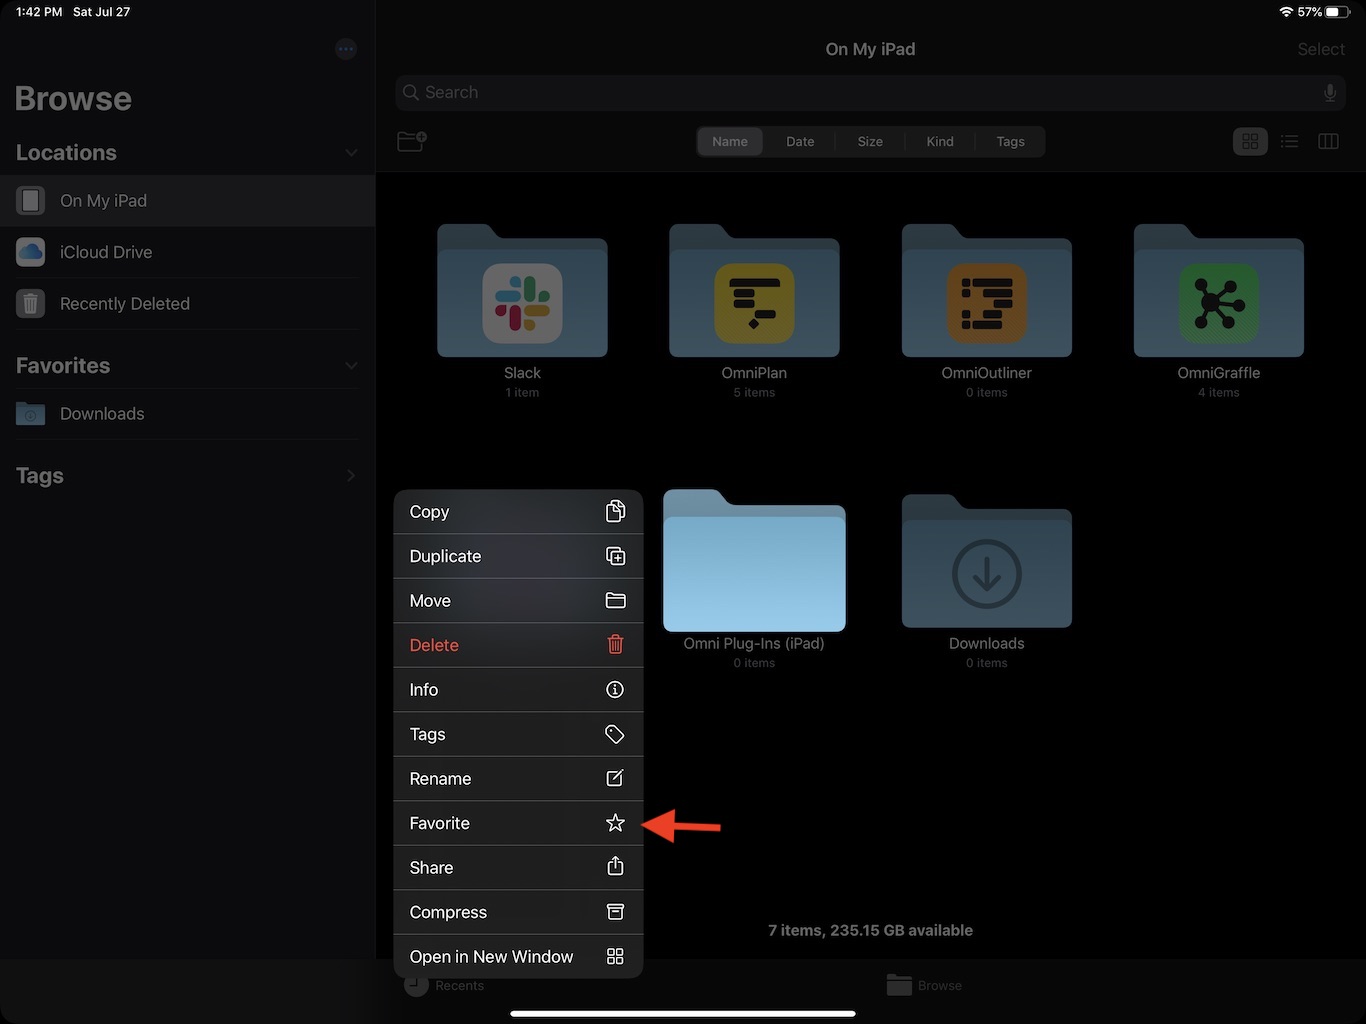
For the sake of providing convenient access to the created folder, let’s add it to the Favorites section in the Files sidebar.
| DO THIS ► | Long-press the created folder until the contextual menu appears. Then tap the Favorite menu item to add the folder to the Favorites section in the sidebar. |
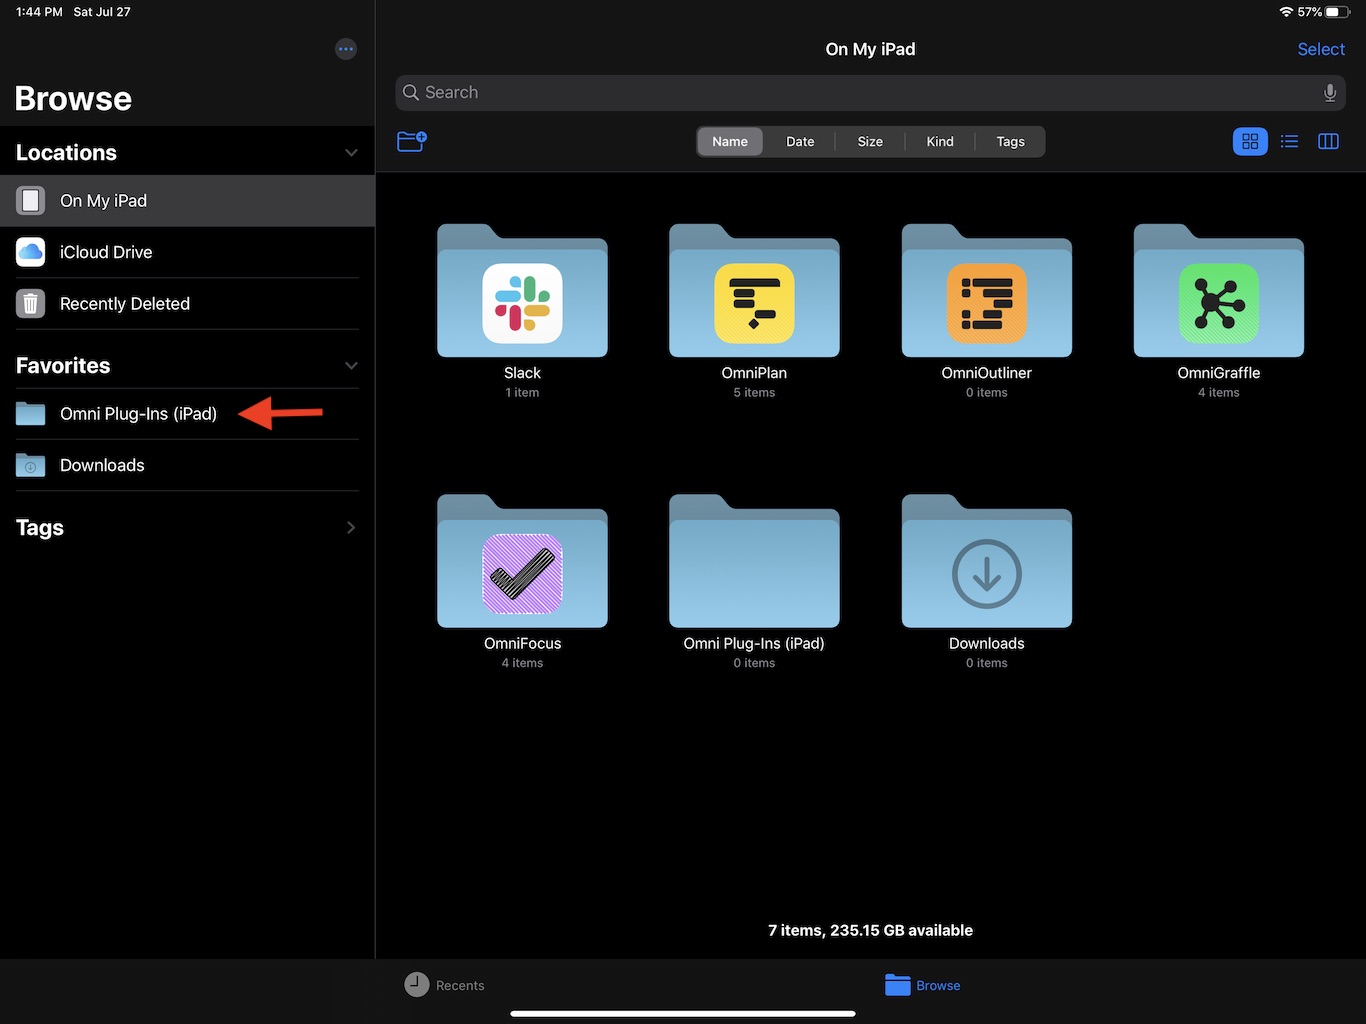
Once the Favorite menu item is chosen, the folder will be added to the Favorites section of the Files sidebar:
Now that the Plug-Ins folder has been created, we need to designate it as a plug-in source folder for each of the installed Omni apps. For the purposes of example, the following illustrations will show the linking process from within OmniFocus.
| DO THIS ► | From with the Omni app, select “Configure Plug-Ins” from the Automation menu to summon the Plug-In Management sheet: |
The Plug-In Management sheet will be displayed, listing all plug-in source directories and installed plug-ins.
An option for adding another source directory (linked folder) will be available:
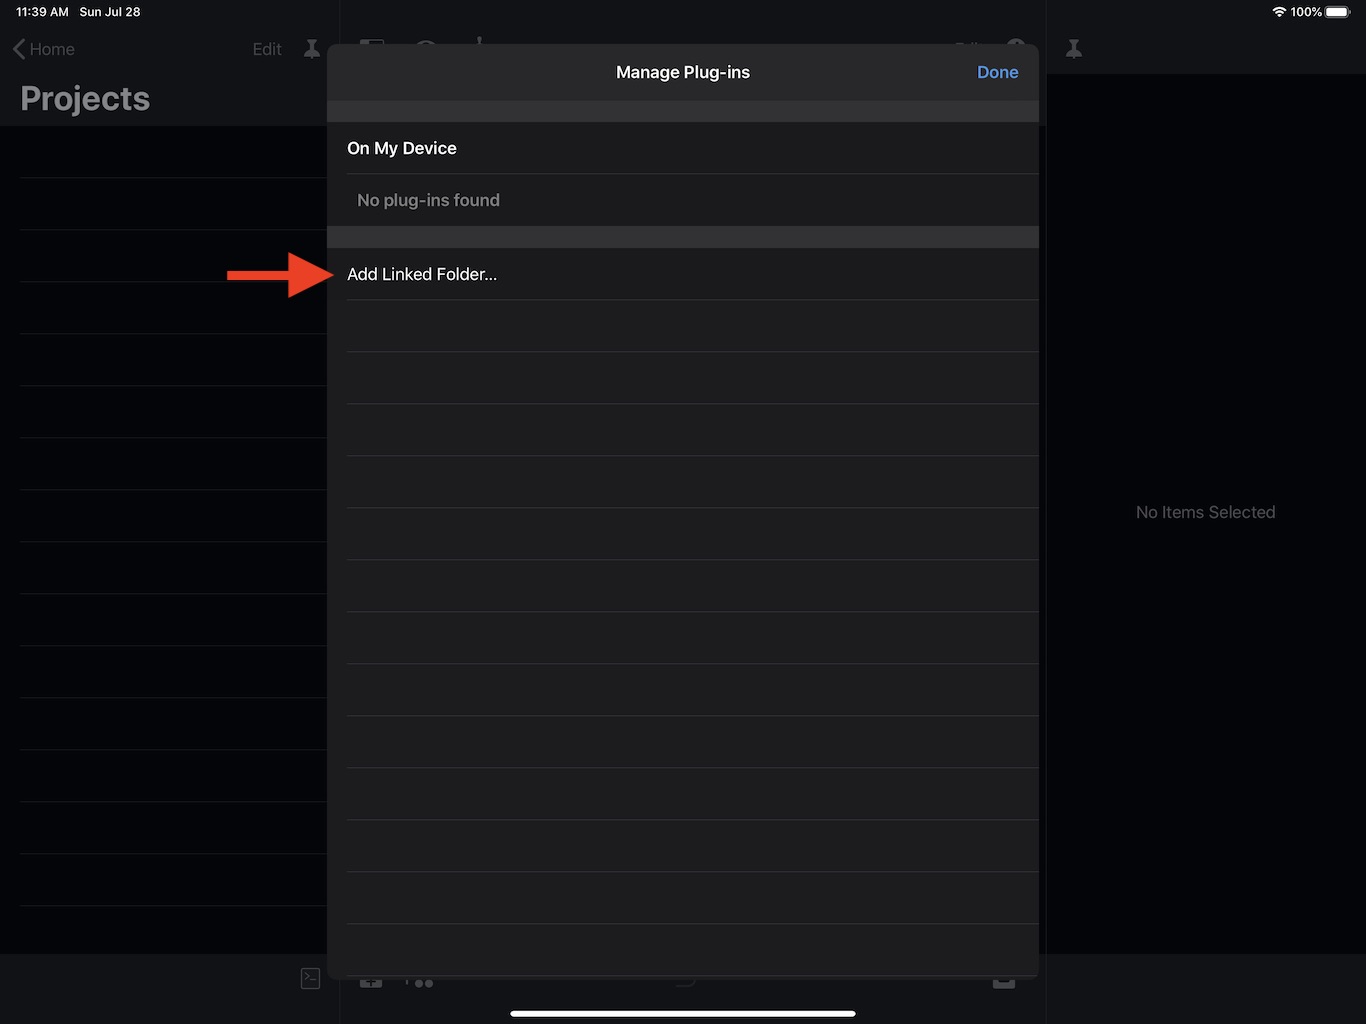
| DO THIS ► | Tap the “Add Linked Folder…” button to display a folder picker view in the sheet: |
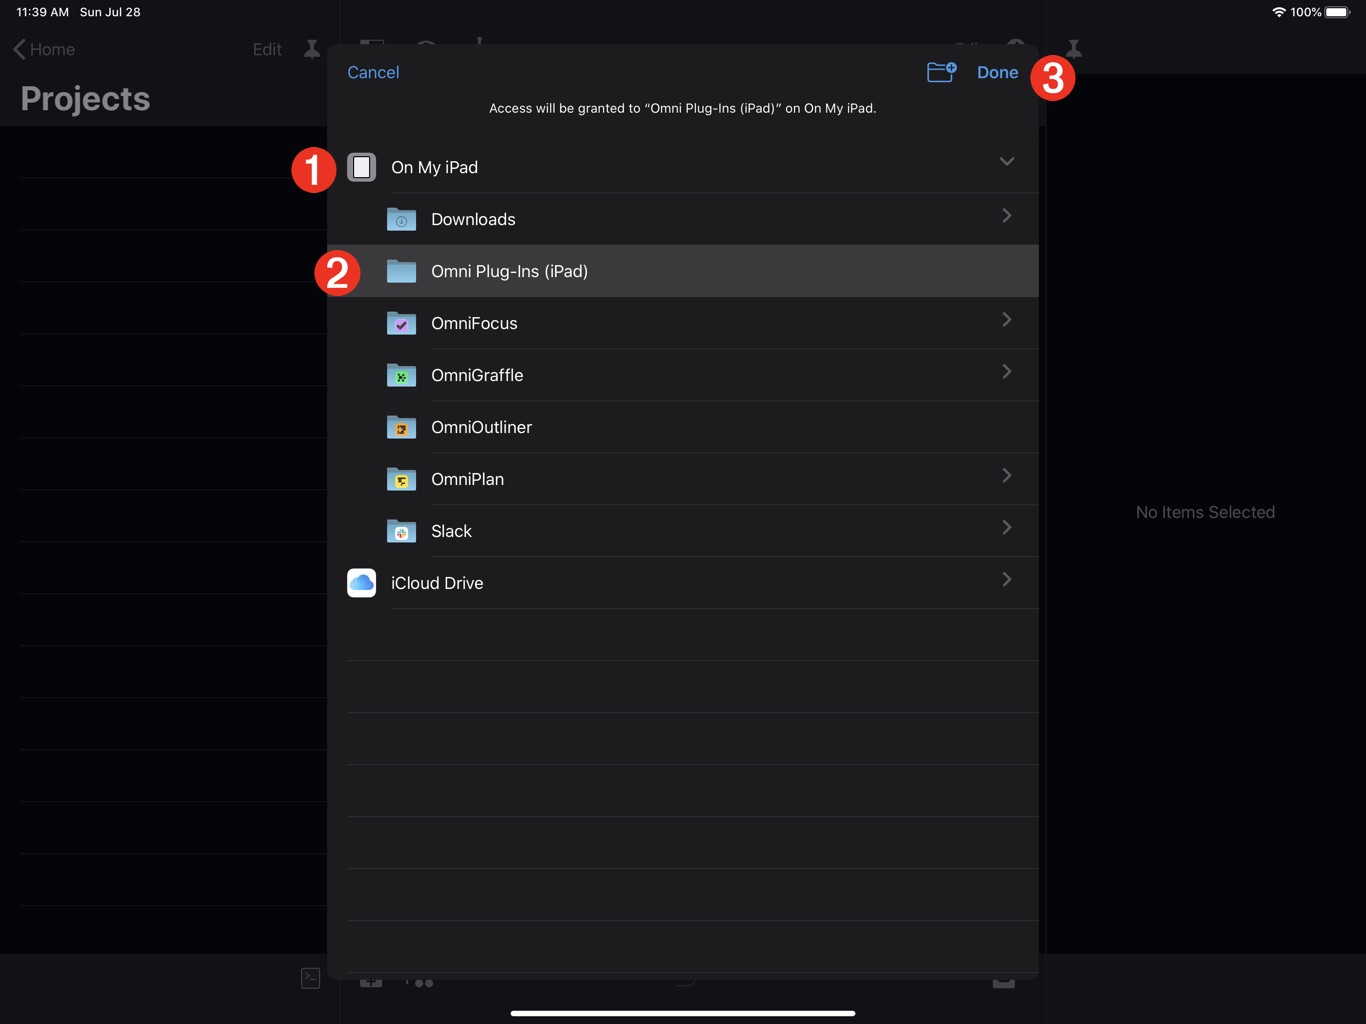
1 The current location (On My iPad) displayed in the Files app
2 The previously created plug-ins folder
3 The Done button for accepting the currently selected directory as the chosen item
| DO THIS ► | To designate the created folder as a plug-in source directory, select the folder and tap the “Done” button. |
The folder picker view will be dismissed and the chosen directory will now appear as a linked source folder in the Plug-Ins Management sheet:
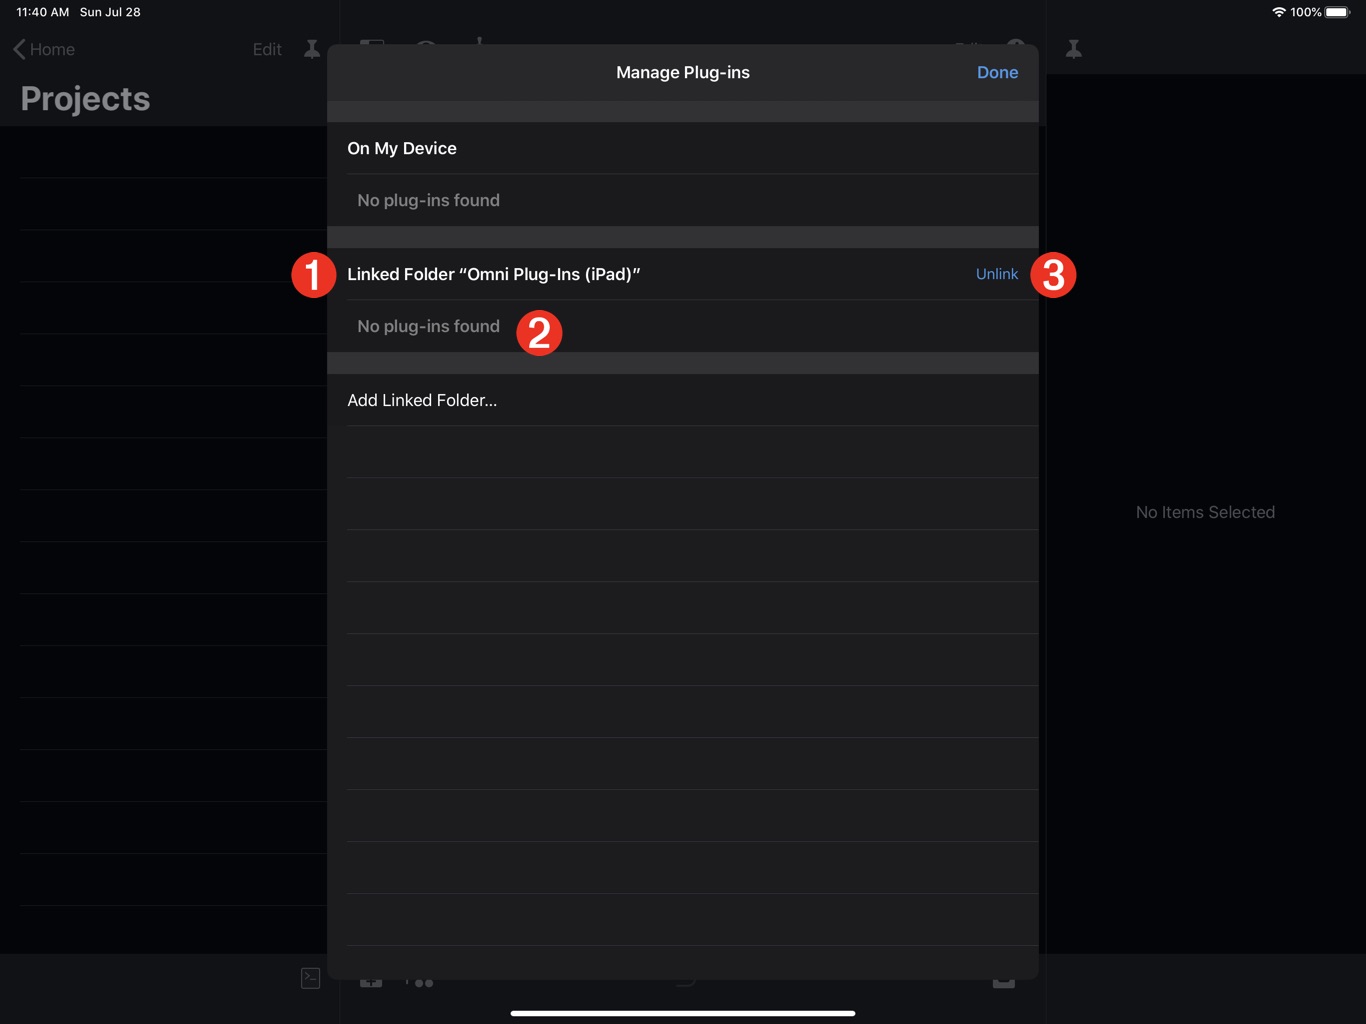
1 The new plug-in source directory (Linked Folder)
2 Any Omni Automation actions placed within the source folder and targeting the host Omni application, will be listed below the Linked Folder item.
3 An “Unlink” button for removing the linked folder as a plug-in source. NOTE: un-linking a folder will not effect it or its contents.
Omni Automation plug-in bundles or files placed within the designated plug-in source folder (Linked Folder):
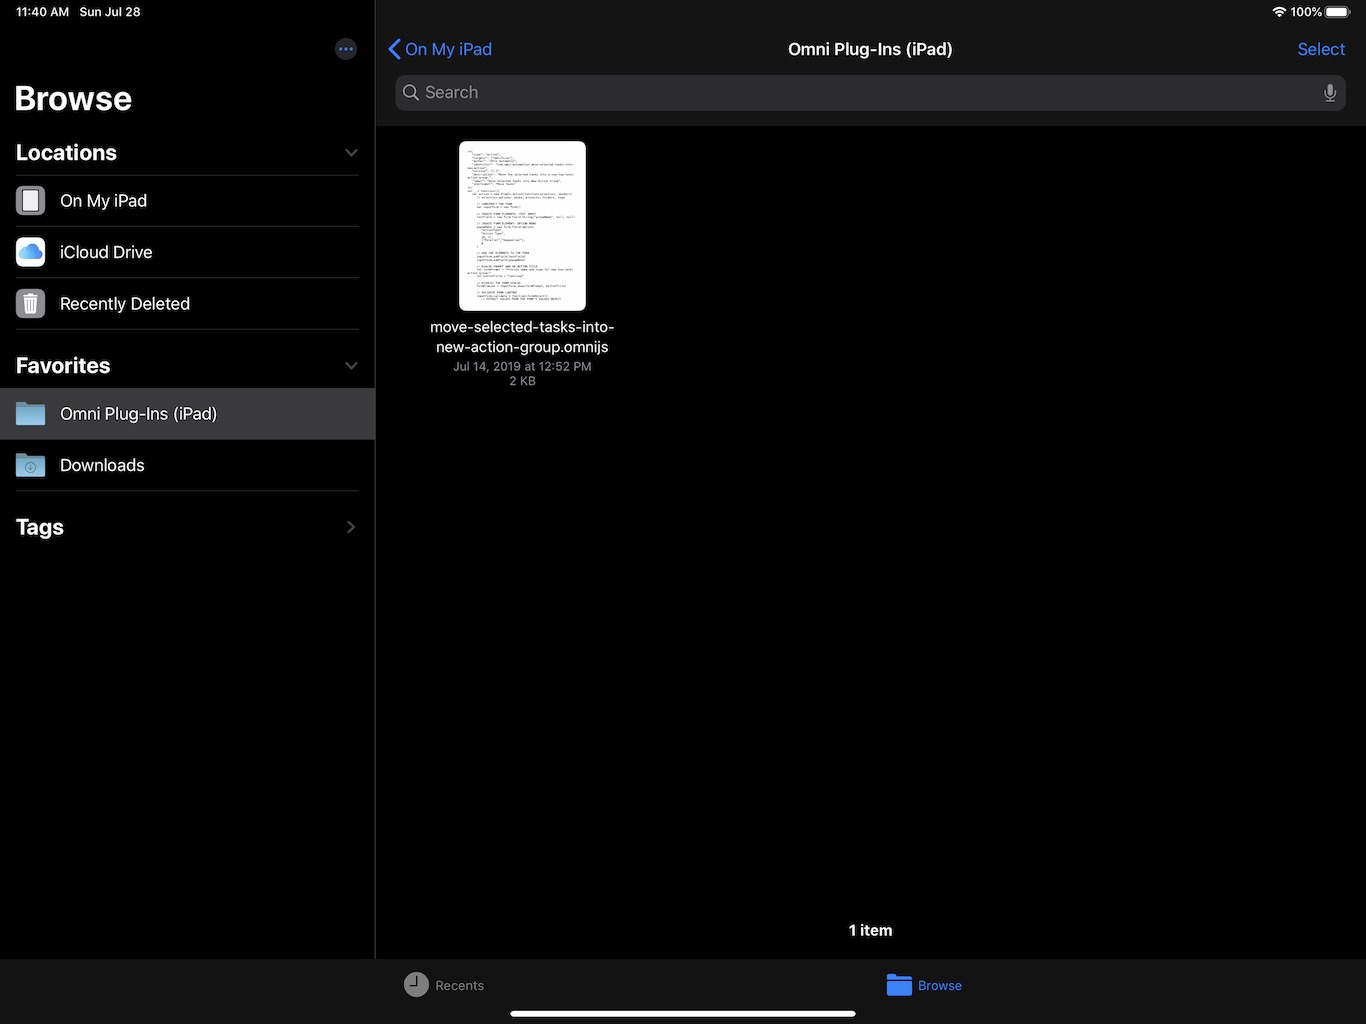
Will appear in the Plug-In Management sheet:
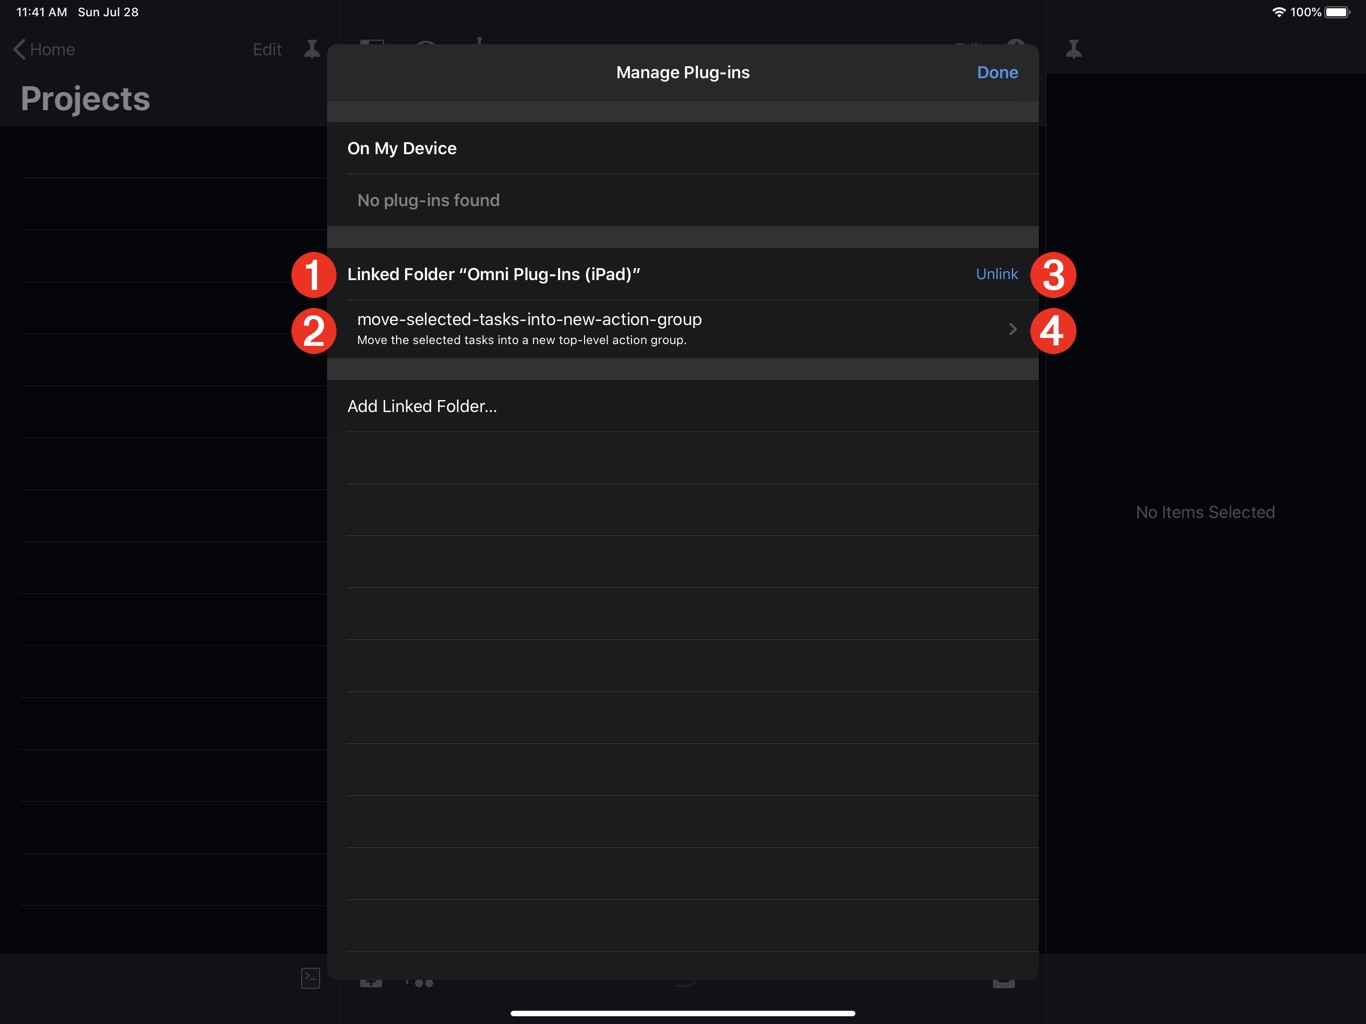
1 The new plug-in source directory (Linked Folder)
2 An Omni Automation action targeting the host Omni application (OmniFocus) placed within the linked source folder.
3 An “Unlink” button for removing the linked folder as a plug-in source. NOTE: un-linking a folder will not effect it or its contents.
4 Button for revealing the selected action’s metadata..
| DO THIS ► | Tap the arrow button 4 to display the selected plug-in’s metadata (details) in a slide-over sheet. |
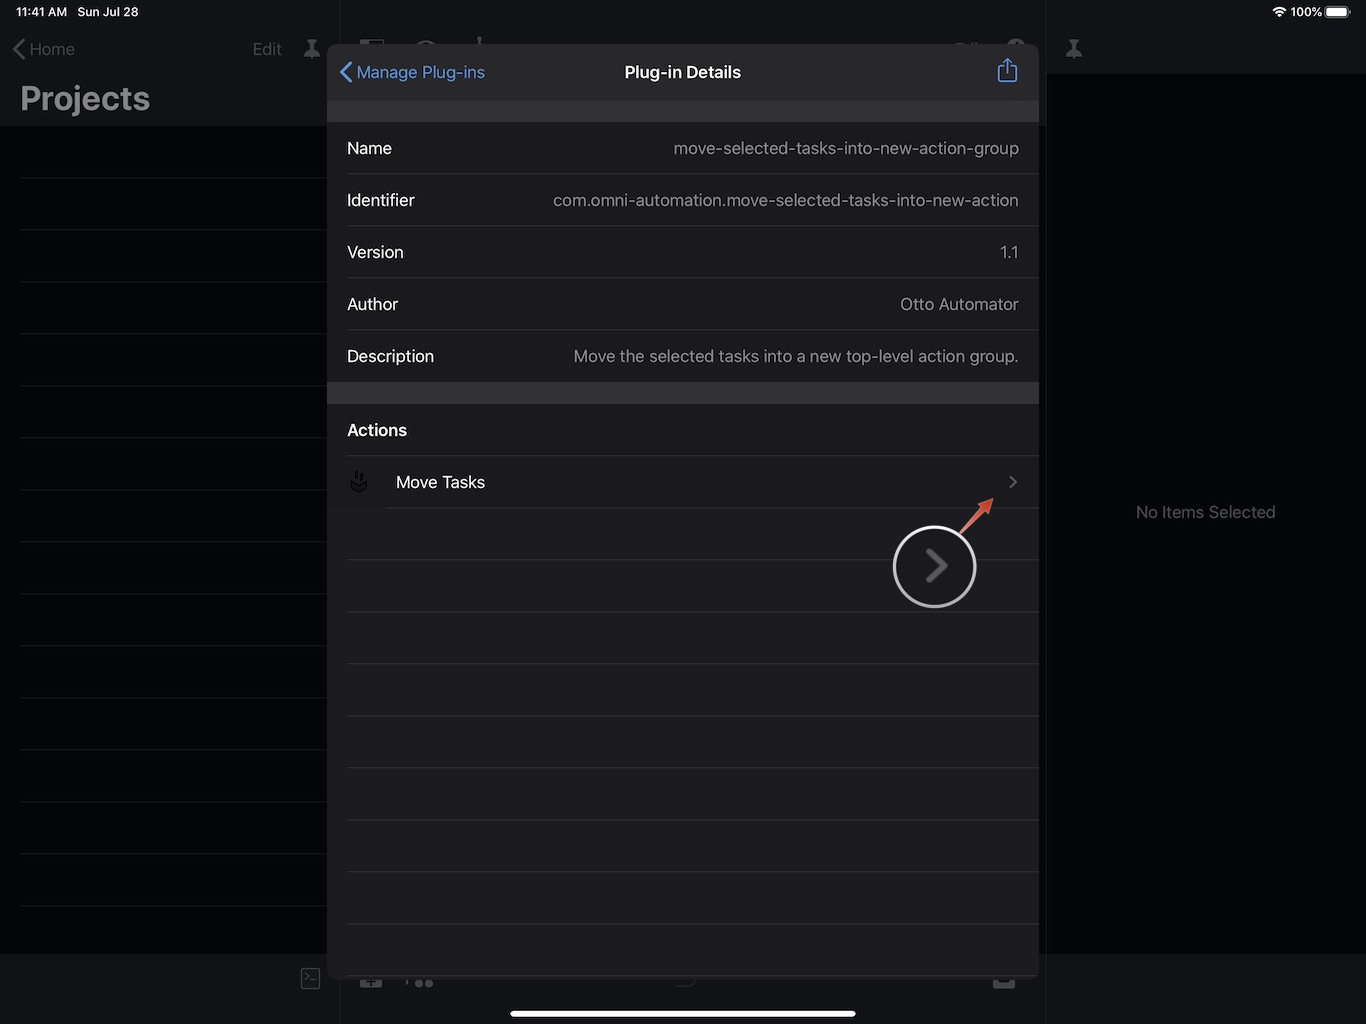
The action’s metadata may include: file name, identifier, version, author, and description.
| DO THIS ► | To optionally assign a keystroke shortcut to the installed action, tap the arrow button (>) at the right of the name of the installed action to reveal the key assignment interface for that action: |

The installed Omni Automation action will be displayed in the host application’s Automation menu, and may be executed when appropriate: