The Omni Automation Console
In order to provide the user with the ability to directly interact with the Omni Automation frameworks, each Omni application includes an Automation Console window in which JavaScript scripts can be entered and executed (run).
In addition, an application’s Automation Console window can be used to view the extensive Automation API Reference for each application. The API (Application Programming Interface) documentation details each class (object), property, and function available for use in querying and controlling the application and its elements.
This section of the Tutorial demonstrates how to access the Automation Menu, the Automation Console, the Automation API Reference (Scripting Dictionary), and how to enter and execute script commands and queries.
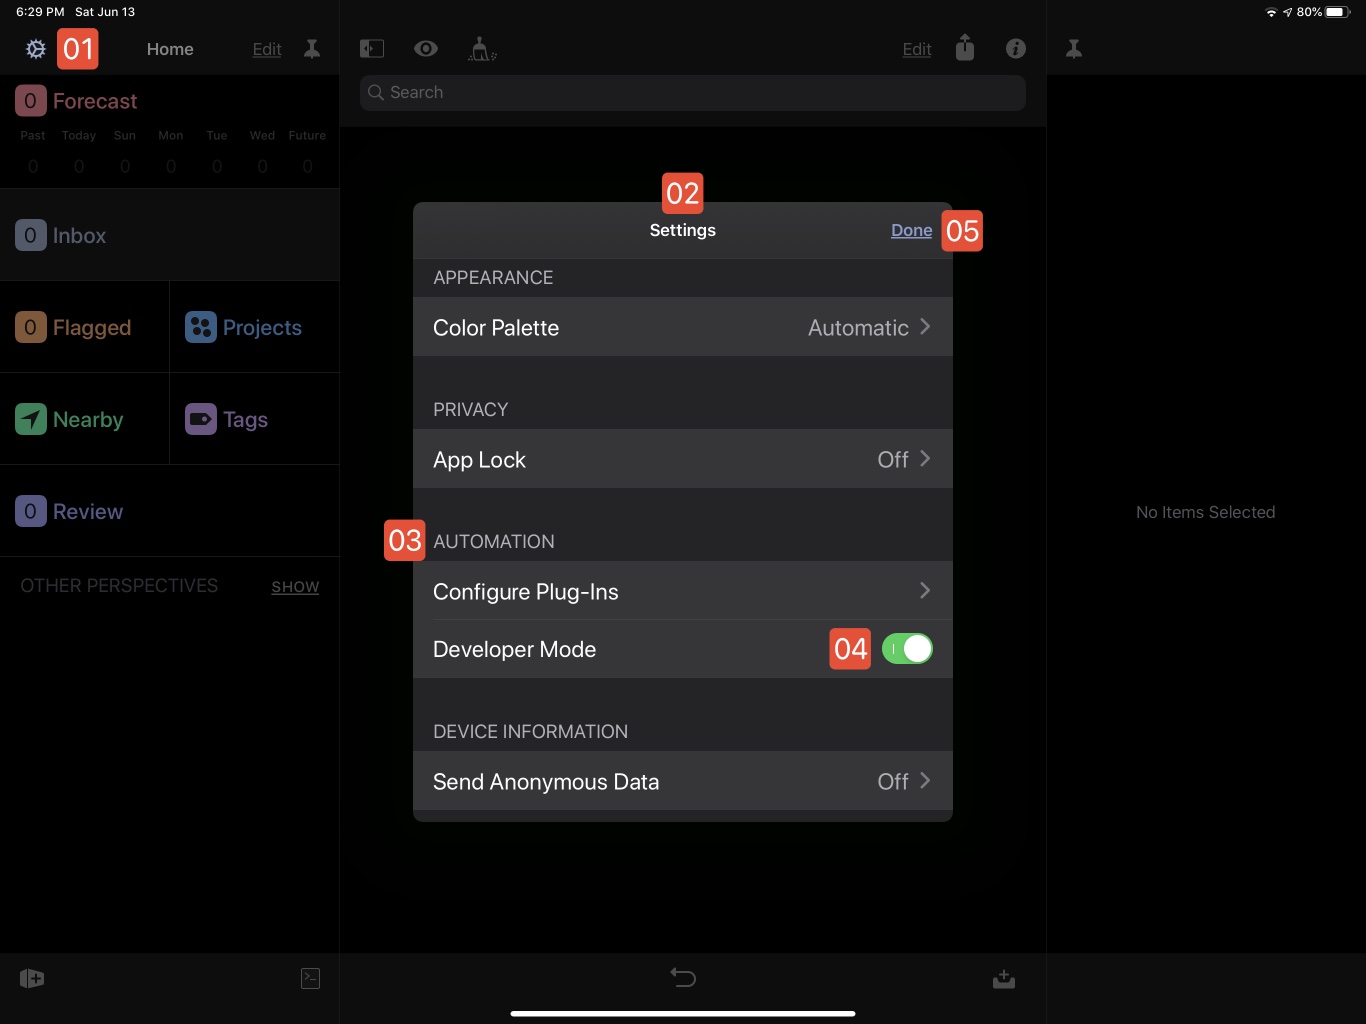
Enable “Developer Mode”
Although Omni Automation is built into every instance of the OmniFocus application, on iPadOS the tools for writing and running scripts are hidden by default. However, access to the automaton tools are easily enabled within the OmniFocus preferences.
| DO THIS ► | (see below) At the top-left of the OmniFocus window, tap the gear icon 01 to summon the modal Settings dialog 02 . Scroll the view to the Automation section 03 and activate the Developer Mode switch 04 which will show as green when “Developer Mode” is “on.” Tap the Done button 05 to close the Settings dialog. |
Once Developer Mode has been activated, the button for accessing the Automation Menu will be displayed at the bottom-left of the OmniFocus window.
In addition to listing any user-installed Omni Automation plug-ins, the Automation Menu also provides menu items for accessing:
Automation Console
Automation API Reference
Configure Plug-Ins Management Controls
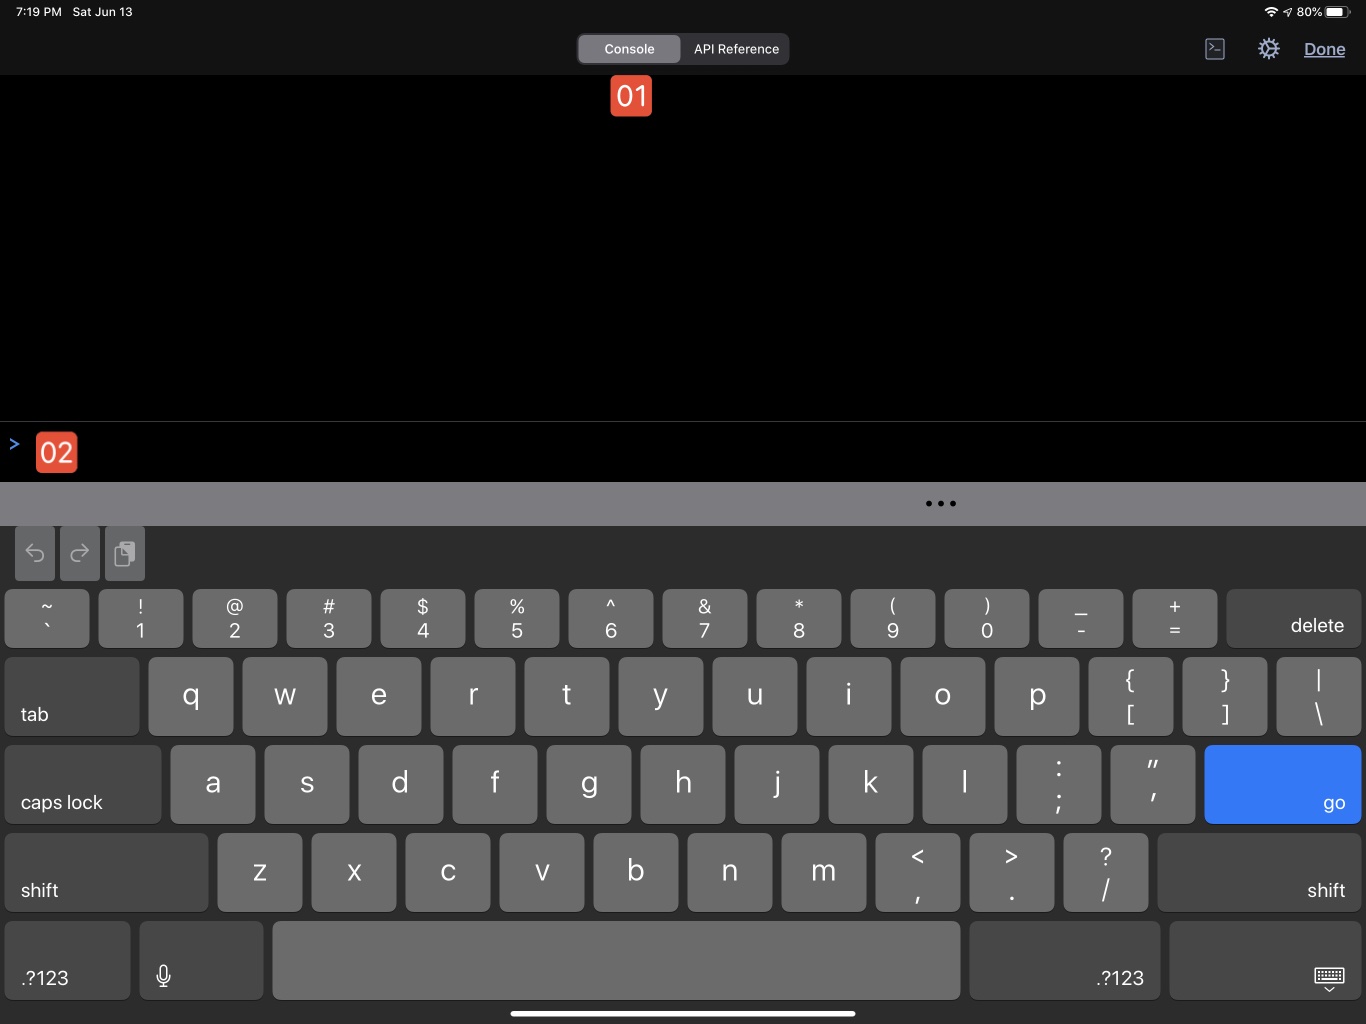
| DO THIS ► | (see below) To summon the Automation Console window, tap the Automation Menu icon 01 at the bottom-left of the OmniFocus window, and in the forthcoming popup menu, select the Automation Console 02 menu item. |

The Console/API Window
The Automation Console will be displayed as a sheet overlaying the main OmniFocus window. Here are some of the essential controls:
1 Code Input Field • (see below) The JavaScript code of the Omni Automation scripts is entered in this field. NOTE: If the host device is not connected to keyboard hardware, such as the Apple Magic Keyboard, the iPadOS on-screen keyboard will be displayed when this field is active.
2 Results Pane • The executed statements and their results are displayed in sequence of execution in this pane. The most recent script results are at the bottom of this pane, just above the input field.
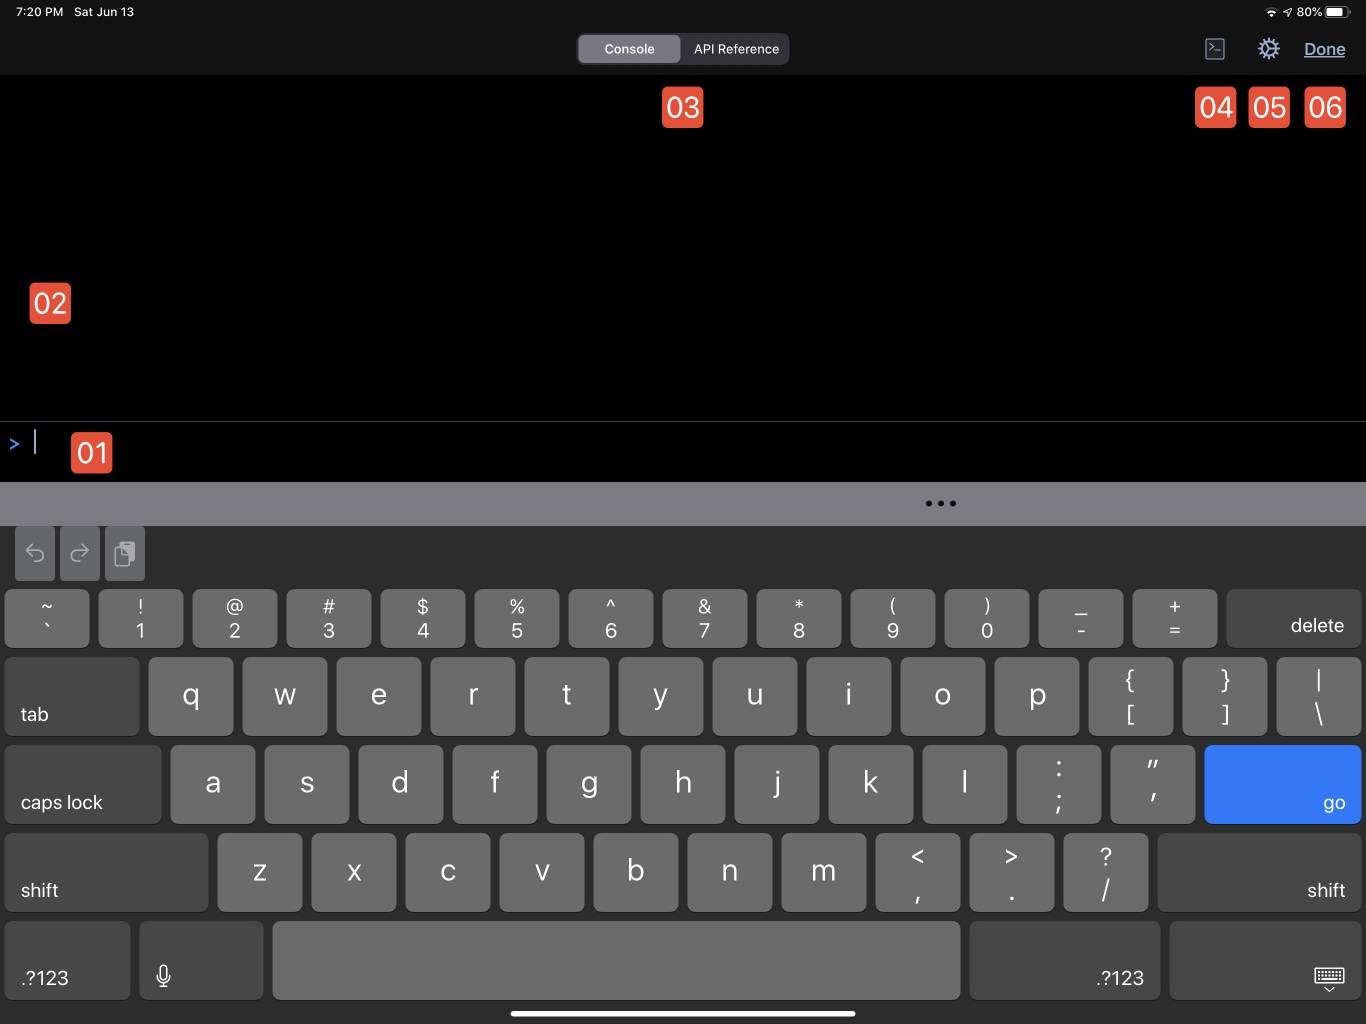
3 Content View Tabs • This control is used to determine the contents of the overlay window: either the code console or the API reference documentation.
4 Automation Menu • This instance of the Automation Menu provides access to the controls for plug-in management as well as any installed Omni Automation plug-ins.
5 Automation Console Preferences • The display preference settings and clearing control for the Automation Console.
6 Close Button • TAP|CLICK the Done button to dismiss the console sheet. Note that dismissing the sheet does not clear the contents of the window.
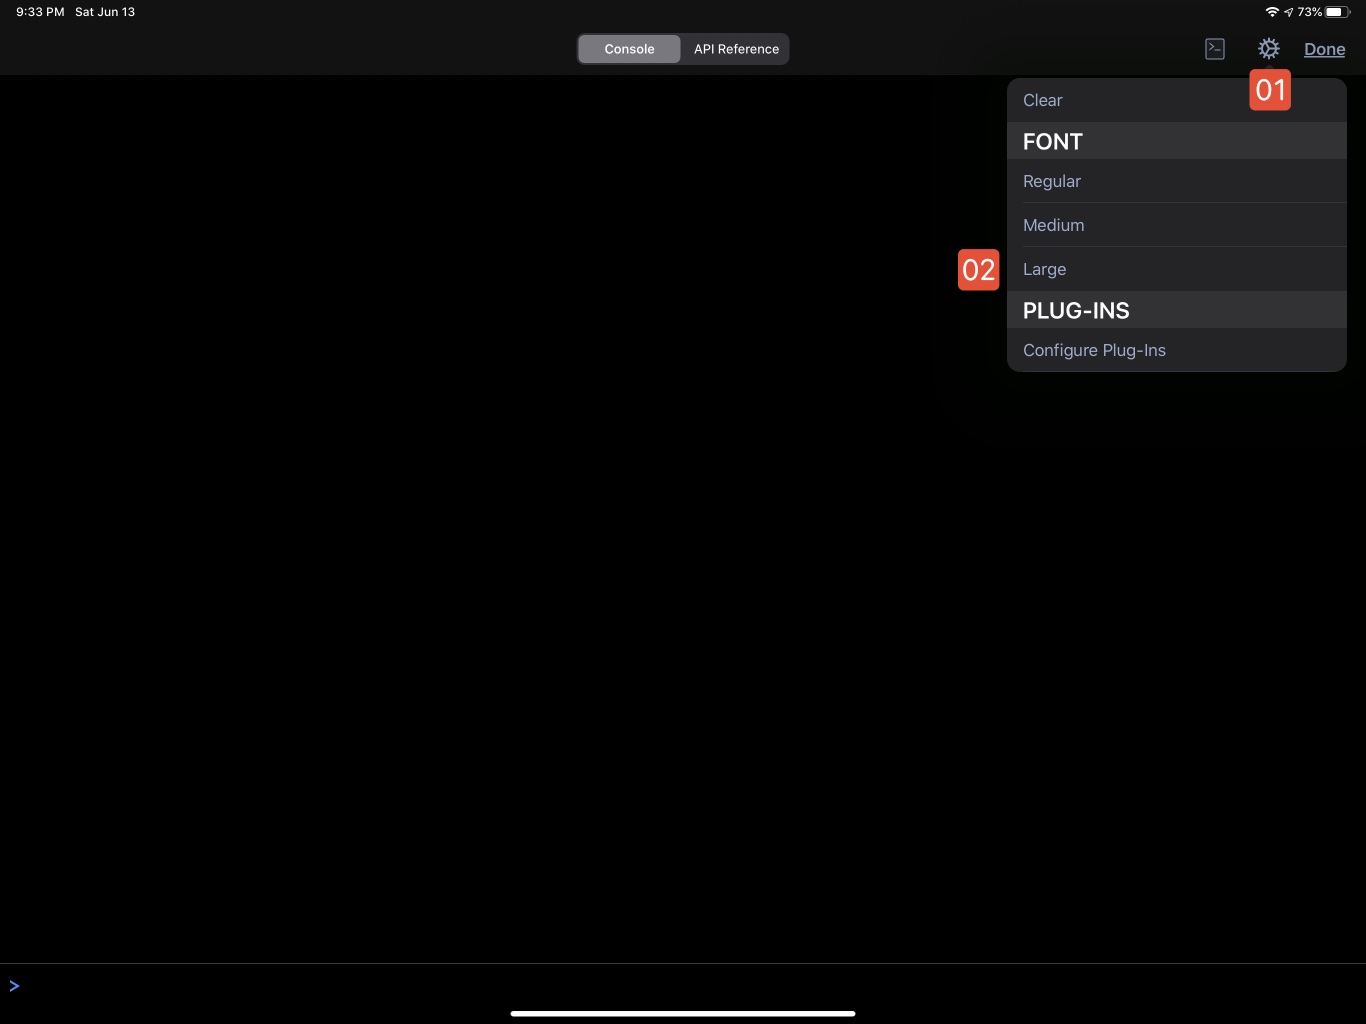
With the console displayed, let’s set the default text size for code and documentation displayed in the console/API window:
| DO THIS ► | (see below) To adjust the size of the text display in the console window, tap the Automation Console Preferences gear icon 01 to reveal the menu and then tap the menu item for setting text display size to Large 02 |
With the text size preference set, let’s switch the window display to the API Reference and discover application properties we can use with scripts entered into the console:
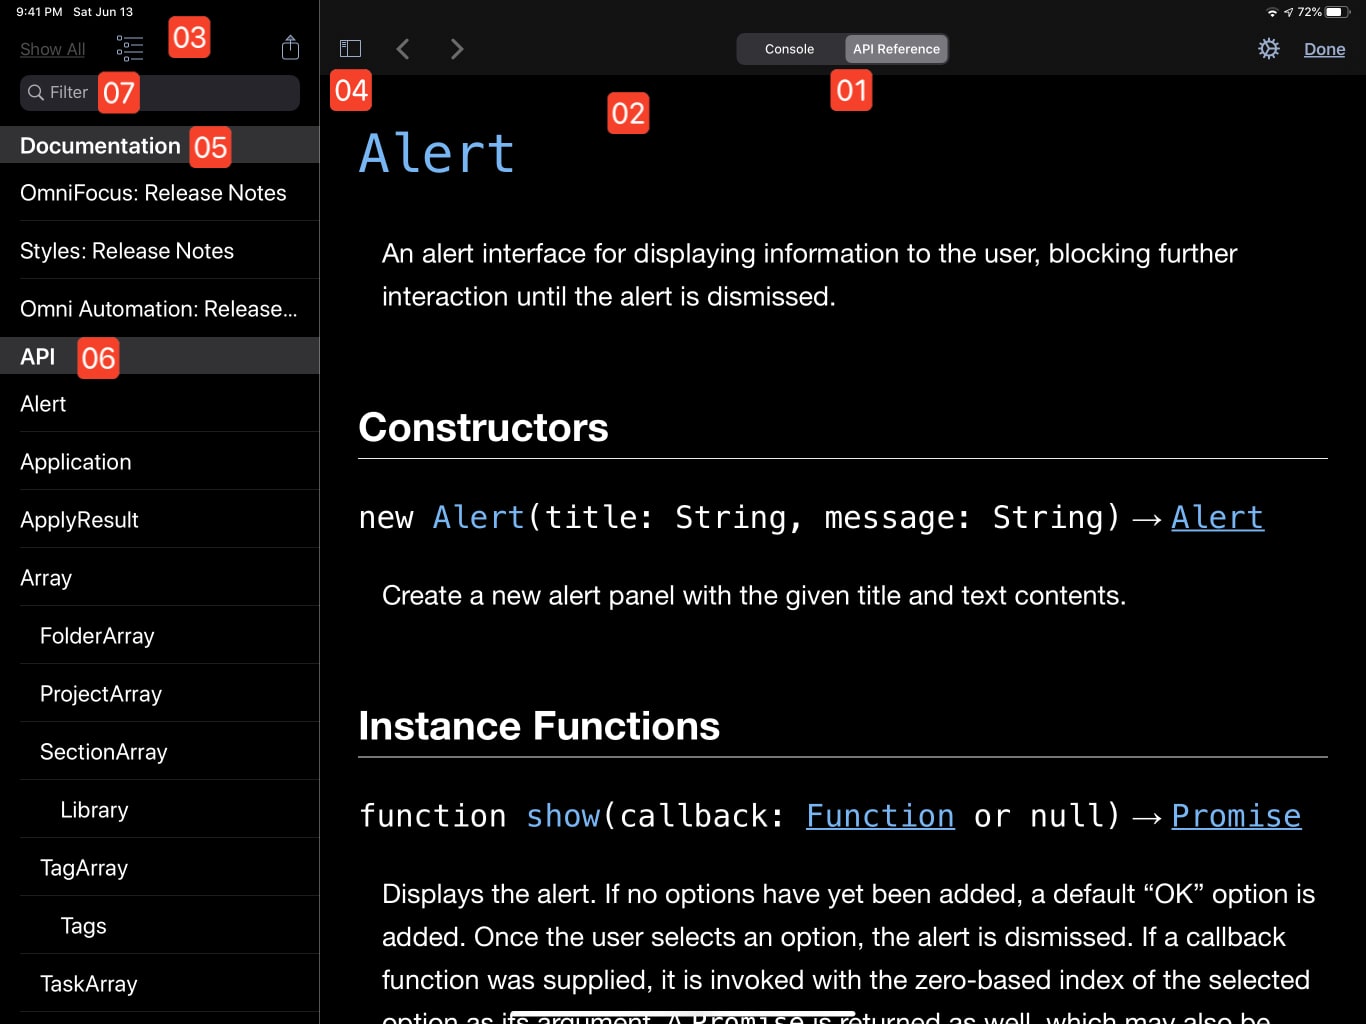
| DO THIS ► | (see below) To display the OmniFocus scripting documentation, TAP|CLICK the “API Reference” tab in the Content View Tabs control 01 and the API Reference documentation will be displayed in the sheet window. |
The API Reference materials are displayed in two panes: (see below)
2 API Documentation • The documentation view displays scrollable content for the item or section chosen in the TOC Sidebar.
3 TOC Sidebar • The display of Table of Contents Sidebar is managed using the Sidebar View Toggle 04 and displays sections for the release notes 05 and the API documentation 06 . In addition, there is an input field 07 to filter the displayed content based upon the keywords entered into the field.
4 Sidebar View Toggle • This control is used to Show|Hide the TOC Sidebar.
Let’s explore the application object in the API Reference and use some of its properties in the console:
| DO THIS ► | (see below) In the API section of the TOC Sidebar, tap the Application class entry 01 to reveal its definition and related properties 02 such as 03 name, buildVersion, userVersion, and platformName. |

Note that the application class object has four properties that are not related to keyboard keys: name, platformName, buildVersion, and userVersion. Each of these properties has a value that is expressed as either a String class instance (text) or as a Version class instance. Let’s use the console to extract the current value of these application properties.
| DO THIS ► | (see below) TAP|CLICK the “Console” Content View Tab 01 to switch the window to console mode. Next, TAP|CLICK in the code input field 02 to make the console ready for entering scripting code. |
| DO THIS ► | (see below) In the code input field 01 enter the first two characters of the term “application” — “a” and “p” |
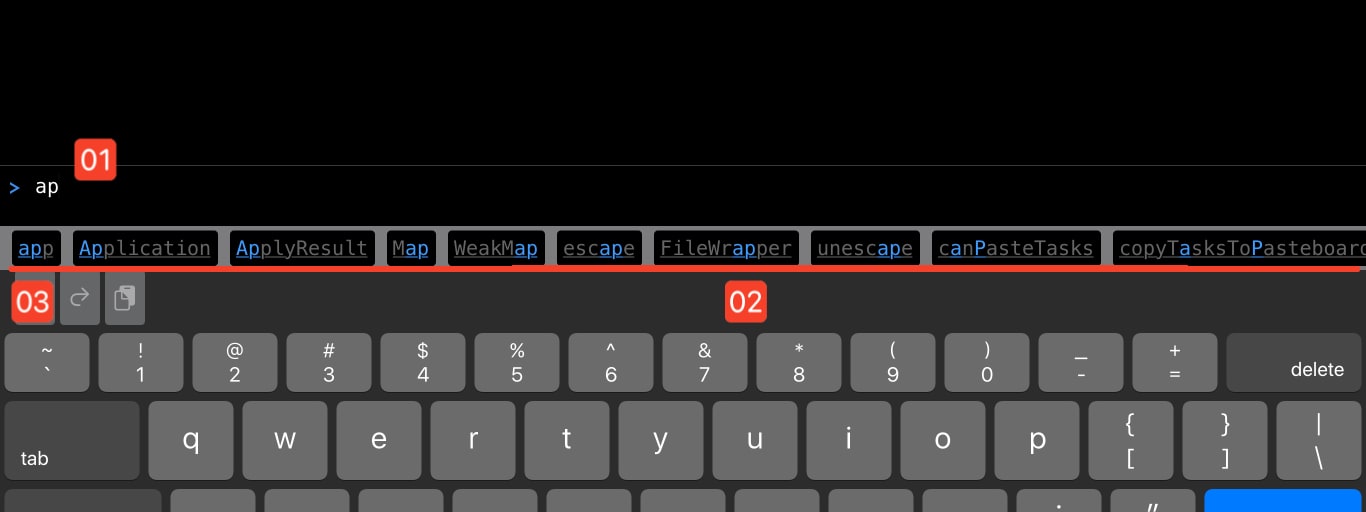
Notice how the area below the input field now displays possible code completion instances for the entered text 02 (for emphasis it’s been underlined in red).
| DO THIS ► | (see above) TAP|CLICK the first code completion instance “app” 03 which is used in Omni Automation to represent the Application object in scripts. Once the code completion button is activated, the corresponding code will entered in the console. |
Next, we’ll extract the current value for the name property that was listed as the first of three instance properties of the Application class in the API Reference.
| DO THIS ► | (see below) To specify a property of the Application object, follow the “app” entry with a period and then type the first two characters of the property: “n” and “a” |
(see below) The code completion buttons 02 will now include one for the name property.
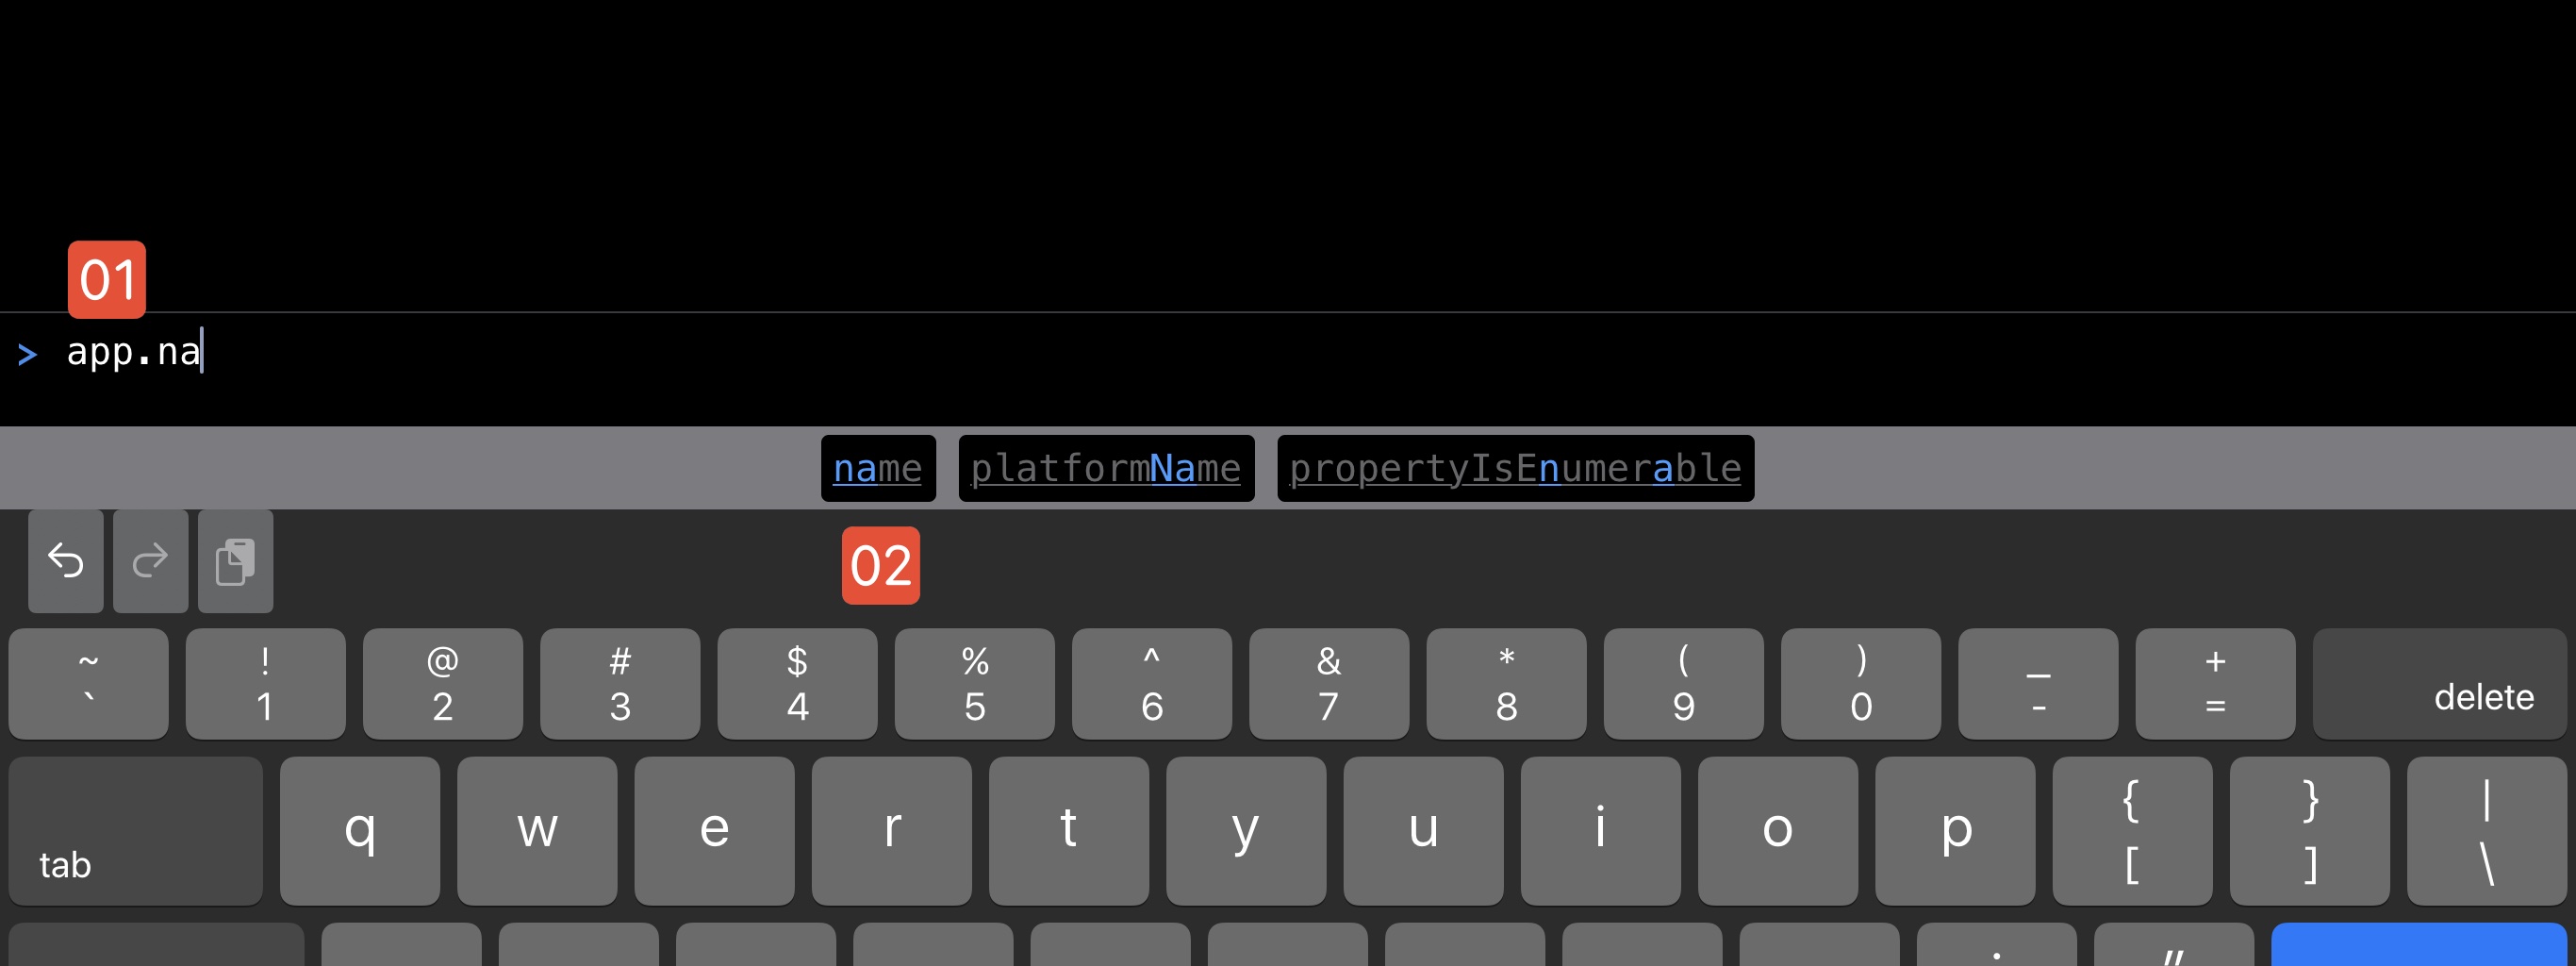
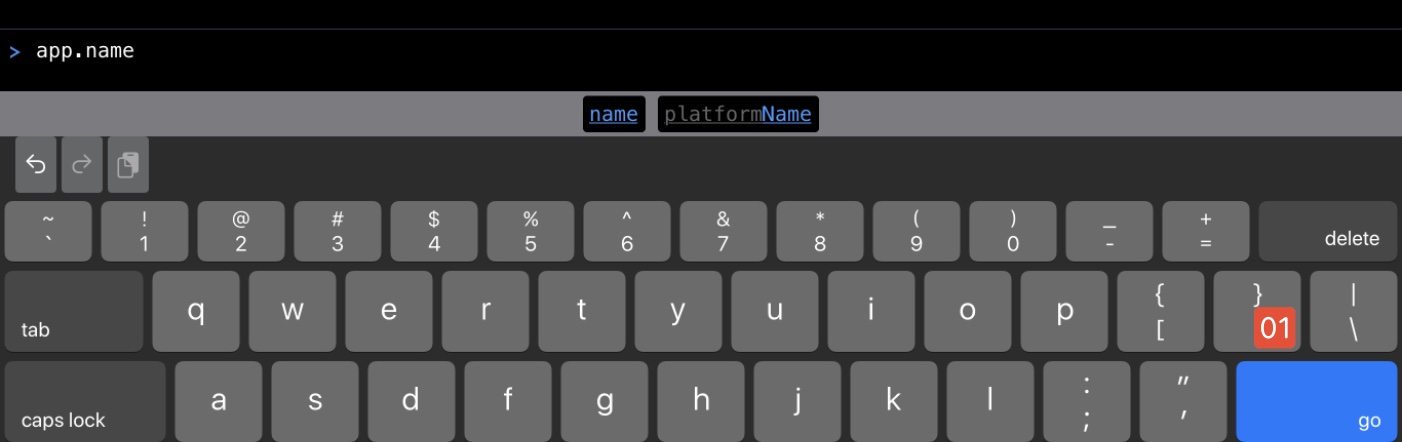
| DO THIS ► | (see above) TAP|CLICK the code completion button 02 and the complete property title will be entered in the code input field (see below). To submit (run) the script, simply TAP|CLICK the Return key 01 . (see below) |
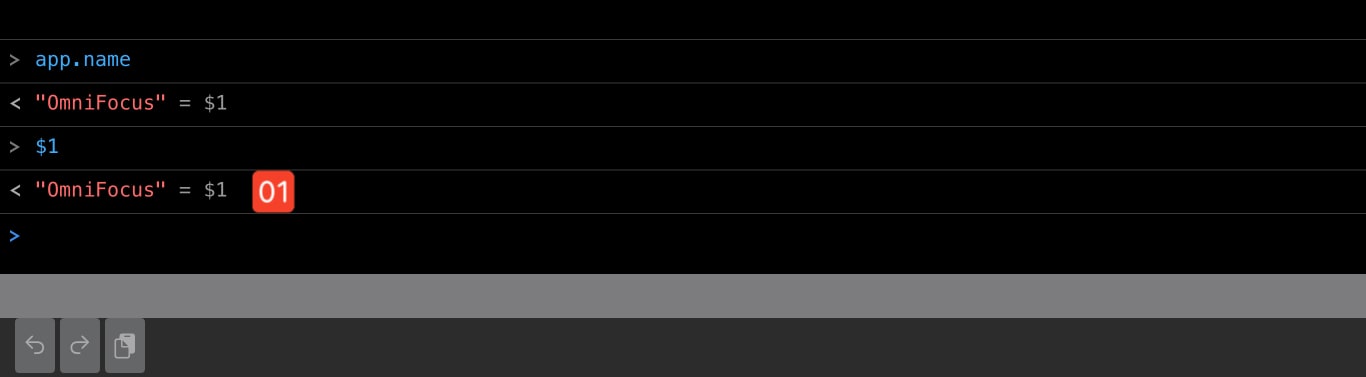
(see below) The console results pane shows a history of every command and result entered in the console window, and it will now display both the entered command app.name ( entries are preceded by >) and the command’s result "OmniFocus" = $1 (results are preceded by <)

Note that the result is composed of two elements:
The result 01 which in this example is the text string: "OmniFocus"
An assigned history variable 02 which in this example is: $1 The equal sign (=) simply means what it implies: that the history variable represents the resulting object.
History variables represent returned objects which are the result of the execution of script statements. you can use them when you are writing and testing Omni Automation scripts in the console as a shortcut to returning to previously derived objects or values.
| DO THIS ► | (see below) To prove that history variables represent and retain the resulting values of their corresponding script statements, enter the variable $1 in the console and TAP|CLICK the Return key. |
The value stored in the variable will be entered in the results pane. 01
NOTE: It is important to remember is that history variables represent returned objects or results and can be used in their place elsewhere in your scripts.
Let’s continue to retrieve the values of the other Application class properties (platformName, and version) and then put the results all together by using their corresponding history variables.
| DO THIS ► | (see below) Enter and execute similar statements for retrieving the values of the other Application class properties:
|
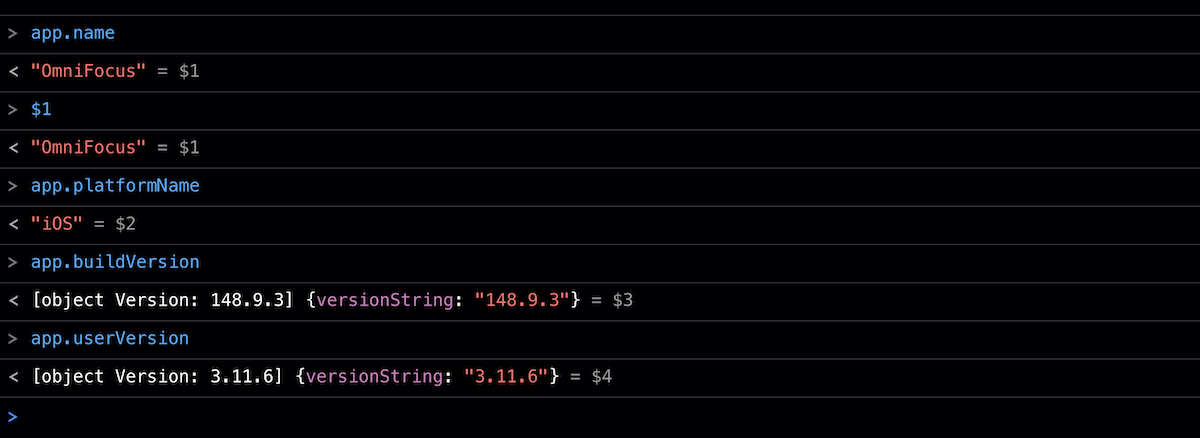
(see above) Notice how the numeric identifier of the assigned variables (the number after the dollar sign $3) is incremented for each new script statement.
Also note that the value of the version properties is an instance of the Version class, returned as a [JavaScript Object Reference] and a {properties record} containing a single property named versionString.
Next, let’s combined the generated history variables into a single string.
| DO THIS ► | Enter the following statement that places the history variables in an array, and then applies the join(…) function to the array to add a space between the value of each variable:
|
(see below) The result of the script statement is string 01 that combines the values of all of the properties:
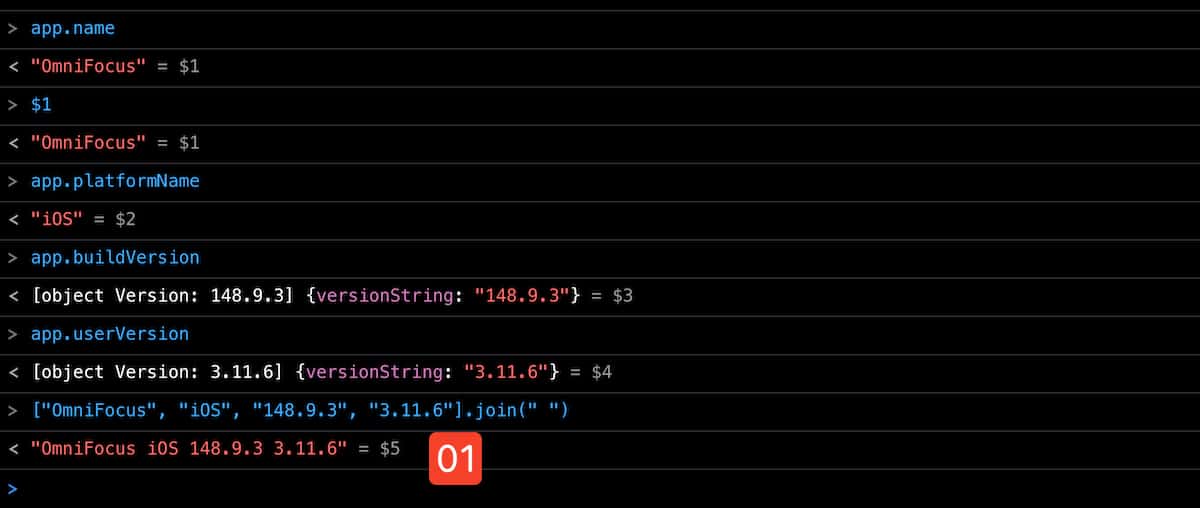
"OmniFocus iOS 148.9.3 3.11.6"
| DO THIS ► | And to close out this initial look at the console, we’ll clear the contents of the console window by entering and executing the clear() function with the Console class:
|
(see below) The result will be an empty console window:
Summary
In this section you learned:
How to activate “Developer Mode” in order to gain access to the Automation Console, Automation API Reference, the Automation Menu, and the dialog for Configuring Plug-Ins Management Controls
How to access the API and use the provided information to access the values of the properties of the Application class.
How to use code completion instances in the console toolbar.
In the next section, we’ll create and modify tasks in the OmniFocus Inbox.