Text
OmniFocus projects and tasks contain an element for storing and displaying text content, the note, whose text contents are accessed through the note property of the Project and Task classes.
note (String) • The Task’s note.
note (String) • The Project’s root Task’s note.
The value or contents of the note property is text in an unaltered or “plain” format, instances of the String class.
While the value of the note property can be both read and written by scripts, any editing of the Note contents must be done by the script (using JavaScript functions) outside of the note container and then the entire existing Note content is replaced by the altered version.
Editing Note Plain Text (Strings)
task = document.windows[0].selection.tasks[0])noteContent = task.note//--> "How Now Brown Cow"newContent = noteContent.replace("Brown", "Green")task.note = newContenttask.note//--> "How Now Green Cow"
In addition to the lack of formatting and styling, another limitation of plain text (Strings) is the use of links embedded within the text of the note. The plain text strings of the note property do not support link attachments, where the URL of the link is not displayed along with the link title, but is activated when the link title is tapped or clicked, like this: OmniFocus Voice Control Collection
Text Objects
Beginning with OmniFocus 4, the textual content of project and task notes supports the standard Rich Text Format (RFT). This means that text in notes can be sized, colored, and styled, and may also contain specialized text objects such as links.
Access to the styled text content of Project and Task notes is provided by the addition of two identical properties:
noteText (Text) • The Task’s note as a rich Text Object.
noteText (Text) • The Project’s root Task’s note as a rich Text Object.
IMPORTANT: These properties do not replace the current note property, but are provided as additional access points to note content.
The value of the the noteText property is a Text Object. Text Objects provide a mechanism for associating formatting data with text strings.
A text object is a container that holds text and related style information, as well as optional references to attachments, and even other text objects.
Creating a Text Object
To create a text object, instantiate an instance of the Text class by providing the text string and the assigned style object. In the example shown below, the style of a specified Project or Task note is used:
new Text(string:String, style:Style) ==> Text Object • Returns a new Text instance with the given string contents and Style applied to the entire range of text.
When the following script example is run in the automation console, the result is an object reference to the created text object followed by a properties record displaying the default property values of the created text object.
Create New Text Object for Note
sel = document.windows[0].selectionitems = sel.databaseObjects.filter(item => (item instanceof Project || item instanceof Task))if(items.length === 1){noteObj = items[0].noteTexttextObj = new Text('How Now Brown Cow', noteObj.style)//--> [object Text] {attachments: [], attributeRuns: [[object Text]], characters: [[object Text], [object Text], [object Text], [object Text], [object Text], [object Text], [object Text], [object Text], [object Text], [object Text], …], end: [object Text.Position], fileWrapper: null, paragraphs: [[object Text]], range: [object Text.Range], sentences: [[object Text]], start: [object Text.Position], string: "How Now Brown Cow", style: [object Style], words: [[object Text], [object Text], [object Text], [object Text]]}task.noteText = textObj}
NOTE: as you can see in the resulting properties record, text objects may contain other text objects.
Text Instance Properties
As with most scriptable objects, a text object has properties whose values can be accessed. However, in the case of text objects, editing the value of a property will not change the displayed text. To change the display of text objects, the Text.Range class will be used as demonstrated later in this section.
attachments (Array of Text Objects r/o) • Returns an array of copies of the blocks of Text in the receiver that represent Attachments. Note that editing these instances will not change the original.
attributeRuns (Array of Text Objects r/o) • Returns an array of copies of the contiguous blocks of Text in the receiver that have the same style. Note that editing these instances will not change the original.
characters (Array of Text Objects r/o) • Returns an array of copies of the characters in the Text. Note that editing these instances will not change the original.
fileWrapper (FileWrapper or nil r/o) • Returns the attached file wrapper for the Text (or rather, the first character of the text), if any.
paragraphs (Array of Text Objects r/o) • Returns an array of copies of the paragraphs in the Text. Note that editing these instances will not change the original. Paragraphs, if ended by a newline, will contain the newline character.
range (Text.Range r/o) • Returns a Text.Range that spans the entire Text.
sentences (Array of Text Objects r/o) • Returns an array of copies of the sentences in the Text. Note that editing these instances will not change the original.
start (Text.Position r/o) • Returns a Text.Position indicating the beginning of the Text.
string (String) • Returns a plain String version of the characters in the Text. Note that since JavaScript represents Strings as Unicode code points, the length of the returned string may be differnt from the number of characters in the Text object.
style (Style) • Returns a Style instance for this Text object.
words (Array of Text Objects r/o) • Returns an array of copies of the words in the Text. Note that editing these instances will not change the original.
TextComponent Class
Text Components are the elements contained with text objects.
Attachments (TextComponent r/o) • The ranges of Text which represent Attachments.
AttributeRuns (TextComponent r/o) • The ranges of Text which have the same attributes.
Characters (TextComponent r/o) • The individual characters of the Text. Note that some characters (like emoji) consist of multiple Unicode code points.
Paragraphs (TextComponent r/o) • The paragraphs of Text. Unlike other options, the line breaking characters that end the paragraph are included.
Sentences (TextComponent r/o) • The sentences of the Text.
Words (TextComponent r/o) • The words in the Text. Whitespace or other word break characters are not included.
all (Array of TextComponent r/o) • This option is used in the creation of plug-in forms.
Using the string property of a Text Object and the JavaScript map() function to convert the arrays of returned text objects to arrays of text strings:
Converting Text Objects to String Arrays
textObj = new Text('How Now Brown Cow.', document.outline.baseStyle)textObj.characters.map(txtObj => txtObj.string)//--> ["H","o", "w", " ", "N", "o", "w", " ", "B", "r", "o", "w", "n", " ", "C", "o", "w", "."] textObj.words.map(txtObj => txtObj.string)//--> ["How","Now","Brown","Cow"]textObj.sentences.map(txtObj => txtObj.string)//--> ["How Now Brown Cow."]textObj.paragraphs.map(txtObj => txtObj.string)//--> ["How Now Brown Cow."]
When using Text Components to apply styling to text content, it is important which type of text component is targeted.
Here’s an example of using the TextComponent class to colorize every word of a note to random color values. The script targets TextComponent.Words as the recipient of the styling settings:
Apply a Random Color to Each Word
sel = document.windows[0].selectionitems = sel.databaseObjects.filter(item => (item instanceof Project || item instanceof Task))if(items.length === 1){function randomColor(){r = Math.floor(Math.random() * 101) * 0.01g = Math.floor(Math.random() * 101) * 0.01b = Math.floor(Math.random() * 101) * 0.01return Color.RGB(r, g, b, 1)}noteObj = items[0].noteTextwordRanges = noteObj.ranges(TextComponent.Words)wordRanges.forEach(range => {aColor = randomColor()txtObjStyle = noteObj.styleForRange(range)txtObjStyle.set(Style.Attribute.FontFillColor, aColor)})}

IMPORTANT: To apply paragraph styling to text without overriding font styling, use TextComponent.AttributeRuns as the targeted text components:
Apply Paragraph Styles
sel = document.windows[0].selectionitems = sel.databaseObjects.filter(item => (item instanceof Project || item instanceof Task))if(items.length === 1){noteObj = items[0].noteTextrunRanges = noteObj.ranges(TextComponent.AttributeRuns)runRanges.forEach(range => {runStyle = noteObj.styleForRange(range)runStyle.set(Style.Attribute.ParagraphLineSpacing, 24)runStyle.set(Style.Attribute.ParagraphFirstLineHeadIndent, 36)})}
Text Functions
Omni Automation support in OmniOutliner includes a set of functions (commands) for manipulating text objects.
Class Functions
makeFileAttachment(fileWrapper: FileWrapper, style: Style) ==> Text Object • Returns a new Text instance that represents a file attachment. The attachment has a single character string content with a special value.
Instance Functions
textInRange(range:Text.Range) ==> Text Object • Returns a copy of the text in the specified range.
styleForRange(range:Text.Range) ==> Style • Returns a Style instance for the given range of the Text.
ranges(component:TextComponent, useEnclosingRange:Boolean or nil) ==> Array of Text.Ranges • Returns an array of Text.Ranges for the specified component. If useEnclosingRange is true, than any extra characters that separate follow a component will be included in its range. Any extra characters before the first found component will be included in the first range.
replace(range:Text.Range, with:Text) • Replaces the sub-range of the receiving Text with a copy of the passed in Text (which remains unchanged).
append(text:Text Object) • Appends the given Text Object to the receiver.
insert(position:Text.Position, text:Text) • Inserts a copy of the given Text at the specified position in the receiver.
remove(range:Text.Range) • Removes the indicated sub-range of the receiving Text.
find(string:String, options:Array of Text.FindOption or null, range:Text.Range or nil) ==> Text.Range or nil • Finds an occurrence of string within the Text and returns the enclosing Text.Range if there is a match. If range is passed, only that portion of the Text is searched. The supplied options, if any, change how the search is performed based on their definition.
Text.FindOption Class
Here are the class properties for setting the parameters for a search using the find() function of the Text class:
Anchored (Text.FindOption r/o) • Matches must be anchored to the beginning (or end if Backwards is include) of the string or search range.
Backwards (Text.FindOption r/o) • Search starting from the end of the string or range.
CaseInsensitive (Text.FindOption r/o) • Compare upper and lower case characters as equal.
DiacriticInsensitive (Text.FindOption r/o) • Ignore diacritics. For example, “ö” is considered the same as “o”.
ForcedOrdering (Text.FindOption r/o) • Force an ordering between strings that aren’t strictly equal.
Literal (Text.FindOption r/o) • Perform exact character-by-character matching.
Numeric (Text.FindOption r/o) • Order numbers by numeric value, not lexigraphically. Only applies to ordered comparisons, not find operations.
RegularExpression (Text.FindOption r/o) • For find operations, the string is treated as an ICU-compatible regular expression. If set, no other options can be used except for CaseInsensitive and Anchored.
WidthInsensitive (Text.FindOption r/o) • Ignore width differences. For example, “a” is considered the same as ‘FULLWIDTH LATIN SMALL LETTER A’ (U+FF41).
all (Array of Text.FindOption r/o) • This option is used when creating plug-in forms that will display Text.FindOption options.
Text.Range Class
Ranges are an essential mechanism for representing text objects for manipulation.
new Text.Range(start: Text.Position, end: Text.Position) → (Text.Range) • The constructor for creating ranges.
end (Text.Position r/o) • Returns the Text.Position for the end of the Text.Range
isEmpty (Boolean r/o) • Returns true if the Text.Range contains no characters.
start (Text.Position r/o) • Returns the Text.Position for the beginning of the Text.Range
Text.Position Class
Indicates the insertion point for a Text object.
end (Text.Position r/o) • Returns the Text.Position for the end of the Text.Range
start (Text.Position r/o) • Returns the Text.Position for the beginning of the Text.Range
Inserting Text Objects using Text.Position
task = new Task("EXAMPLE TASK")task.note = "How Now Brown Cow"noteObj = task.noteTextnewTextObj = new Text('START-->', noteObj.style)noteObj.insert(noteObj.start, newTextObj)newTextObj = new Text('<--END', noteObj.style)noteObj.insert(noteObj.end, newTextObj)URL.fromString(`${URL.currentAppScheme}:///task/${task.id.primaryKey}`).open()
Working with Note Objects
Here’s a simple example of editing a text object by prepending it with another text object assigned with the same style as the target text object. Note the use of the start and style text object properties, and the insert() instance function:
Prepend to Text Object (note)
task = new Task("Example Task")task.note = "How Now Brown Cow"noteObj = task.noteTextnoteObj.insert(noteObj.start, new Text("Well ", noteObj.style))noteObj.string//--> "Well How Now Brown Cow"
Removing Text Objects from Note
To remove the previously added word “Well” select the previously created task and run the following script, which uses the remove() function to remove the first word as well as the space following it:
Remove Texts Objects from Note
sel = document.windows[0].selectionitems = sel.databaseObjects.filter(item => (item instanceof Project || item instanceof Task))if(items.length === 1){noteObj = items[0].noteText// remove the first wordnoteObj.remove(noteObj.words[0].range)// remove the space after the removed first wordnoteObj.remove(noteObj.characters[0].range)}
The task note is returned to its prior state.
DO THIS: In preparation for demonstrating the use of styles, summon the OmniFocus Color palette from the Format menu and apply three different colors to each of the last three words of the the task’s note.
Adding a Text Object to Existing Note
Using the append() and insert() functions of the Text class, it is easy to add a newly created text object to the text object of the note.
Also note the use of the isEmpty property of the Text.Range class to determine if there is existing note content.
Select the task and run this script:
Adding Created Text Object to Note
sel = document.windows[0].selectionitems = sel.databaseObjects.filter(item => (item instanceof Project || item instanceof Task))if(items.length === 1){noteObj = items[0].noteTextnewTextObj = new Text('Rain in Spain Stays in the Plain', noteObj.style)if(noteObj.range.isEmpty){noteObj.insert(noteObj.start, newTextObj)} else {newLineObj = new Text('\n', noteObj.style)noteObj.append(newLineObj, noteObj.style)noteObj.append(newTextObj, noteObj.style)}}
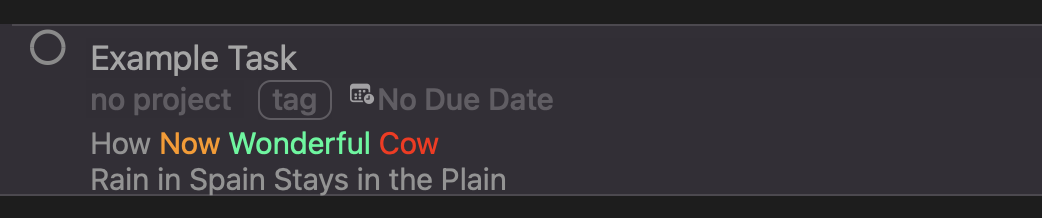
(⬇ see below ) Content added to task note:

NOTE: Content added using Text Objects does not interfere with the formatting of the existing text.
Next, let’s replace the word “Brown” with the word: “Wonderful”
To perform the replacement of one text object with another, use the find() and replace() functions:
Replace Text with Text
sel = document.windows[0].selectionitems = sel.databaseObjects.filter(item => (item instanceof Project || item instanceof Task))if(items.length === 1){noteObj = items[0].noteTextfindParams = [Text.FindOption.CaseInsensitive]range = noteObj.find("Brown", findParams, noteObj.range)if(range){newTextObj = new Text('Wonderful', noteObj.style)noteObj.replace(range, newTextObj)}}
(⬇ see below ) Content replaced in task note:

All good! However, notice that the existing formatting applied to the word “Brown” did not automatically transfer to the replacement word: “Wonderful”
To accomplish the application of the existing style to the replacement text, use the styleForRange() function of the Text class and the setStyle() function of the Style class to store and apply the existing style settings of the targeted word.
Replace Retaining Current Style
sel = document.windows[0].selectionitems = sel.databaseObjects.filter(item => (item instanceof Project || item instanceof Task))if(items.length === 1){noteObj = items[0].noteTextfindParams = [Text.FindOption.CaseInsensitive]range = noteObj.find("Brown", findParams, noteObj.range)if(range){currentStyle = noteObj.styleForRange(range)newTextObj = new Text('Wonderful', noteObj.style)newTextObj.styleForRange(newTextObj.range).setStyle( currentStyle) noteObj.replace(range, newTextObj)}}
(⬇ see below ) Content replaced in task note:
NOTE: Simply setting the value of the style property does not apply the values. To apply styling to text, use the setStyle() function on the range of the text.
Matching by Words (Word Ranges)
A common automated process is searching a range of text for all occurrences of a specific word, and processing each found instance.
Iterating an array of word ranges derived through the use of the TextComponent class can provide the mechanism accomplishing this challenge.
Case Sensitive Word Match
sel = document.windows[0].selectionitems = sel.databaseObjects.filter(item => (item instanceof Project || item instanceof Task))if(items.length === 1){noteObj = items[0].noteTextwordToMatch = 'commodo'wordRanges = noteObj.ranges(TextComponent.Words)wordRanges.forEach(range => {if(noteObj.textInRange(range).string === wordToMatch){txtObjStyle = noteObj.styleForRange(range)txtObjStyle.set(Style.Attribute.FontFillColor, Color.magenta)txtObjStyle.set(Style.Attribute.FontWeight, 9)}})} else {throw {name: "Selection Issue",message: "Please select a single project or task."}}
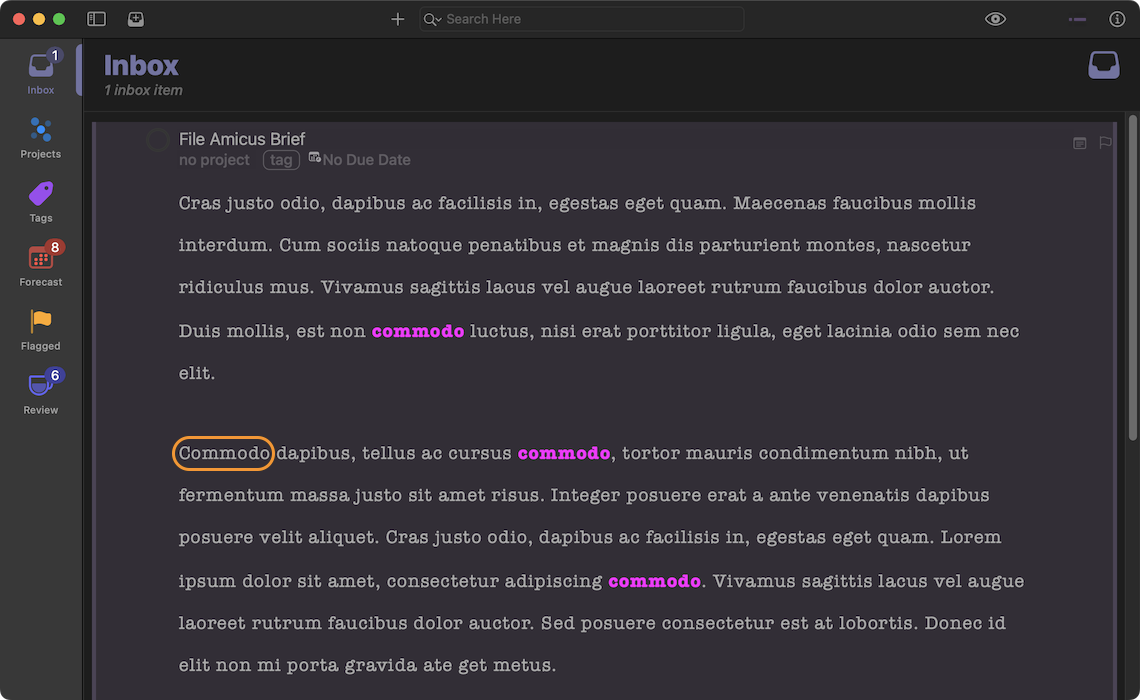
(⬇ see below ) Occurrences of the targeted word are stylized. NOTE: that the search was case-sensitive, missing the occurrence of the targeted word that was capitalized. (orange oval)
To perform a case-insensitive search that recognizes case variations of the the targeted word, here are two options:
- Use a RegEx comparison with the JavaScript match() function to determine a case-insensitive match
- Use the CaseInsensitive option of the Text.FindOption class as a parameter for the find() function of the Text class
In this example, both methods work. NOTE: the Text.FindOption class provides an extensive set of parameters to refine your searches.
Case Insensitive Word Match (RegEx)
sel = document.windows[0].selectionitems = sel.databaseObjects.filter(item => (item instanceof Project || item instanceof Task))if(items.length === 1){noteObj = items[0].noteTextwordToMatch = /commodo/iwordRanges = noteObj.ranges(TextComponent.Words)wordRanges.forEach(range => {wordString = noteObj.textInRange(range).stringresult = wordString.match(wordToMatch)if(result){txtObjStyle = noteObj.styleForRange(range)txtObjStyle.set(Style.Attribute.FontFillColor, Color.magenta)txtObjStyle.set(Style.Attribute.FontWeight, 9)}})} else {throw {name: "Selection Issue",message: "Please select a single project or task."}}
Case Insensitive Word Match (Find Options)
sel = document.windows[0].selectionitems = sel.databaseObjects.filter(item => (item instanceof Project || item instanceof Task))if(items.length === 1){noteObj = items[0].noteTextwordToMatch = 'commodo'findParams = [Text.FindOption.CaseInsensitive]wordRanges = noteObj.ranges(TextComponent.Words)wordRanges.forEach(range => {result = noteObj.find(wordToMatch, findParams, range)if(result){txtObjStyle = noteObj.styleForRange(range)txtObjStyle.set(Style.Attribute.FontFillColor, Color.magenta)txtObjStyle.set(Style.Attribute.FontWeight, 9)}})} else {throw {name: "Selection Issue",message: "Please select a single project or task."}}
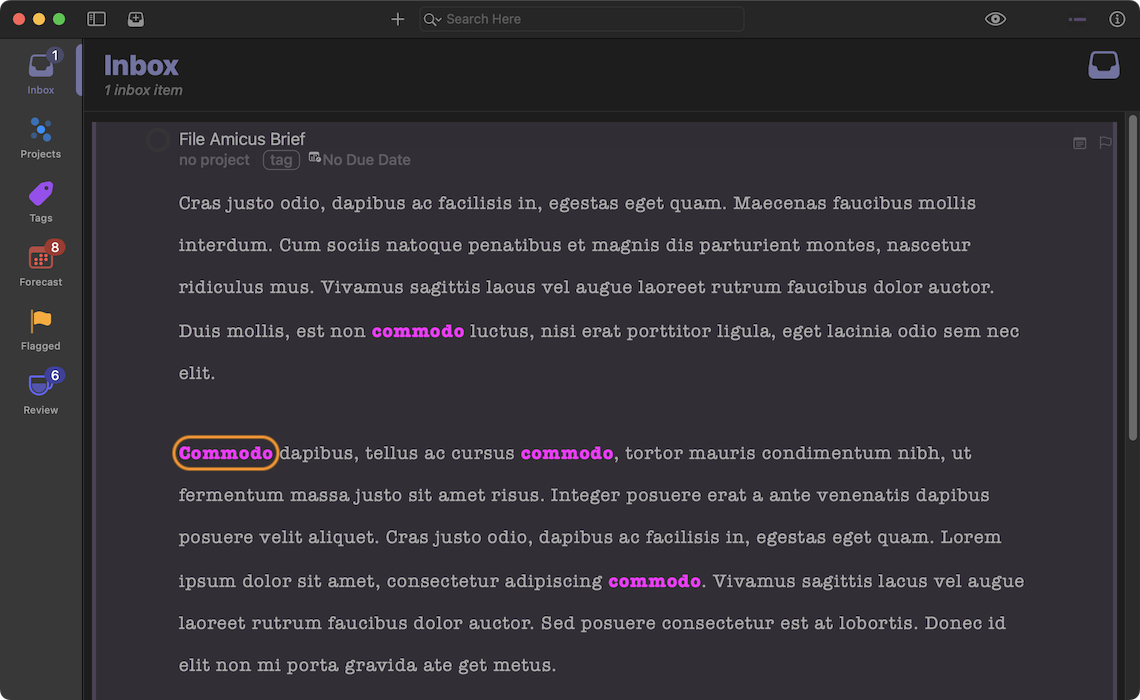
(⬇ see below ) All occurrences of the targeted word were processed, even those that were capitalized. (orange oval)
Matching by Strings
To search and match phrases containing one or more words, use the find() function of the Text class.
Since the find() function returns only the first matching reference, it is placed within a JavaScript while loop that repeats the search until no more matches are found.
The key to making this technique work is to adjust the range to be searched to begin with the end of the previously matched range (line 21).
Search for All Occurrences of a String
sel = document.windows[0].selectionitems = sel.databaseObjects.filter(item => (item instanceof Project || item instanceof Task))if(items.length === 1){noteObj = items[0].noteTextconsole.log(noteObj)stringToMatch = 'consectetur adipiscing commodo'findParams = [Text.FindOption.CaseInsensitive]rangeToSearch = noteObj.rangeresultRange = noteObj.rangewhile (resultRange !== null) {resultRange = noteObj.find(stringToMatch, findParams, rangeToSearch)if(resultRange){txtObjStyle = noteObj.styleForRange(resultRange)txtObjStyle.set(Style.Attribute.FontFillColor, Color.magenta)txtObjStyle.set(Style.Attribute.FontWeight, 9)// adjust search range to begin from end of last matched rangerangeToSearch = new Text.Range(resultRange.end, noteObj.range.end )}}} else {throw {name: "Selection Issue",message: "Please select a single project or task."}}
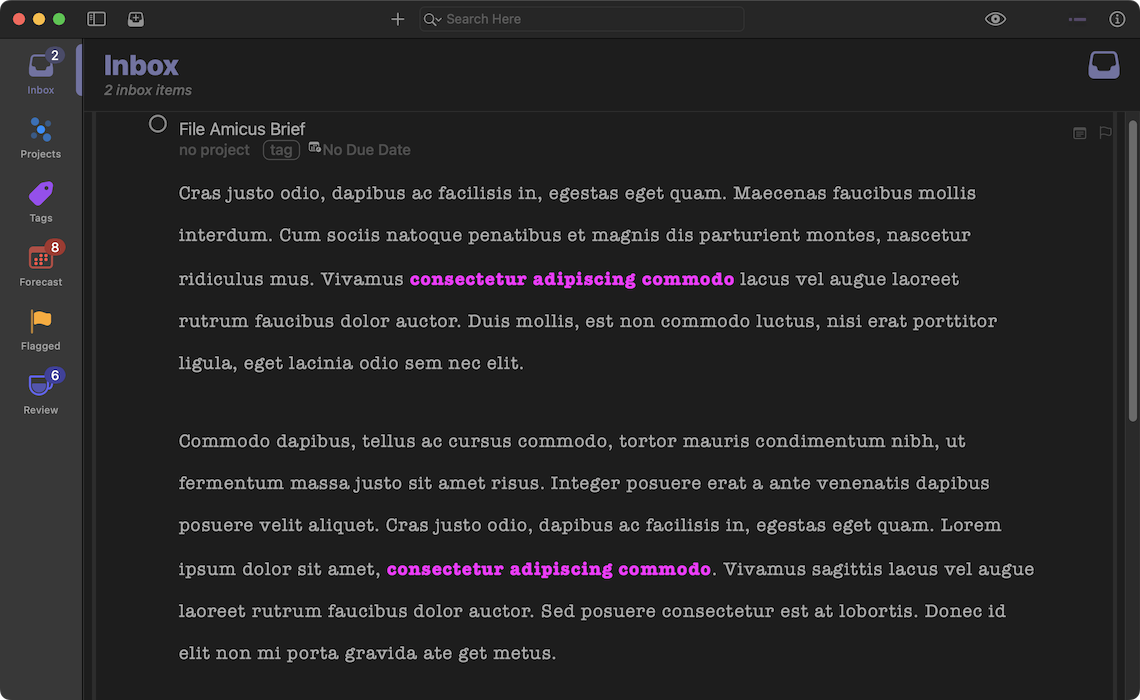
(⬇ see below ) All occurrences of the phrase are processed:
Link Objects
We’ve all encountered Link Objects embedded in formatted text, similar to this one: OmniFocus Automation. The link title displayed is often different from the actual URL that the link calls when it is activated through tap or click.
Link Objects are Text Objects with the Link style attribute applied to the range of the text object. The text content of the Text Object is displayed, but the value of the Link style attribute is what gets sent to the operating system to handle.
Here’s an example script for locating all link instances in a note and applying style attributes. It works by checking the value of the Link style attribute for every attribute run in the note.
Apply Styling to Links
sel = document.windows[0].selectionitems = sel.databaseObjects.filter(item => (item instanceof Project || item instanceof Task))if(items.length === 1){noteObj = items[0].noteTextrunRanges = noteObj.ranges(TextComponent.AttributeRuns)runRanges.forEach(range => {runStyle = noteObj.styleForRange(range)linkStr = runStyle.get(Style.Attribute.Link).stringif(linkStr.length > 0){console.log(noteObj.textInRange(range).string)// mutable attributesrunStyle.set(Style.Attribute.FontFamily, "Helvetica")runStyle.set(Style.Attribute.FontWeight, 9)curSize = runStyle.get(Style.Attribute.FontSize)newSize = curSize * 1.5runStyle.set(Style.Attribute.FontSize, newSize)runStyle.set(Style.Attribute.FontItalic, true)runStyle.set(Style.Attribute.KerningAdjustment, 4)}})}
NOTE: Color attributes cannot be applied to link objects.
The following script demonstrates the creation and addition of a Link Object to the note of the selected OmniFocus task or project:
Appending a Link to a Note
sel = document.windows[0].selectionitems = sel.databaseObjects.filter(item => (item instanceof Project || item instanceof Task))if(items.length === 1){noteObj = items[0].noteTextlinkURL = URL.fromString("https://omni-automation.com")linkObj = new Text("(Omni Automation)", noteObj.style)newLineObj = new Text("\n", noteObj.style)style = linkObj.styleForRange(linkObj.range)style.set(Style.Attribute.Link, linkURL)if (noteObj.string.length > 0){noteObj.append(newLineObj)}noteObj.append(linkObj)node = document.windows[0].content.selectedNodes[0]node.expandNote(false)} else {throw {name: "Selection Issue",message: "Please select a single project or task."}}
Links that Do Things (Actionable Links)
NOTE The URLs of link objects you add to OmniFocus item notes, may be links that trigger actions in 3rd-party applications or services.
Since all Omni Automation scripts can be converted into script URLs, they can also be embedded as actionable links into a note.
The following script example will append a link to the selected project or task. Since the link is an Omni Automation Script URL, it requires user approval to execute (documentation).
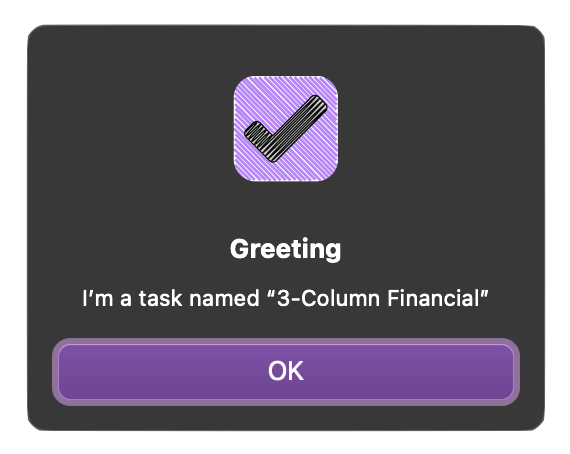
When the link is activated, a script security dialog in which you can view the script code and approve or deny its execution, will be presented. If you approve the script, it will present a greeting alert containing its name. There is an option to approve the script to run without further approval.
Embedded Omni Automation scripts may perform one or more functions for you, such as automatically sharing info with teammates about the status of the task or project — an “Update Team” link.
Here’s the alert presented by the example script:
Append Omni Automation Script Link
sel = document.windows[0].selectionitems = sel.databaseObjects.filter(item => (item instanceof Project || item instanceof Task))if(items.length === 1){itemID = items[0].id.primaryKeynoteObj = items[0].noteTextif(items[0] instanceof Task){scriptURLStr = `omnifocus://localhost/omnijs-run?script=itemTitle%20%3D%20Task%2EbyIdentifier%28%22${itemID}%22%29%2Ename%0Dnew%20Alert%28%22Greeting%22%2C%20%60I%E2%80%99m%20a%20task%20named%20%E2%80%9C%24%7BitemTitle%7D%E2%80%9D%60%29%2Eshow%28%29` } else {scriptURLStr = `omnifocus://localhost/omnijs-run?script=itemTitle%20%3D%20Project%2EbyIdentifier%28%22${itemID}%22%29%2Ename%0Dnew%20Alert%28%22Greeting%22%2C%20%60I%E2%80%99m%20a%20project%20named%20%E2%80%9C%24%7BitemTitle%7D%E2%80%9D%60%29%2Eshow%28%29` }console.log(scriptURLStr)linkURL = URL.fromString(scriptURLStr)linkObj = new Text("(GREETING)", noteObj.style)newLineObj = new Text("\n", noteObj.style)style = linkObj.styleForRange(linkObj.range)style.set(Style.Attribute.Link, linkURL)if (noteObj.string.length > 0){noteObj.append(newLineObj)}noteObj.append(linkObj)node = document.windows[0].content.selectedNodes[0]node.expandNote(false)} else {throw {name: "Selection Issue",message: "Please select a single project or task."}}
Here are the two scripts (one for tasks, one for projects) of which one is converted into an Omni Automation script URL and used as the URL of the appended link object:
Greeting Scripts
// Replace "XXXXX" in encoded script with: ${itemID}itemTitle = Task.byIdentifier("XXXXX").namenew Alert("Greeting", `I’m a task named “${itemTitle}”`).show()// Replace "XXXXX" in encoded script with: ${itemID}itemTitle = Project.byIdentifier("XXXXX").namenew Alert("Greeting", `I’m a project named “${itemTitle}”`).show()
Here's a script that prepends a link to the start of the note of the selected project or task using the URL currently on the clipboard:
Prepend Clipboard Link to Note
(async () => {try {var sel = document.windows[0].selectionitems = sel.databaseObjects.filter(item => (item instanceof Project || item instanceof Task))if(items.length === 1){item = sel.databaseObjects[0]targetType = TypeIdentifier.URLif(Pasteboard.general.availableType([targetType])){var items = Pasteboard.general.itemsvar ifor (i = 0; i < items.length; i++) {var data = items[i].dataForType(targetType)if(data){console.log(data.toString())break}}urlStr = data.toString()noteObj = item.noteTextlinkURL = URL.fromString(urlStr)linkObj = new Text("(LINK)", noteObj.style)newLineObj = new Text("\n", noteObj.style)style = linkObj.styleForRange(linkObj.range)style.set(Style.Attribute.Link, linkURL)noteObj.insert(noteObj.start, linkObj)noteObj.insert(linkObj.range.end, newLineObj)node = document.windows[0].content.selectedNodes[0]node.expandNote(false)} else {throw {name: "Missing URL",message: "There are no URLs on the clipboard."}}} else {throw {name: "Selection Issue",message: "Please select a single project or task."}}}catch(err){new Alert(err.name, err.message).show()}})();
And here’s another Link script that replaces all links in markdown format with link objects:
Replace Markdown Links with Link Objects
sel = document.windows[0].selectionitems = sel.databaseObjects.filter(item => (item instanceof Project || item instanceof Task))if(items.length === 1){noteObj = items[0].noteTextregexMdLinks = /\[([^\[]+)\](\(.*\))/gmstrToMatch = regexMdLinks.sourcefindParams = [Text.FindOption.RegularExpression]rangeToSearch = noteObj.rangeresultRange = noteObj.rangewhile (resultRange !== null) {resultRange = noteObj.find(regexMdLinks.source, findParams, rangeToSearch)if(resultRange){mdLinkStr = noteObj.textInRange(resultRange).stringx = mdLinkStr.indexOf("]")y = mdLinkStr.indexOf("(")mdLinkTitle = mdLinkStr.substr(1, x - 1)mdLinkURLStr = mdLinkStr.substr(y + 1, mdLinkStr.length)mdLinkURLStr = mdLinkURLStr.slice(0, -1)linkURL = URL.fromString(mdLinkURLStr)if (linkURL){linkObj = new Text(mdLinkTitle, noteObj.styleForRange(resultRange))style = linkObj.styleForRange(linkObj.range)style.set(Style.Attribute.Link, linkURL)noteObj.replace(resultRange, linkObj)}// adjust search range to begin from end of last matched rangerangeToSearch = new Text.Range(resultRange.end, noteObj.range.end )}}} else {throw {name: "Selection Issue",message: "Please select a single project or task."}}
And conversely, here’s a script that replaces all link objects with markdown:
Replace Link Objects with Markdown
sel = document.windows[0].selectionitems = sel.databaseObjects.filter(item => (item instanceof Project || item instanceof Task))if(items.length === 1){noteObj = items[0].noteTextrunRanges = noteObj.ranges(TextComponent.AttributeRuns)runRanges.reverse().forEach(range => {runStyle = noteObj.styleForRange(range)linkStr = runStyle.get(Style.Attribute.Link).stringif(linkStr.length > 0){linkTitle = noteObj.textInRange(range).stringmdLinkStr = `[${linkTitle}](${linkStr})`linkObj = new Text(mdLinkStr, runStyle)noteObj.replace(range, linkObj)}})}
Attachments
Since note content is now in RTF format, inline file attachments can be inserted into the note content.
In the following Text attachment example, a POST method is used with the fetch() function (documentation) to retrieve a chart generated by the QuickChart website (API documentation). The generated image is then added as a text attachment to the note of the currently selected project or task.
NOTE: The retrieved image data is used to create a file wrapper (line 20) which is then used with the makeFileAttachment() function of the Text class to generate an “attachment” text object (line 21) containing the image. The text object is then appended to the end of the note (line 25).
Add Chart Attachment
(async () => {try {sel = document.windows[0].selectionitems = sel.databaseObjects.filter(item => (item instanceof Project || item instanceof Task))if(items.length === 1){noteObj = items[0].noteTextnStyle = noteObj.stylevar chartData = {"backgroundColor":"transparent","width":600,"height":300,"format":"png","chart":{"type":"line","data":{"labels":["January","February","March","April","May","June","July"],"datasets":[{"label":"A","data":[-15,-80,79,-11,-5,33,-57],"backgroundColor":"rgb(255, 99, 132)","borderColor":"rgb(255, 99, 132)","fill":false,"borderDash":[5,5],"pointRadius":15,"pointHoverRadius":10},{"label":"B","data":[-86,59,-70,-40,40,33,16],"backgroundColor":"rgb(54, 162, 235)","borderColor":"rgb(54, 162, 235)","fill":false,"borderDash":[5,5],"pointRadius":[2,4,6,18,0,12,20]},{"label":"C","data":[59,-65,-33,0,-79,95,-53],"backgroundColor":"rgb(75, 192, 192)","borderColor":"rgb(75, 192, 192)","fill":false,"pointHoverRadius":30},{"label":"D","data":[73,83,-19,74,16,-12,8],"backgroundColor":"rgb(255, 205, 86)","borderColor":"rgb(255, 205, 86)","fill":false,"pointHitRadius":20}]},"options":{"legend":{"position":"bottom"},"title":{"display":true,"text":"Sales Projections"}}}}targetURLString = "https://quickchart.io/chart"request = URL.FetchRequest.fromString(targetURLString)request.headers = {"Content-Type":"application/json"}request.method = 'POST'request.bodyString = JSON.stringify(chartData)response = await request.fetch()responseCode = response.statusCodeif (responseCode >= 200 && responseCode < 300){wrapper = FileWrapper.withContents("ex-chart.png", response.bodyData)attachmentObj = Text.makeFileAttachment(wrapper, noteObj.style)if(noteObj.range.isEmpty){noteObj.insert(noteObj.start, attachmentObj)} else {newLineObj = new Text('\n', noteObj.style)noteObj.append(newLineObj, noteObj.style)noteObj.append(attachmentObj, noteObj.style)}node = document.windows[0].content.selectedNodes[0]node.expandNote(false)} else {throw {name: "Server Response Code",message: `The server responded with code: ${responseCode}`}}} else {throw {name: "Selection Issue",message: "Please select a single project or task."}}}catch(err){new Alert(err.name, err.message).show()}})();