
Tagged-Container Publishing
Here’s a dual-platform (macOS & iOS) database publishing automation between FileMaker applications (FileMaker Pro (macOS), FileMaker Go (iOS)) and OmniGraffle (macOS & iOS) from the Omni Group.
The provided FileMaker database uses a combination of FileMaker and Omni Automation scripts to transfer data to and manipulate data in an OmniGraffle document. All with simple clicks, taps, and drags.
FileMaker Pro
FileMaker Pro is a long-established database creation and publishing tool that is the heart of the FileMaker Platform, a robust database and app development and deployment environment.
But perhaps the best feature of FileMaker Pro is how easily its users can create attractive and interactive interfaces that take advantage of the native scripting architecture of FMP. In this documentation, you’ll learn how to incorporate Omni Automation with the FMP toolset to enable the effortless transfer of data between FileMaker databases and Omni applications! Let’s begin…
| DO THIS ► | DOWNLOAD and open the example FileMaker database file. When opening the file for the first time, log in as Guest. |
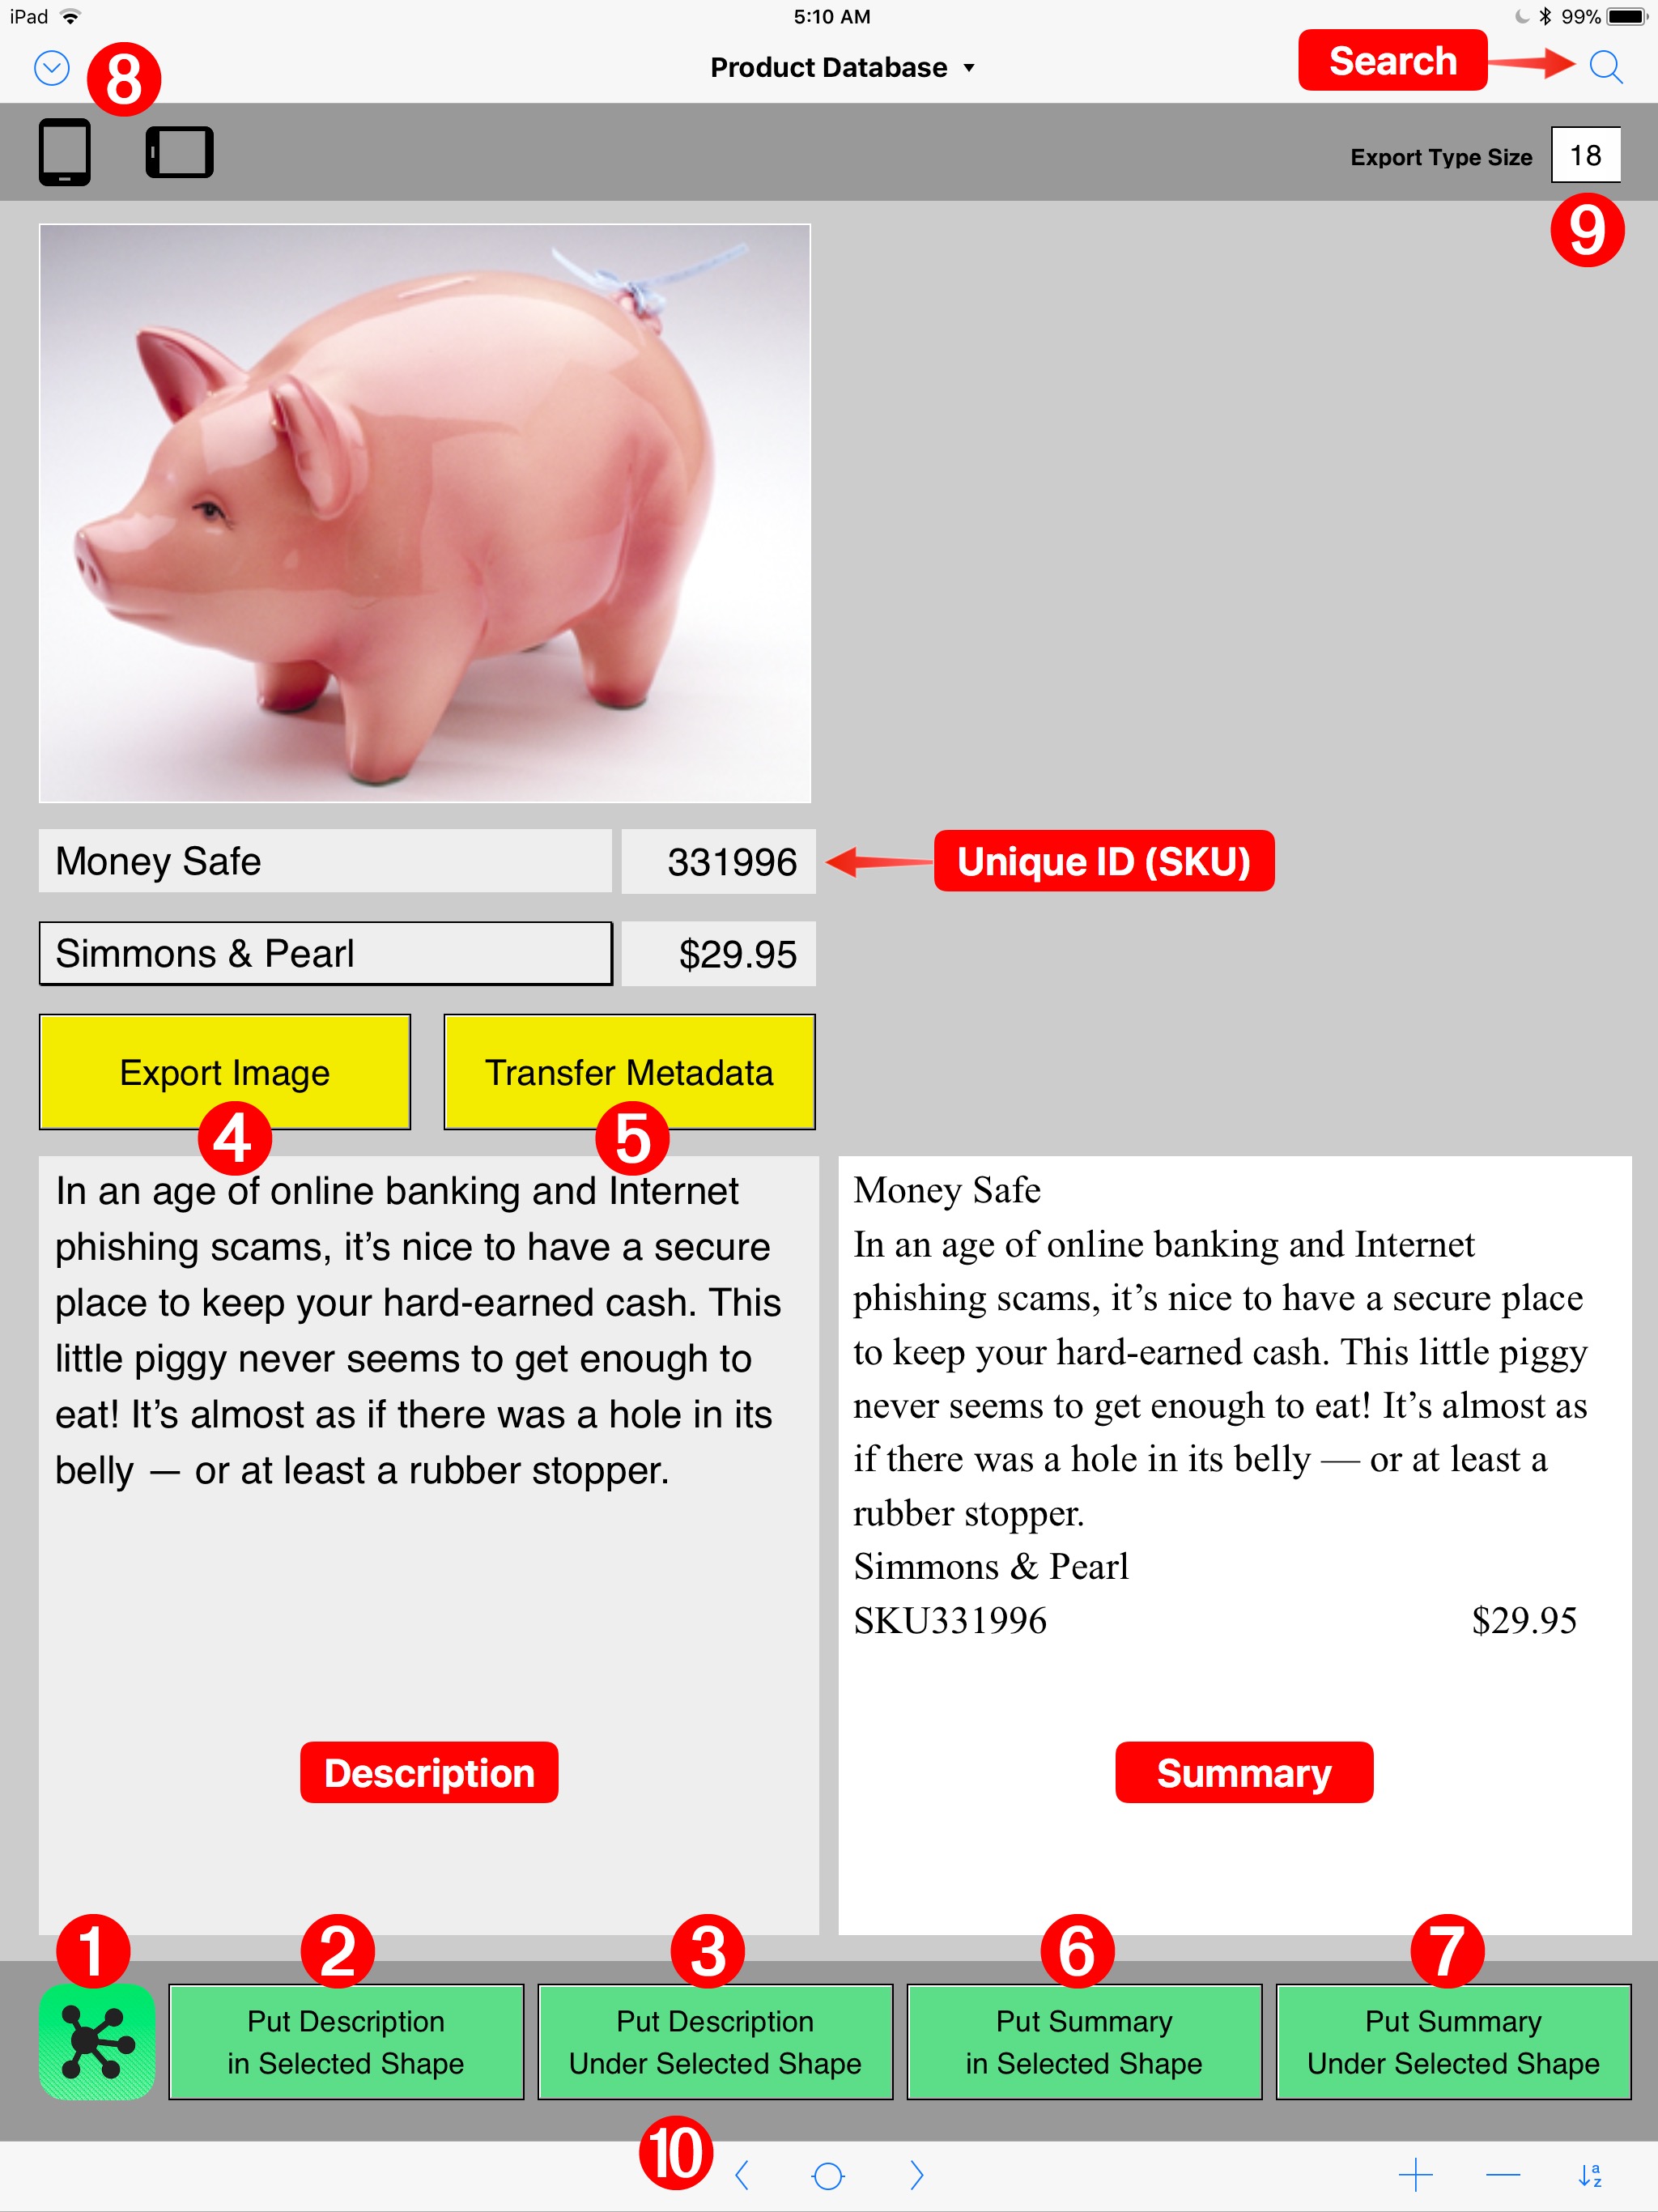
Whether you’re using FileMaker Pro on macOS or FileMaker Go on iOS, the interface of the example database is almost identical in its design and functionality. The example database incorporates a series of FileMaker scripts assigned to a row of buttons in the interface. Here’s a description of the action performed when each button is triggered with a click or a tap: (top illustration: macOS, bottom illustration: iOS)
NOTE: The ability to create and edit layouts and scripts is a feature of FileMaker Pro (macOS) and is not available within FileMaker Go (iOS).
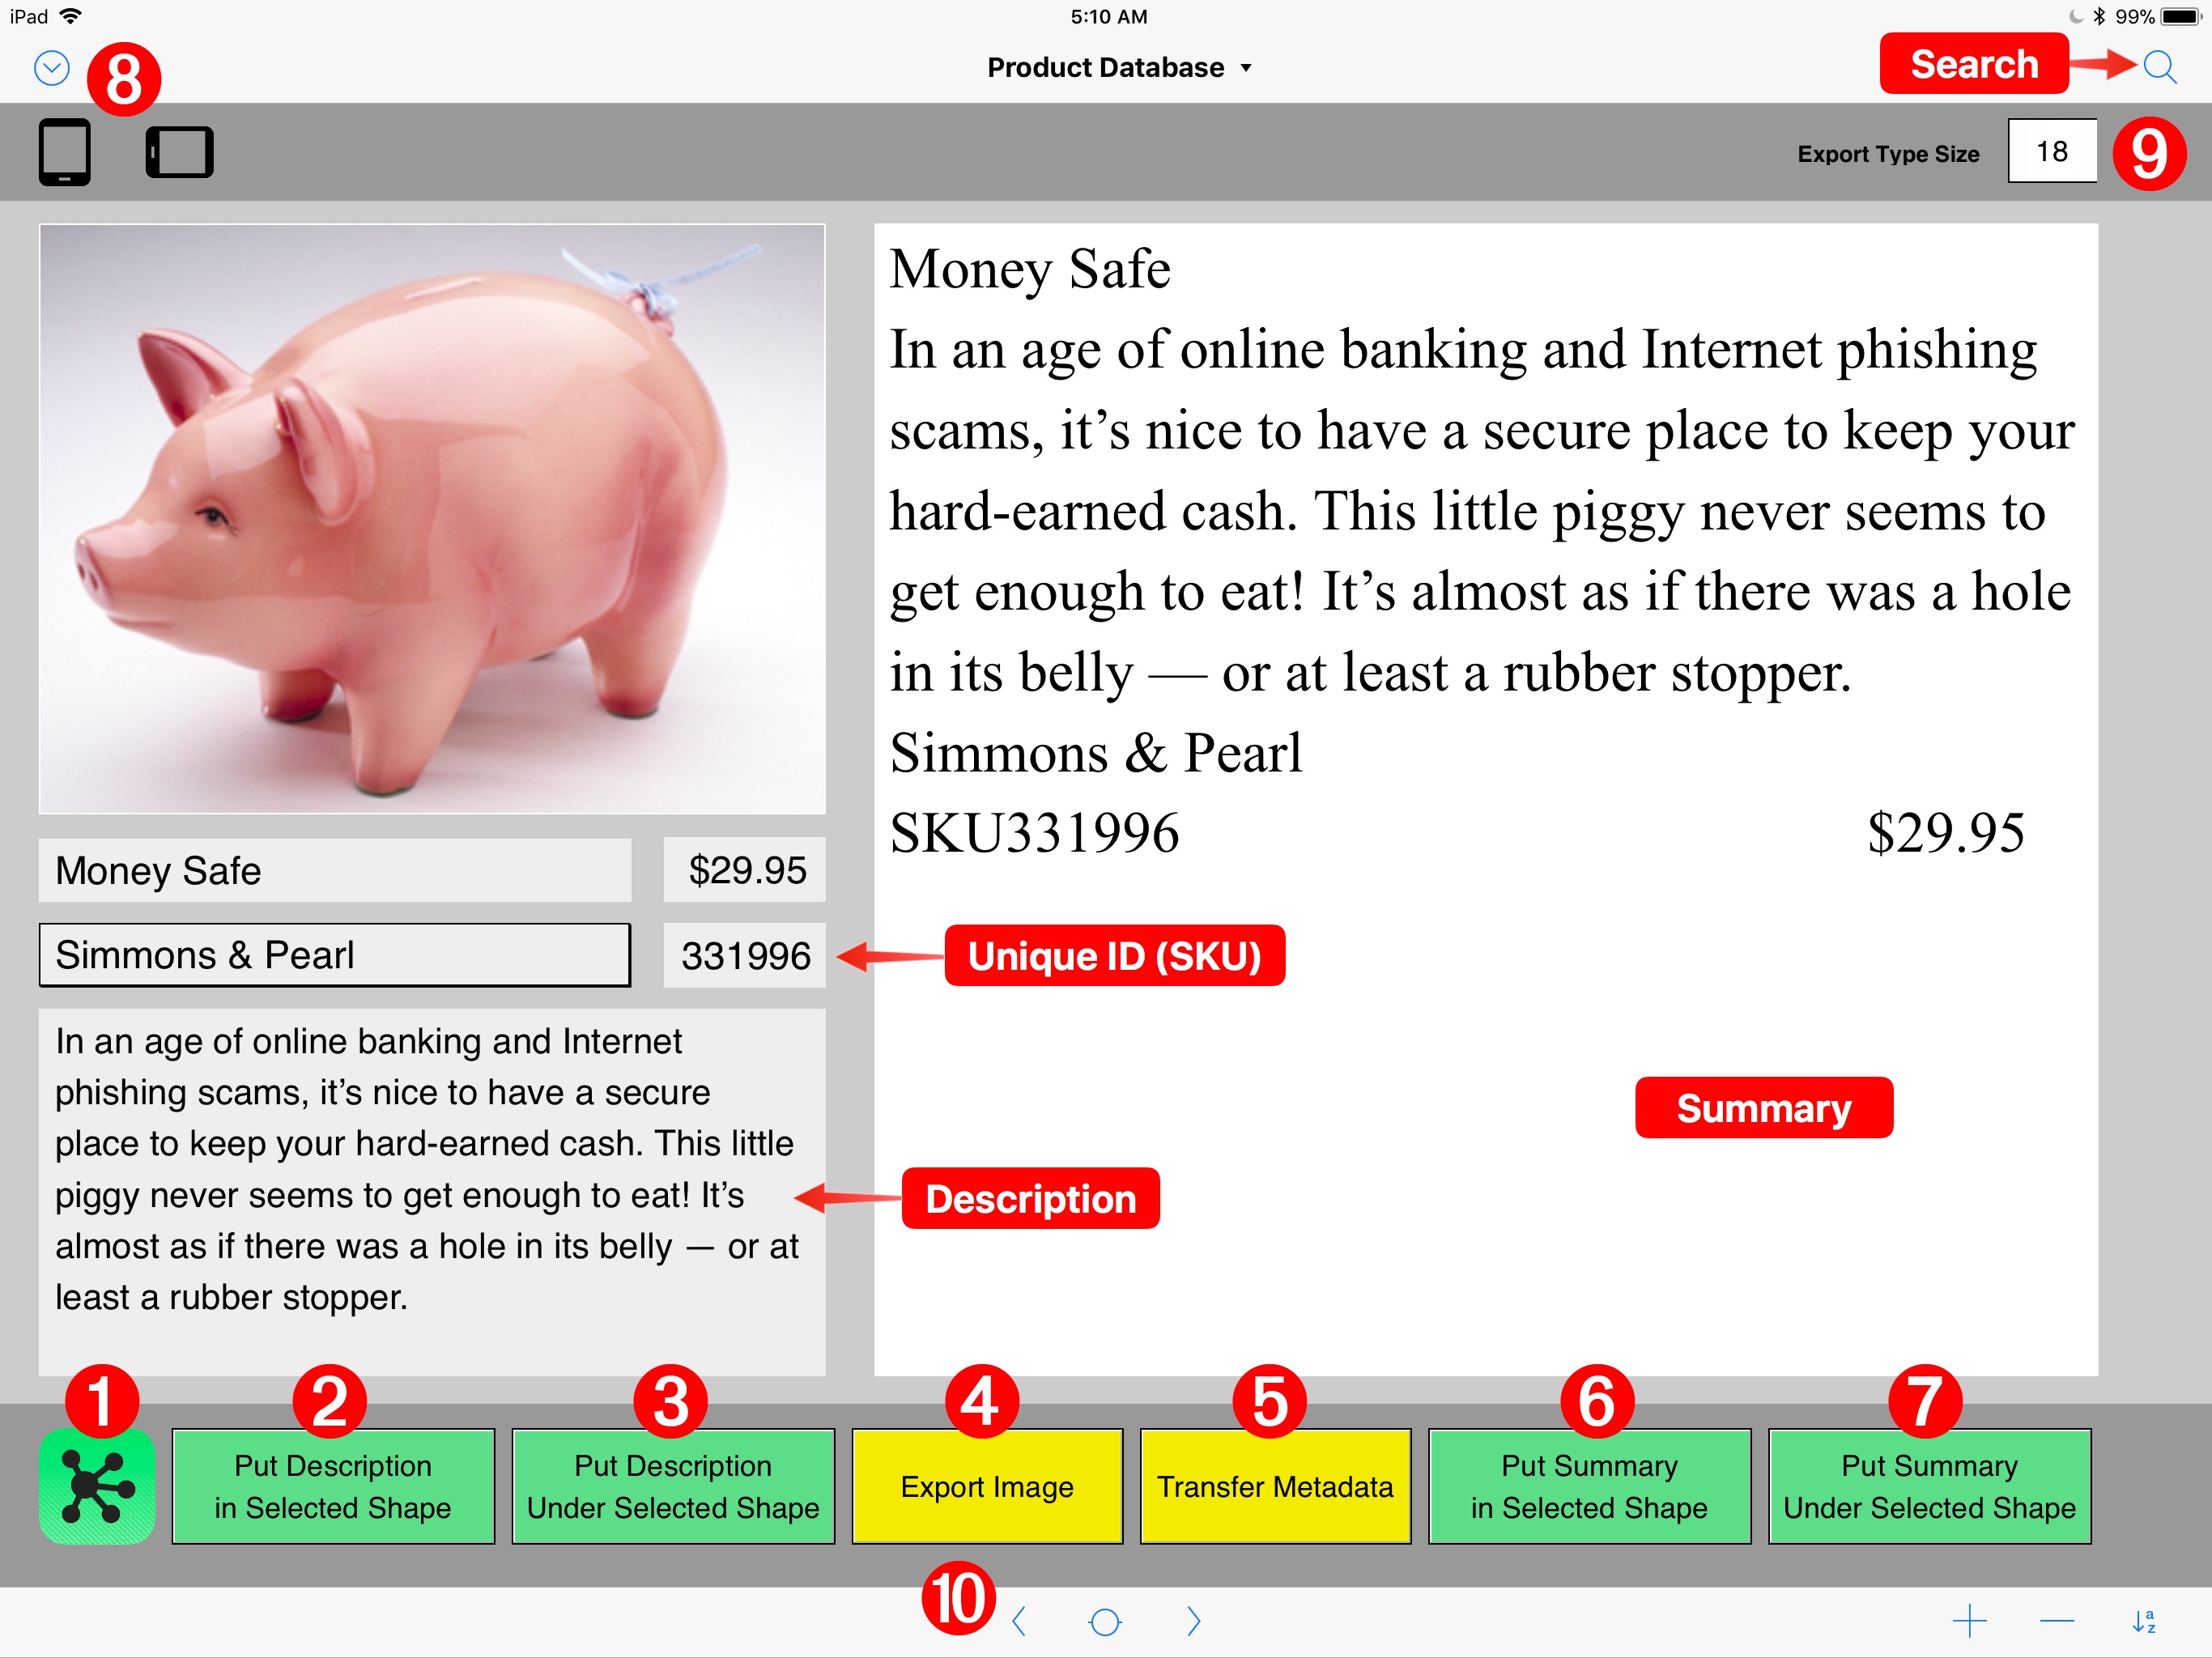
1 Switch to OmniGraffle • Runs a script to show the current OmniGraffle document.
2 Put Description in Selected Shape • Copies the product description from the current record into the selected solid in OmniGraffle.
3 Put Description Under Selected Shape • Copies the product description from the current record into a new solid placed below the selected shape in OmniGraffle.
4 Export Image • Due to application sandbox security restrictions, in macOS, the image will be exported to the Documents folder, and then imported into the current OmniGraffle document. In iOS, the image is exported to a temporary folder, then opened into an overlay window so it may be dragged into the OmniGraffle document.
5 Transfer Metadata • Because images have to be exported by hand, this script will add the metadata of the current record to the exported image currently selected in the OmniGraffle document. Run this script after the export.
6 Put Summary in Selected Shape • Copies the product summary from the current record into the selected solid in OmniGraffle.
7 Put Summary Under Selected Shape • Copies the product summary from the current record into a new solid placed below the selected shape in OmniGraffle. The size of the new shape matches the size of the selected shape.
8 Layout Orientation Controls • The layout of the FileMaker database will change automatically as you alter the orientation of the host device. However, in certain situations, such as 50/50 split screen view in iOS, you can use these controls to adjust the layout to view the view.
9 Export Font Size • A popup menu offering the following type sizes for the exported contents of either the Description or Summary fields: 12, 14, 18, 24, 36
10 Record Navigation • Tap right or left to navigate the visible records. To show all records or to quickly move to the beginning or end, tap the center circle, and uses the controls appearing in the pop-over dialog.
Explicit “localhost”
IMPORTANT: When encoding your Omni Automation scripts for use with FileMaker Pro (macOS) or FileMaker Go (iOS) add an explicit reference to the localhost in the link URL, like this:
- use: "omnigraffle://localhost/omnijs-run?script=%2F%2F%20etc."
- instead of: "omnigraffle:///omnijs-run?script=%2F%2F%20etc."
This webpage is in the process of being developed. Any content may change and may not be accurate or complete at this time.
DISCLAIMER